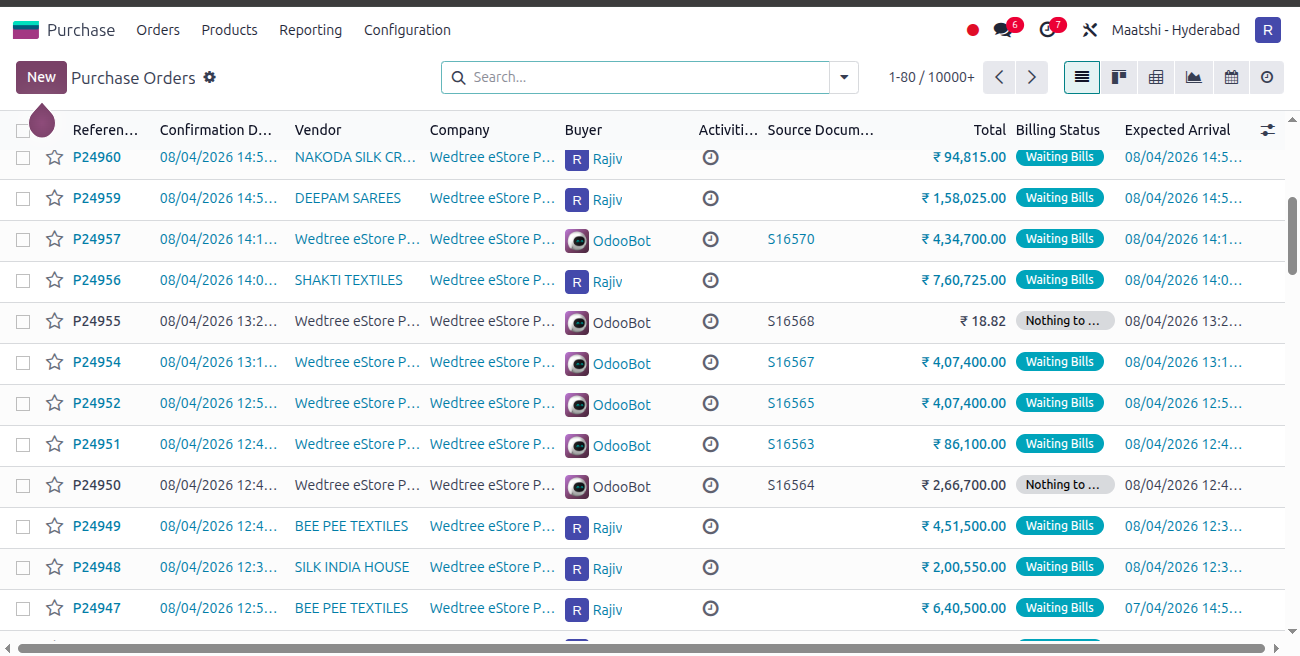
Purchase Orders
About
A Purchase Order (PO) is a formal document sent to a vendor to request the purchase of goods or services under agreed conditions such as quantity, price, delivery date, and terms.
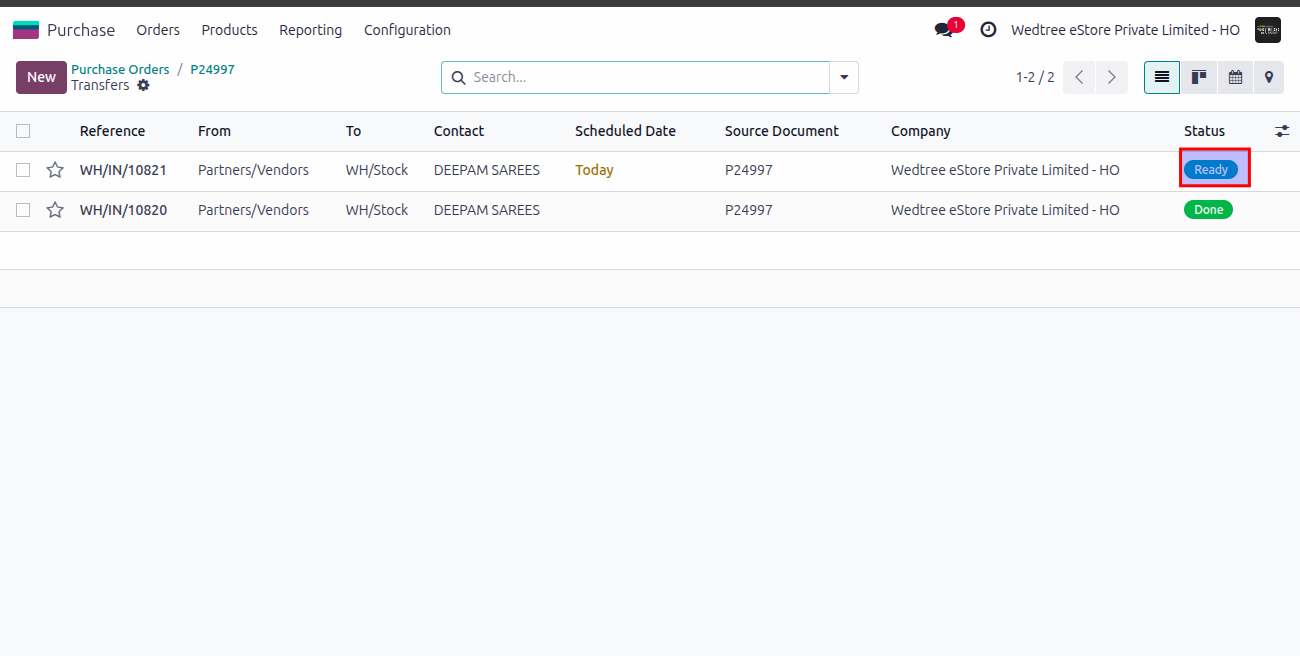
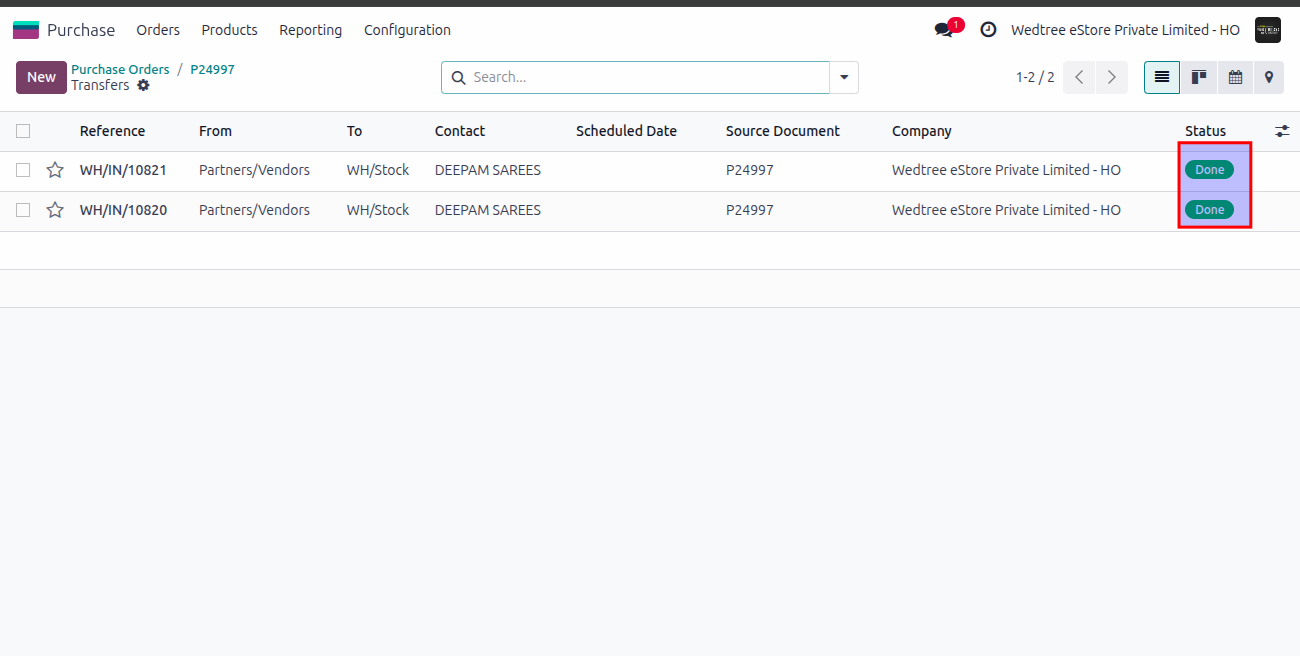
List View
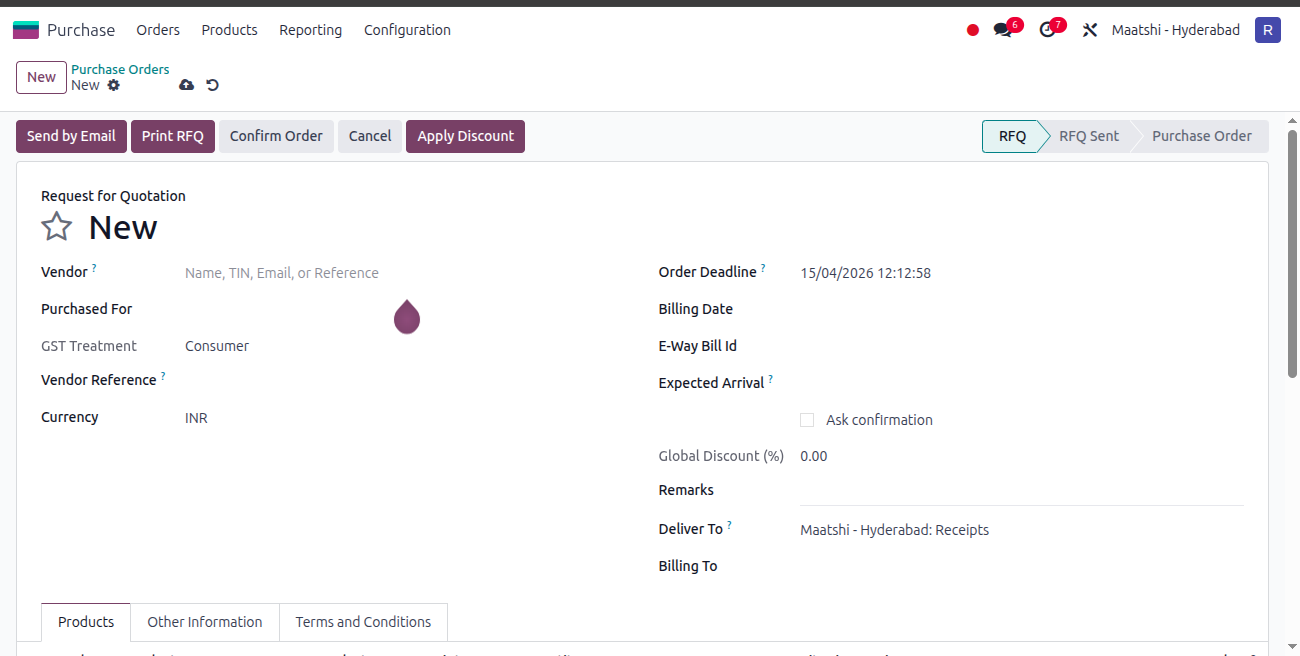
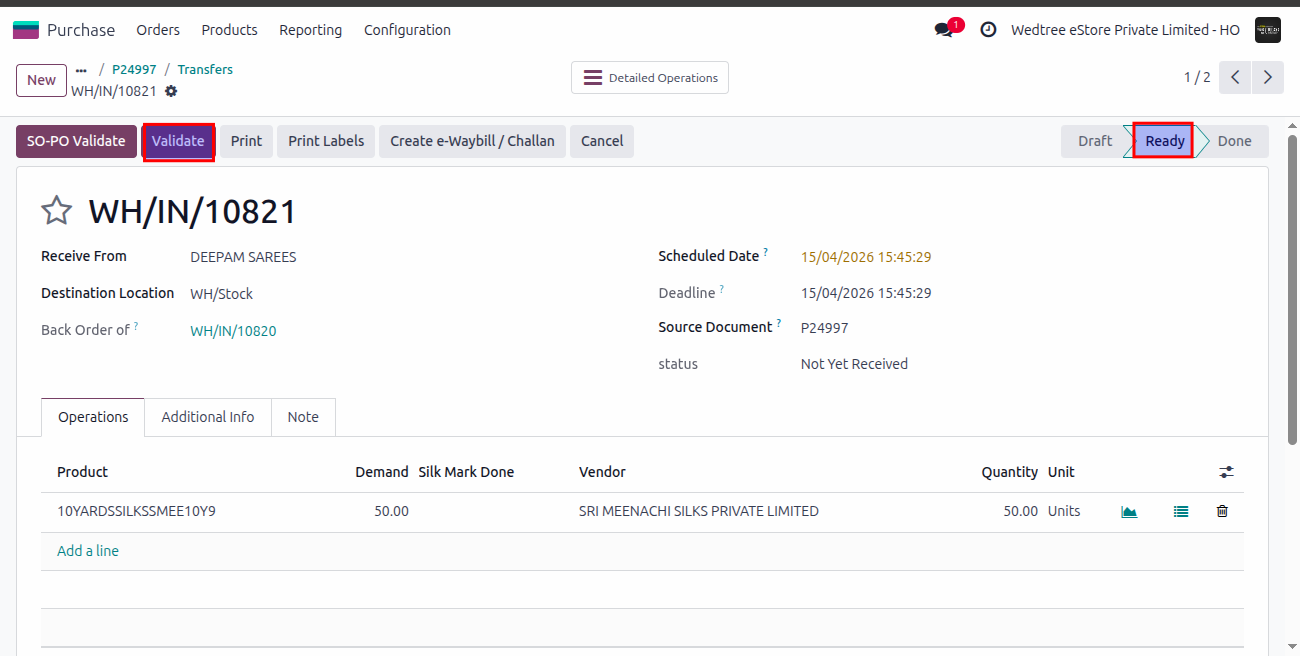
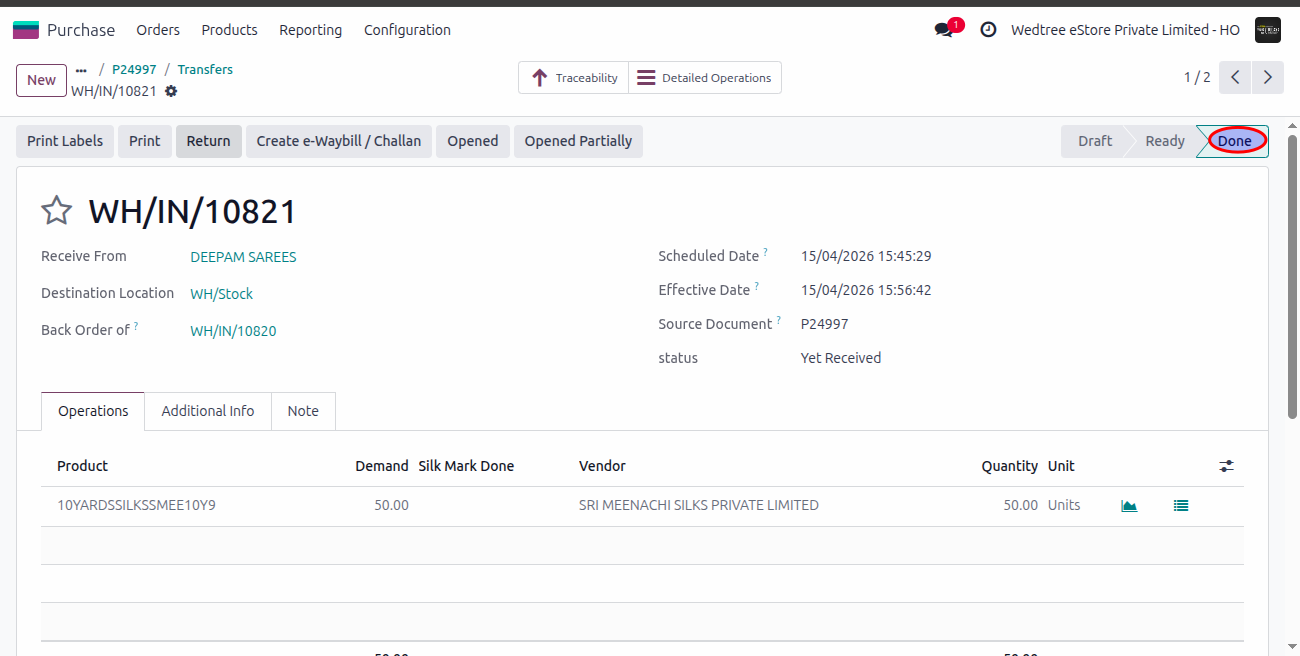
Form View
Workflow of Creating Purchase Order (PO):
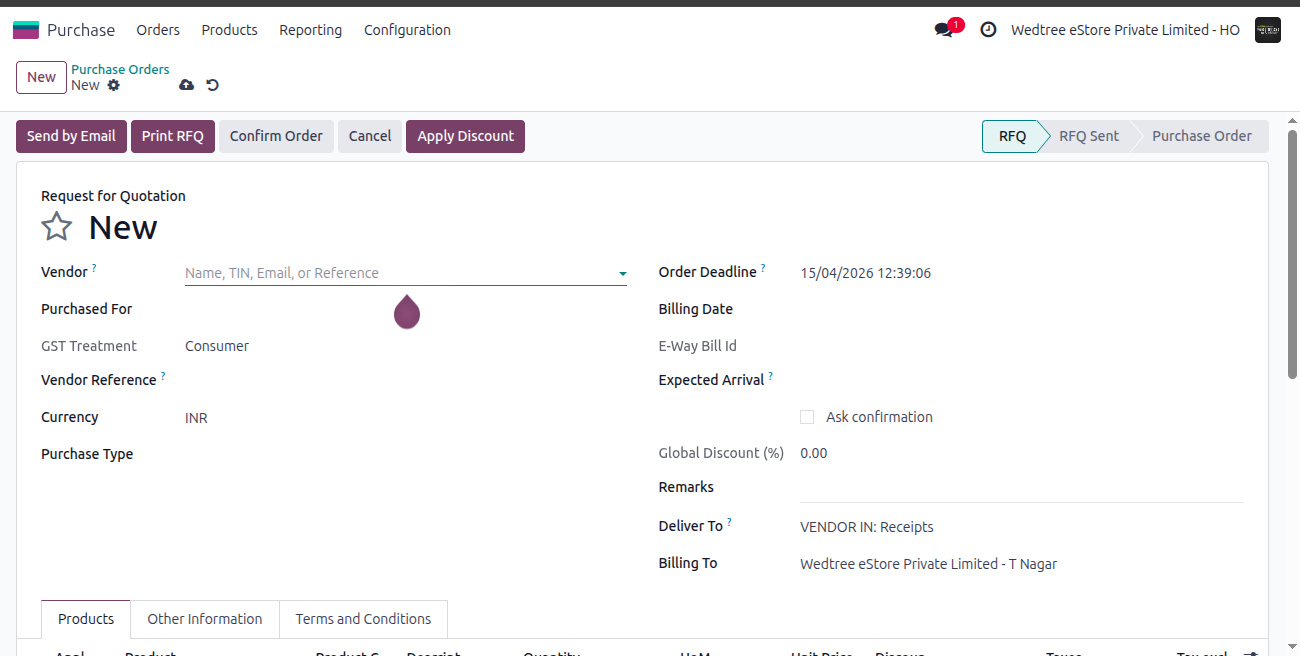
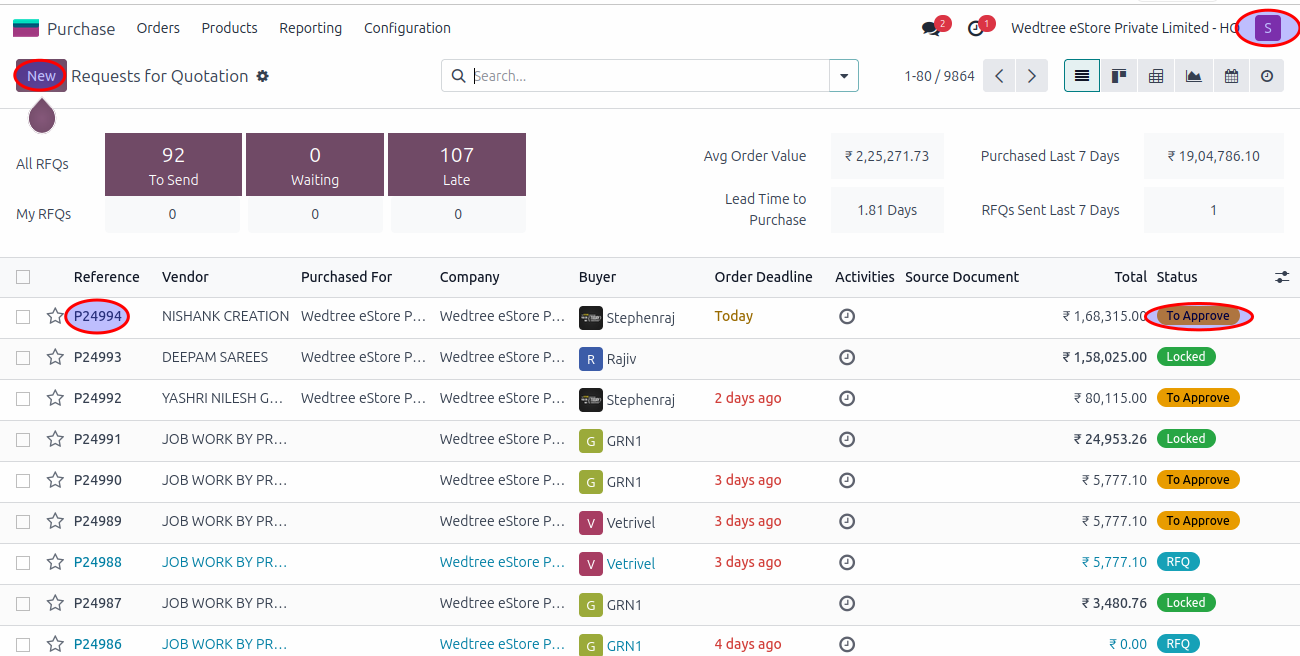
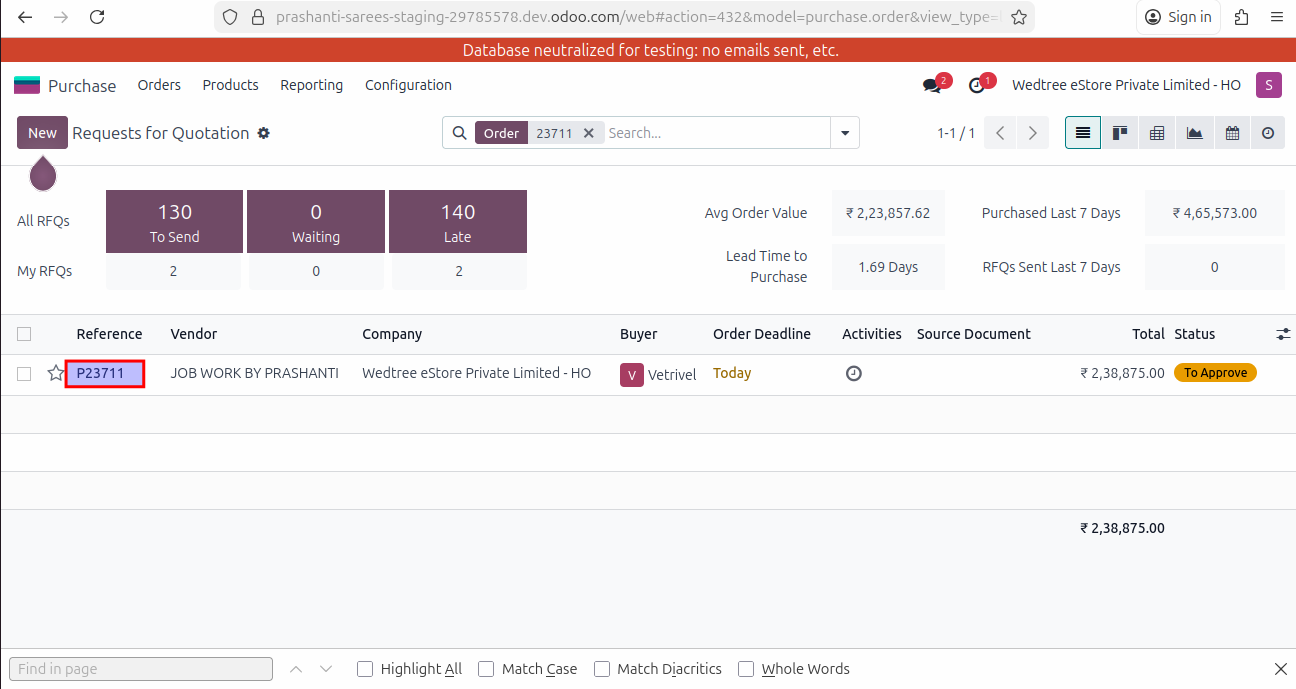
Step 1: Login with User ID. For demonstration purpose, logged in with purchase@prashantisarees.com (Stephenraj) and click on New button for creating new PO.
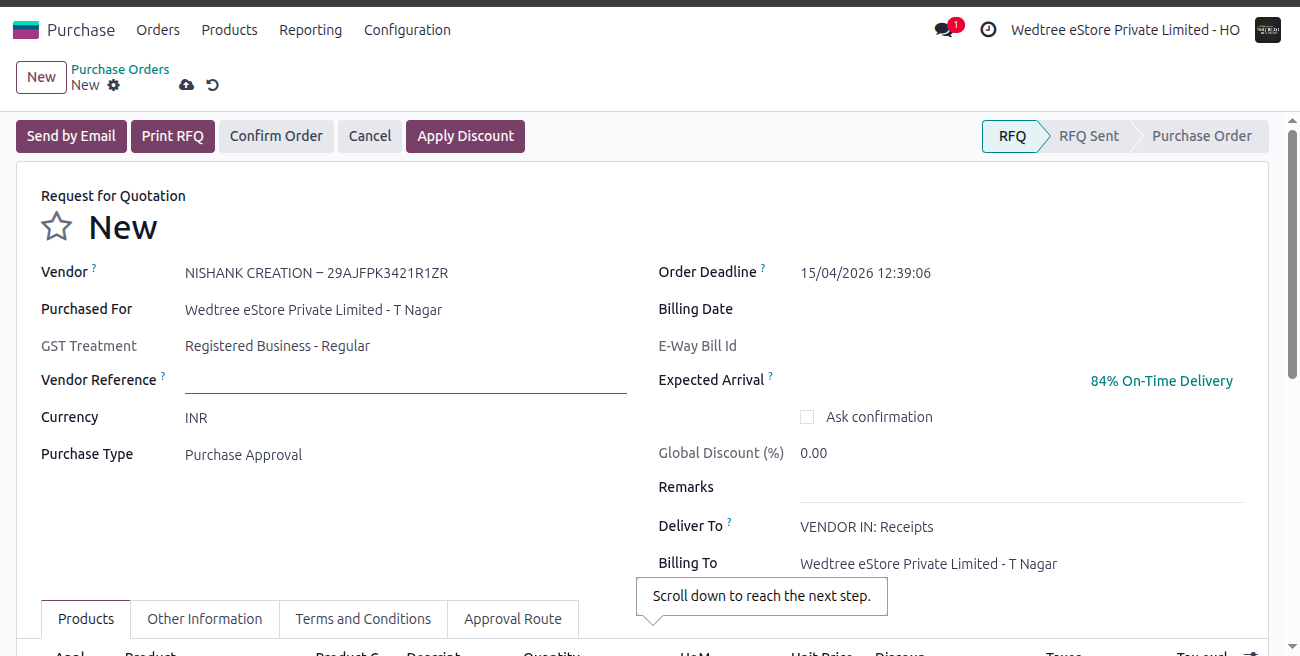
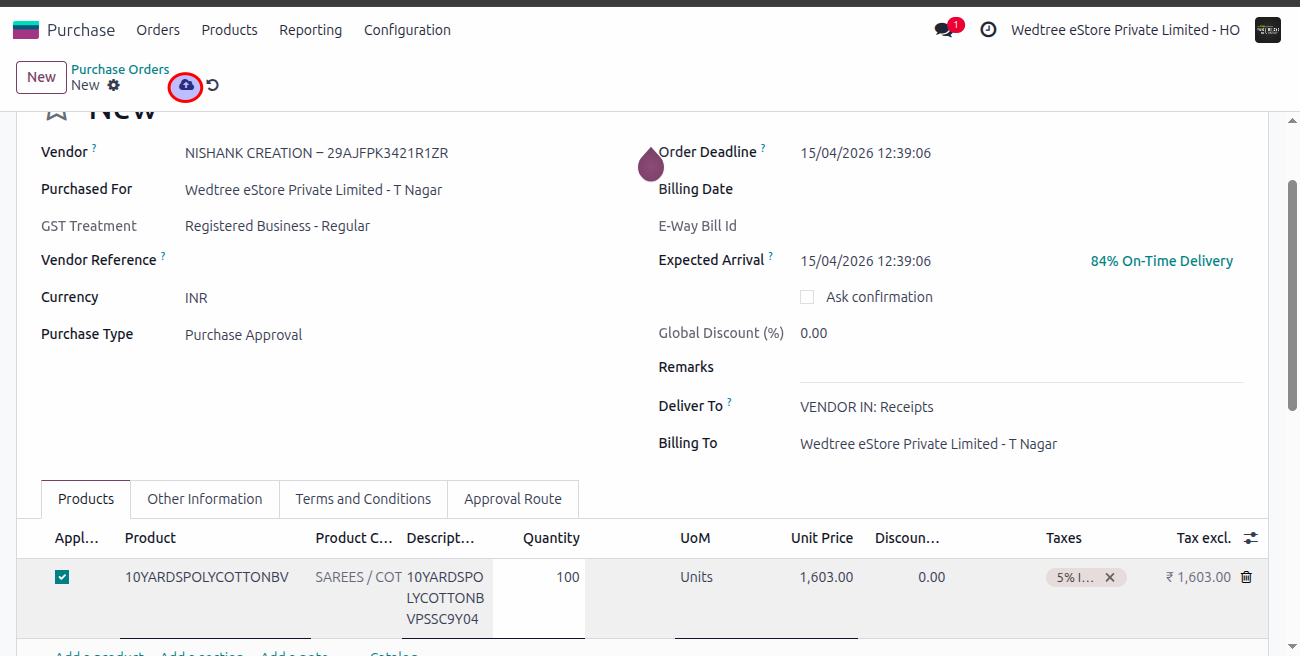
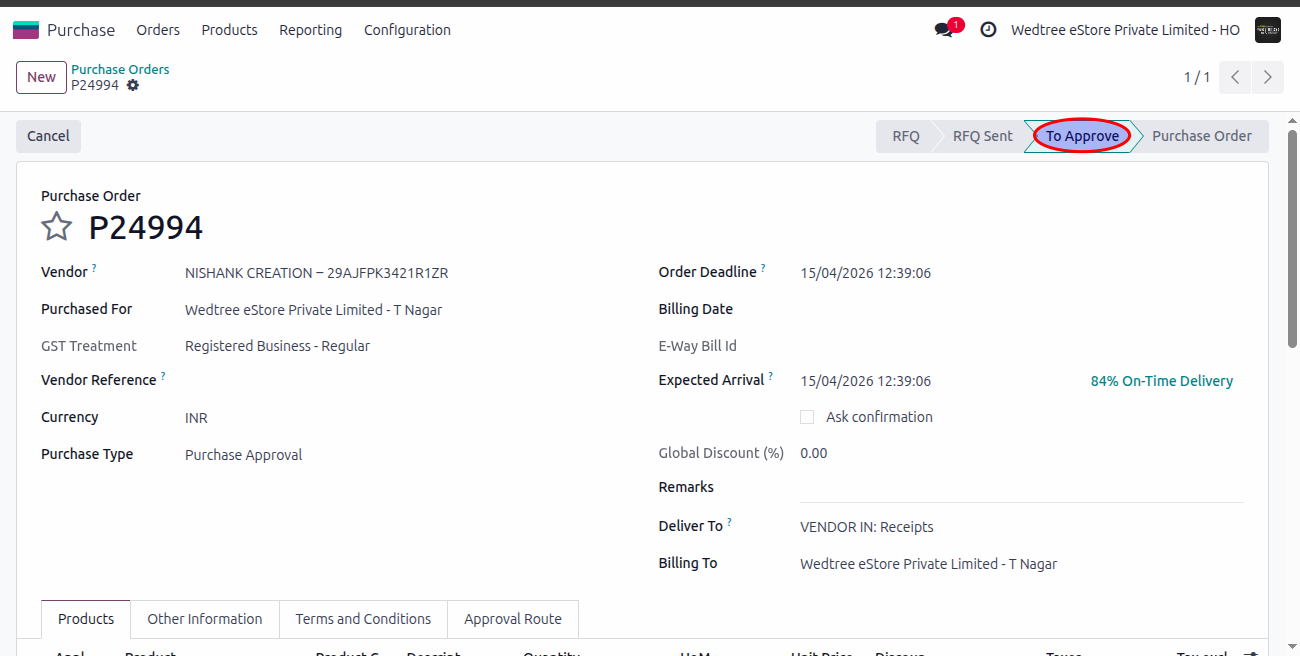
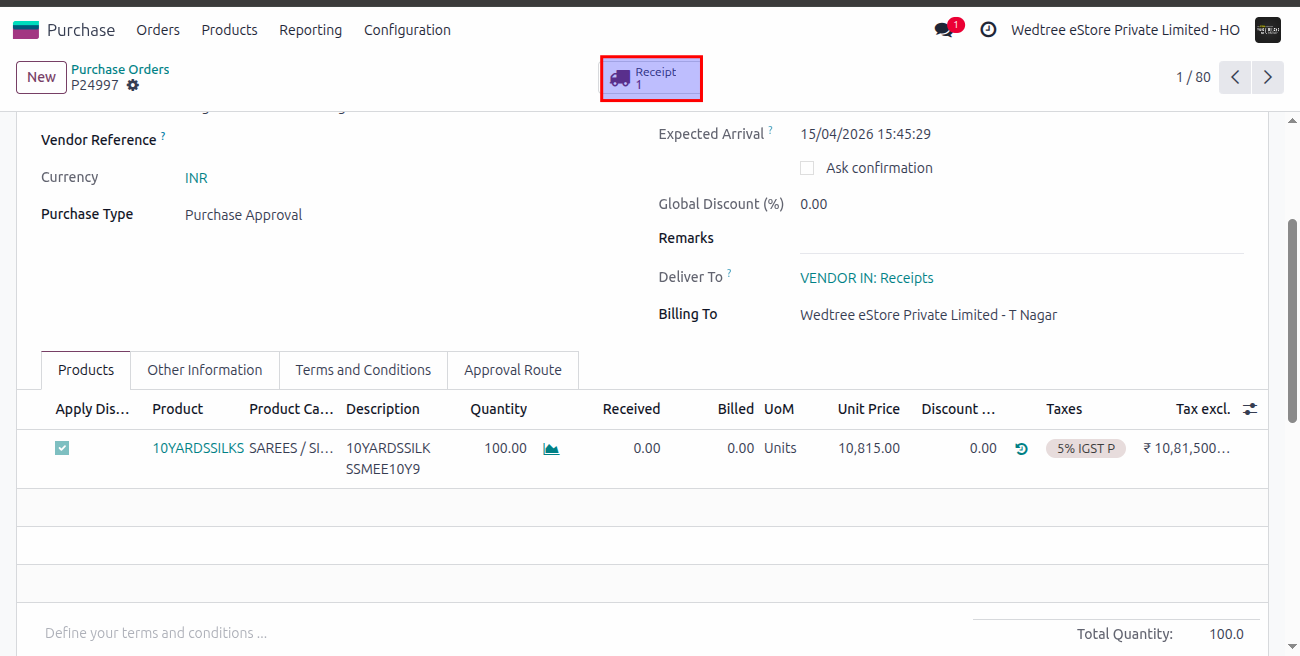
Step 2: Enter Vendor Name, select Purchased For which store, select Purchase Type for whom should approve the PO, then add Product, enter Quantity, and save.
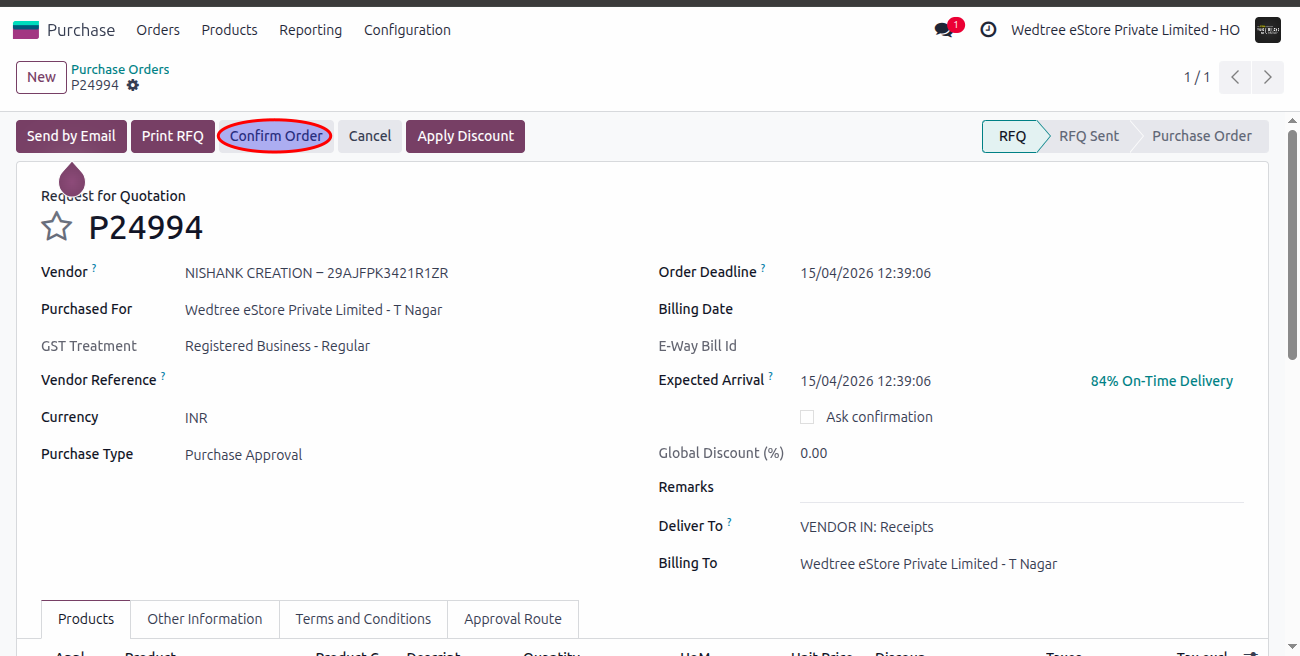
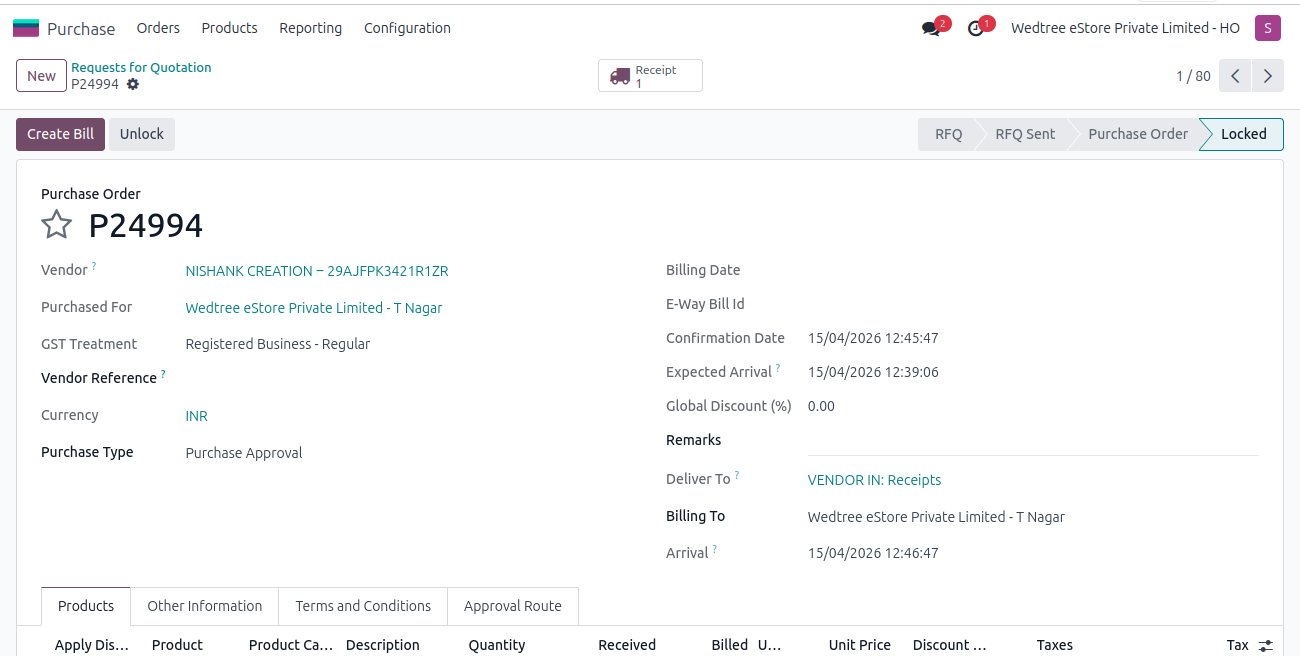
Step 3: Give Confirm, the PO status goes to To Approve state which should be approved by the Purchase Approver.
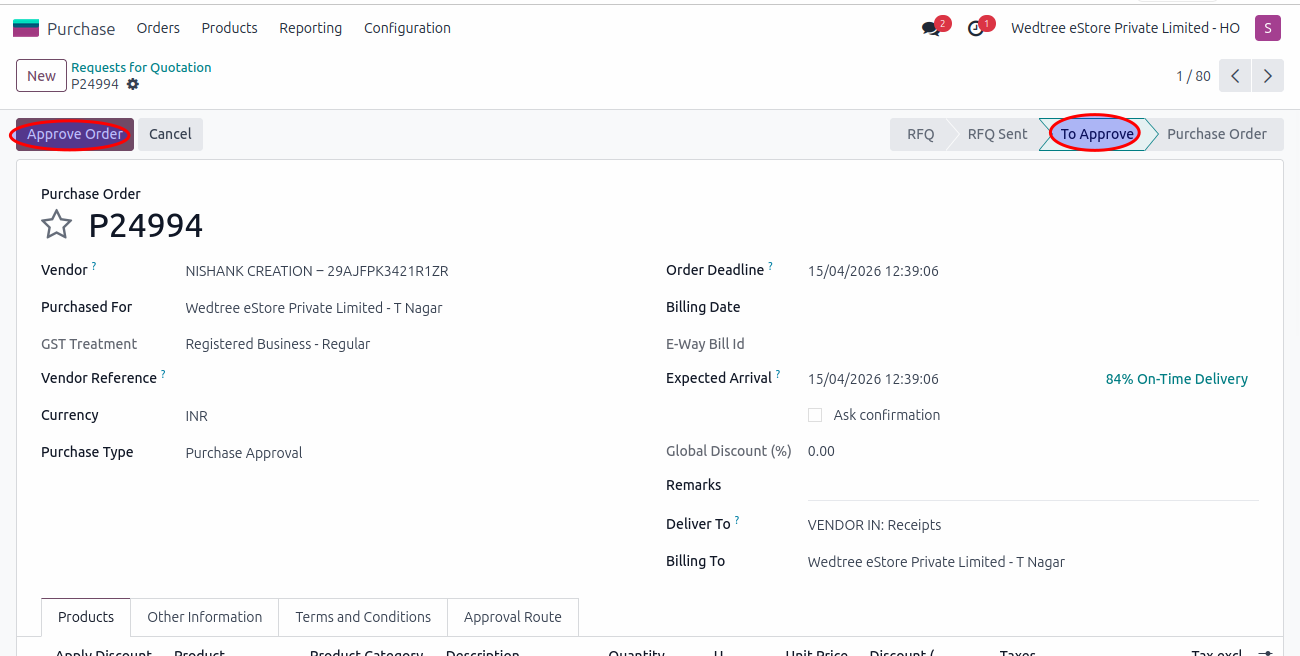
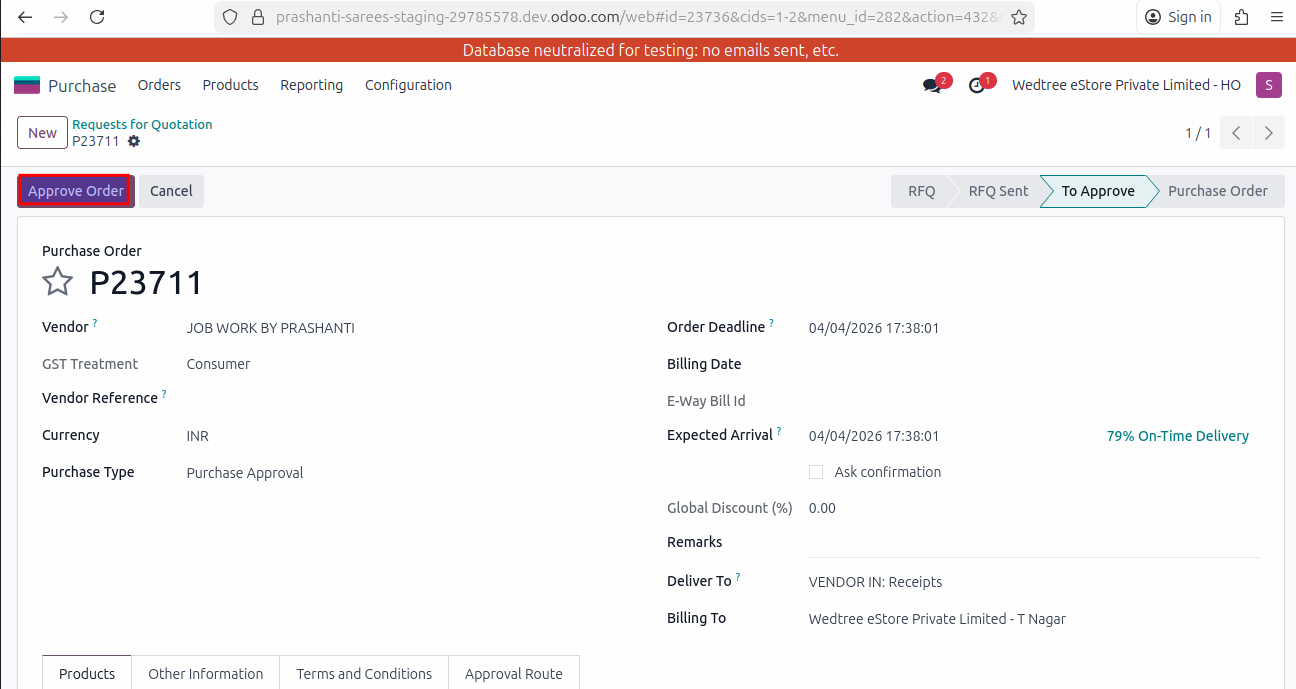
Step 4: Log in with Purchase Manager (swetha@wedtree.com) to approve the PO. Open the PO in RFQ state.
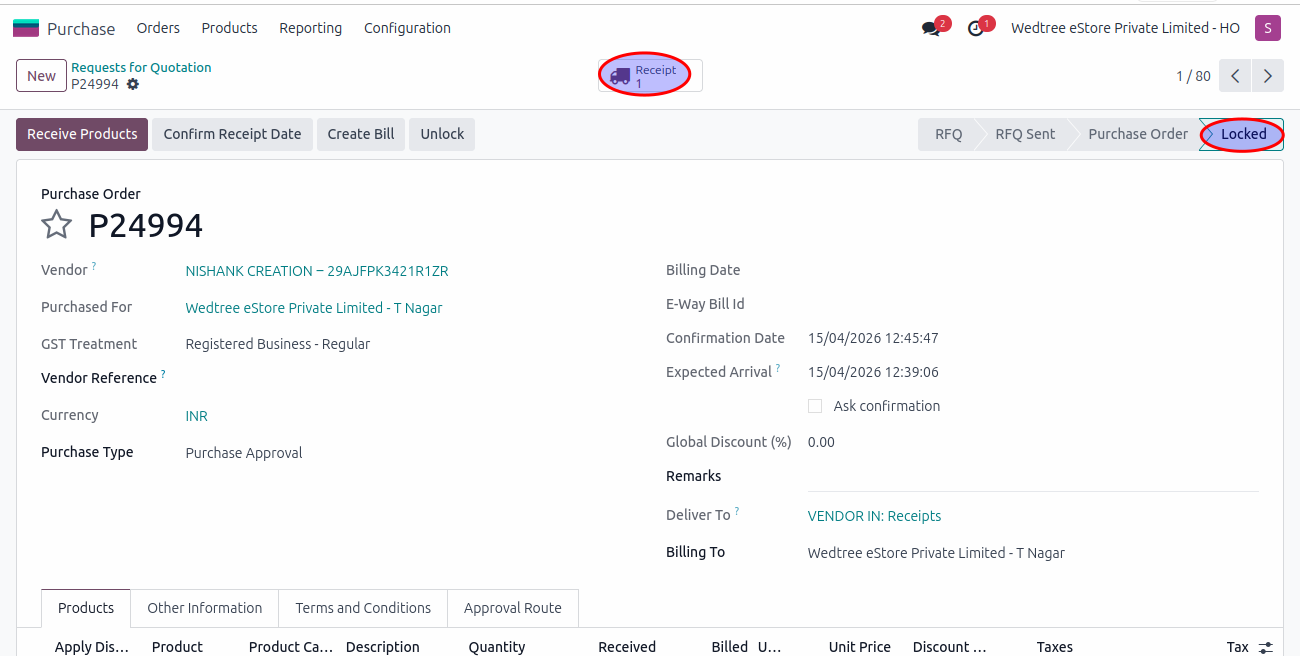
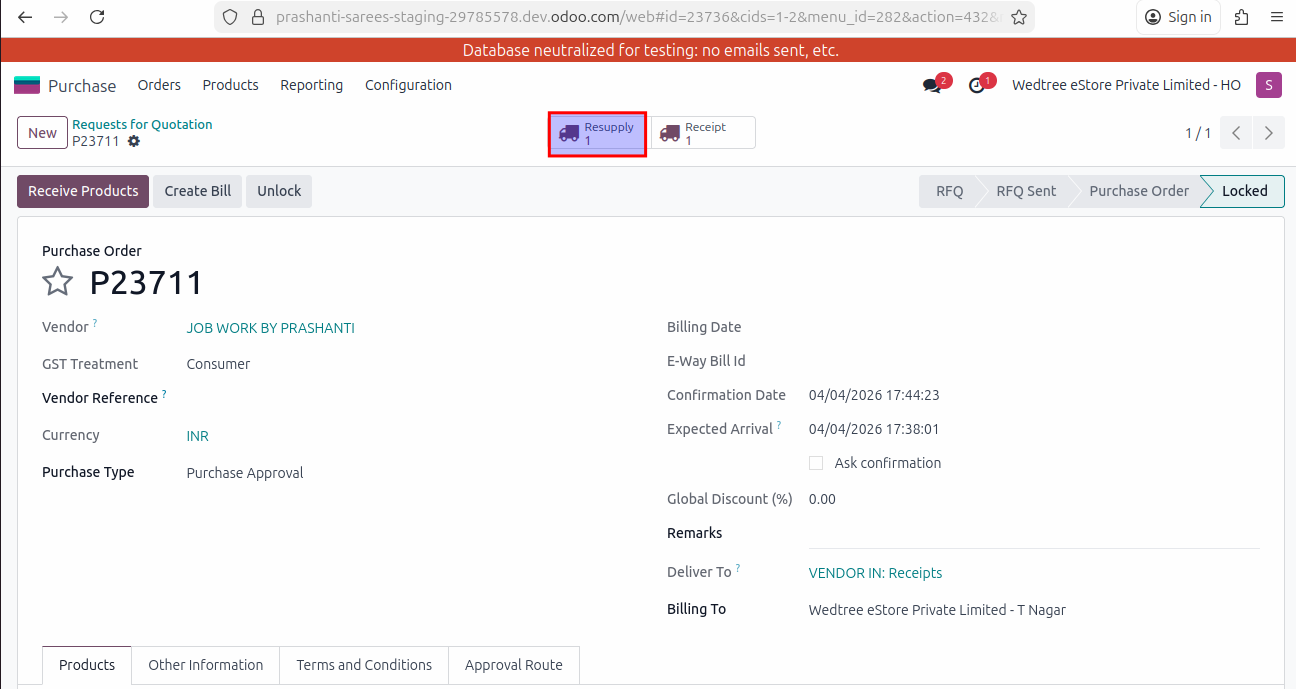
Step 5: Approve the PO. The status goes to Locked state.
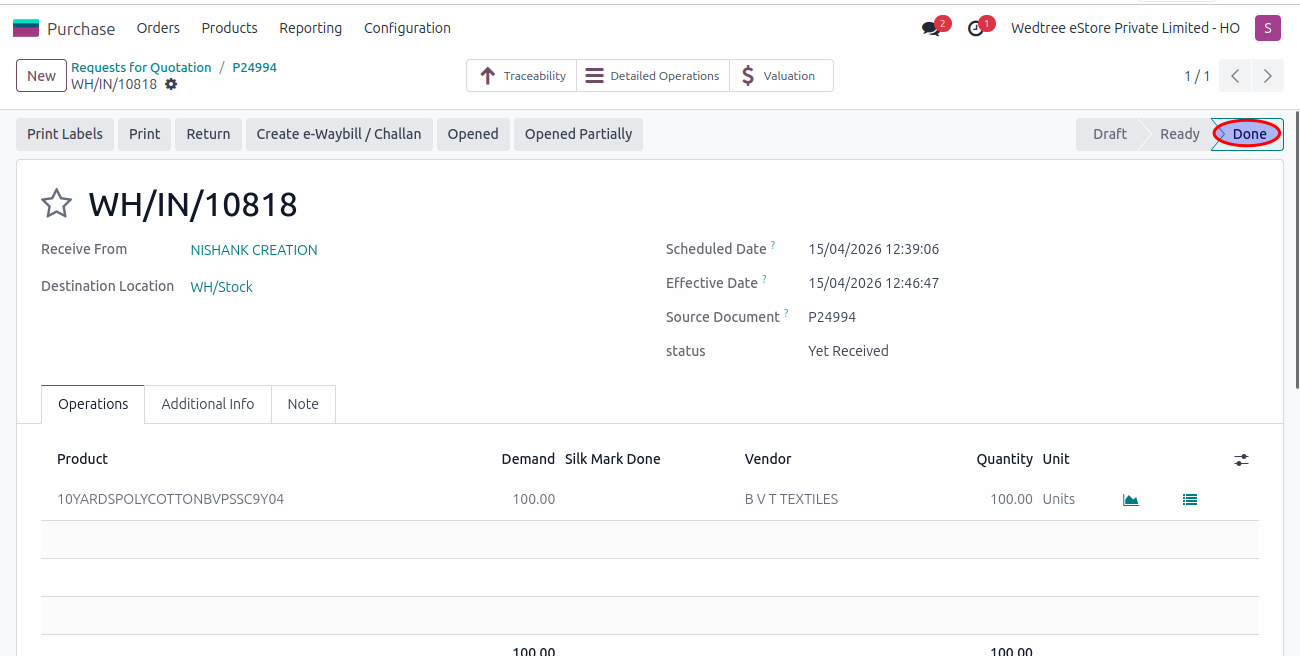
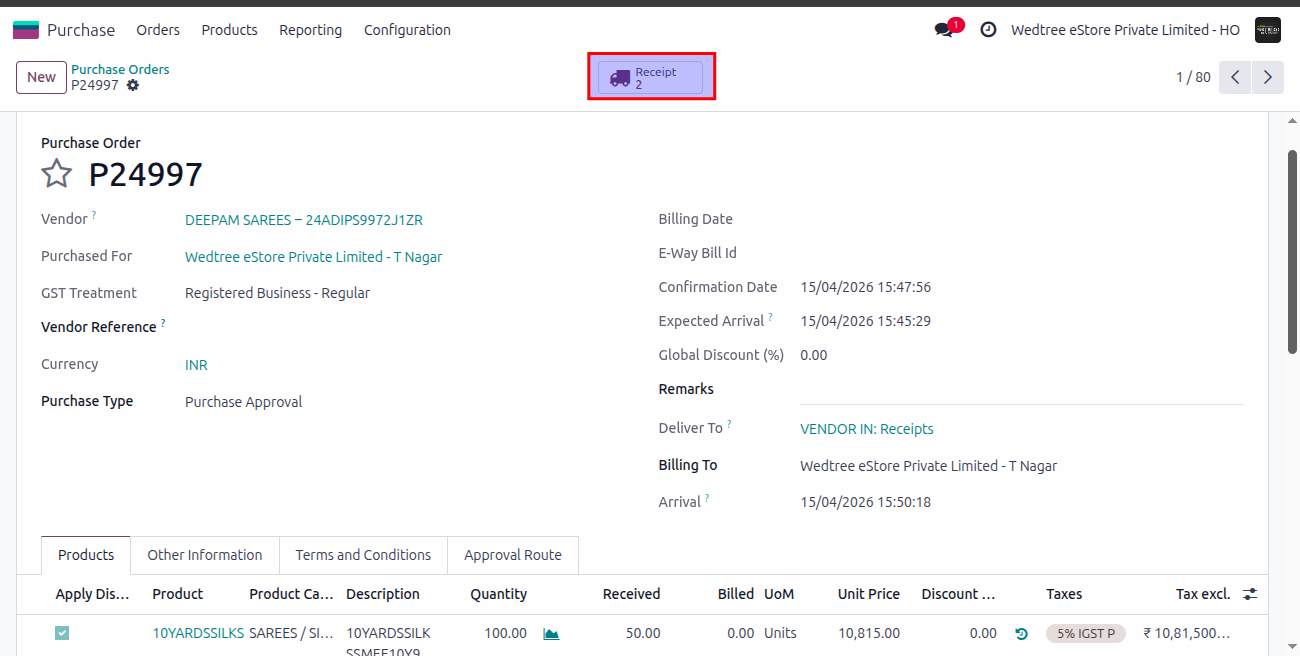
Step 6: Go to Receipt generated.
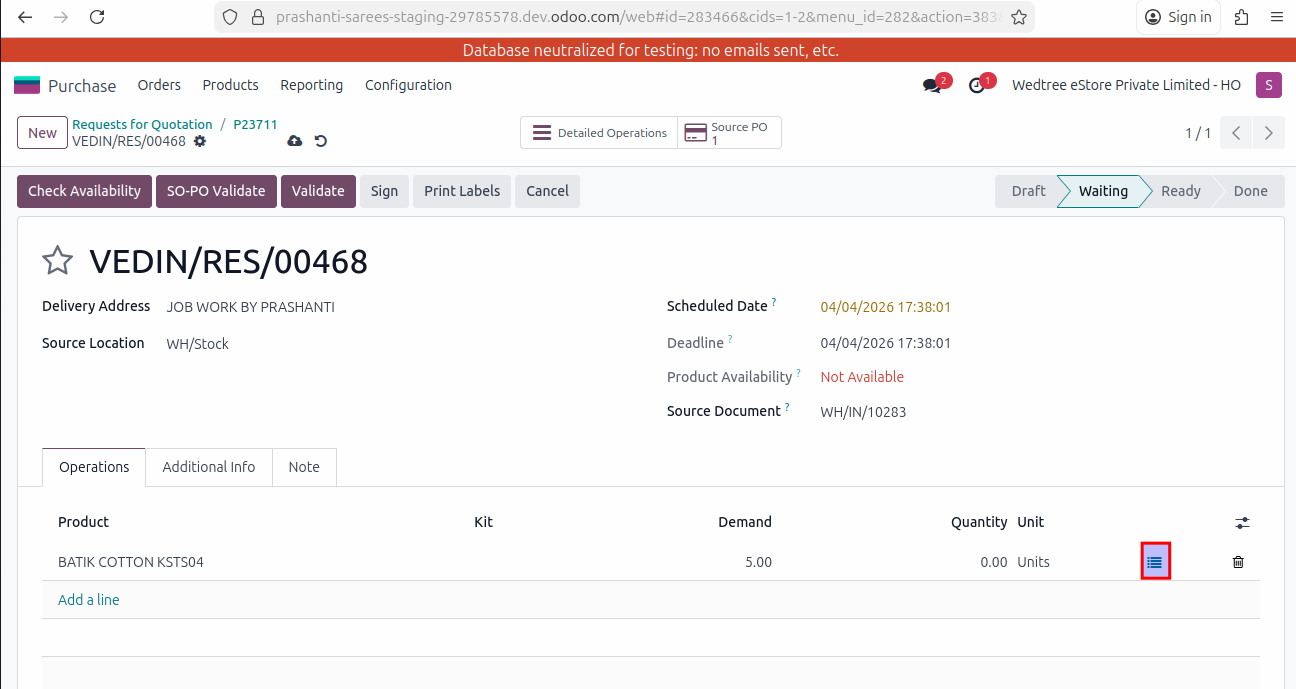
Step 7: Validate the receipt.

Step 8: The status goes to Done state.
Demo Video for creating PO:
Creating Bill for the Vendor:
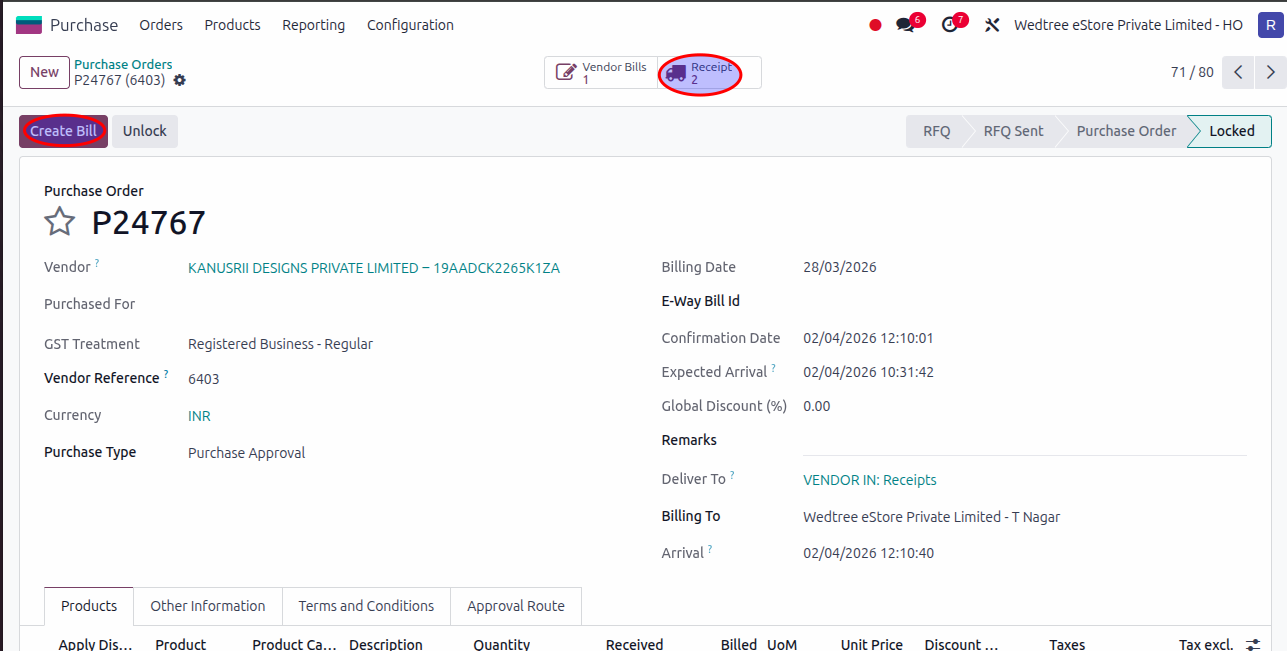
After validating the PO by clicking Validate button and the status goes to Done state, open that PO and it shows a Create Bill button. Click on that and it creates the bill for the Vendor.
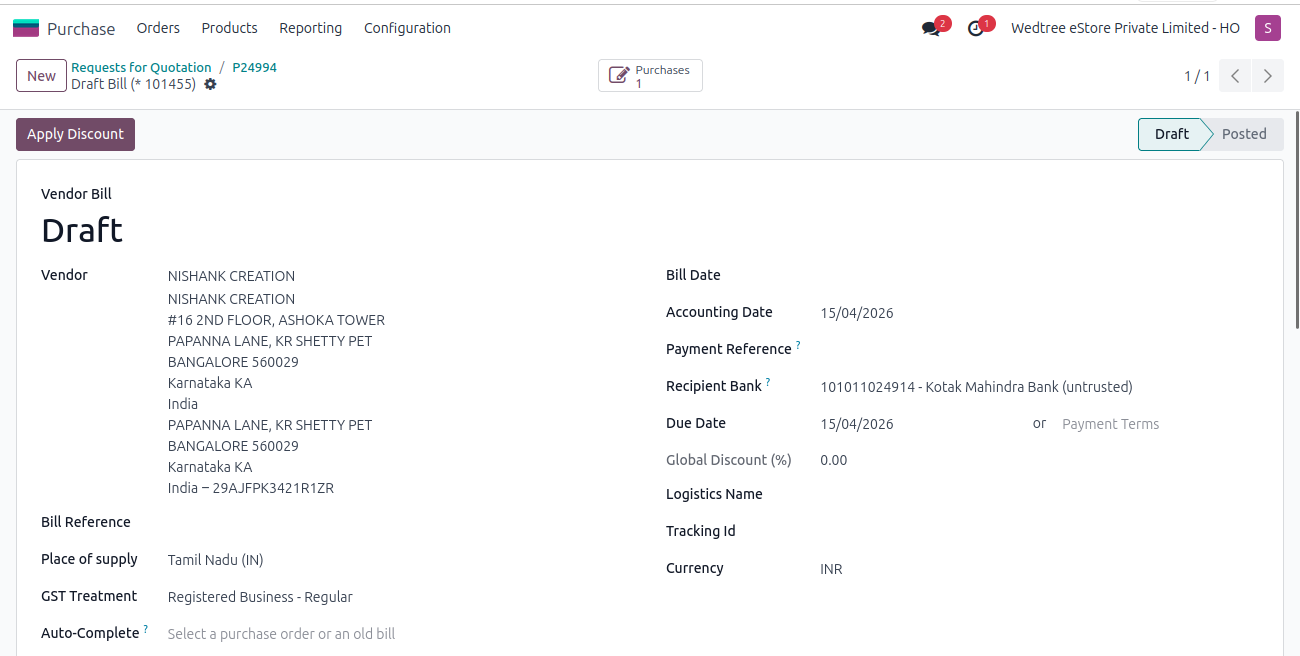
This bill goes to the Accounting team and they will process the payment.
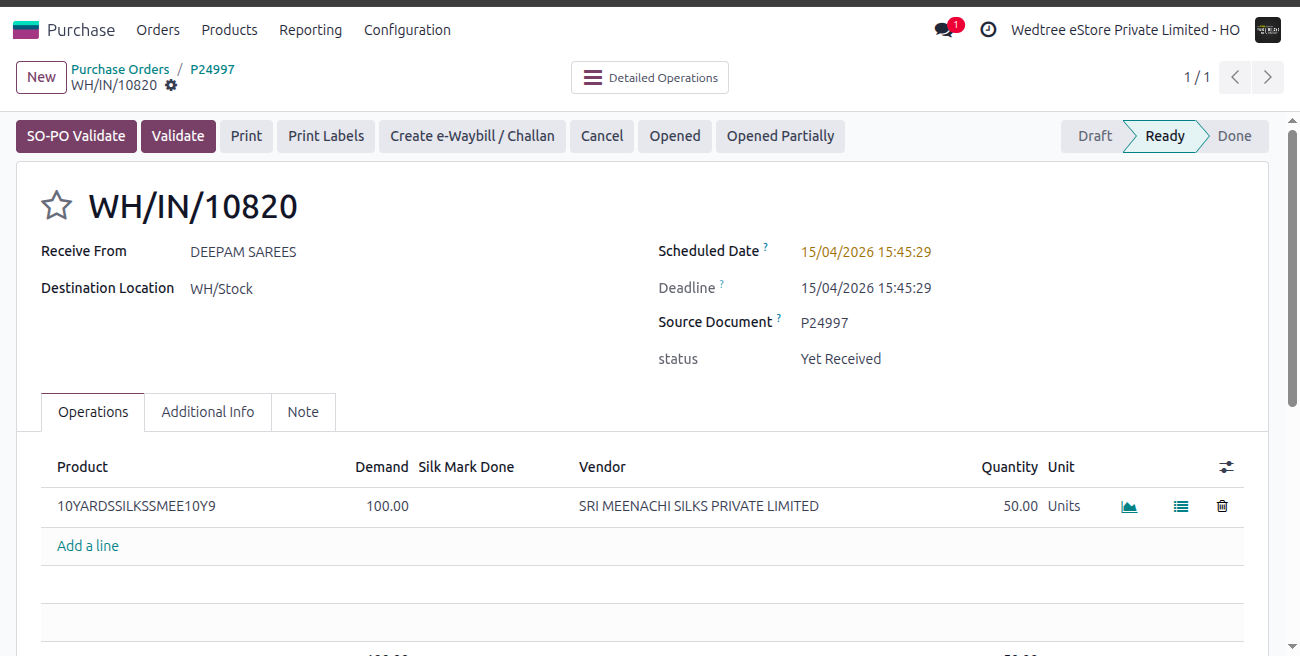
Creating Backorder:
A Backorder in Purchase Module is a follow-up delivery order automatically created when a vendor delivers only a partial quantity of the products specified in a Purchase Order (PO).
Follow the steps from 1 to 5 as above. After Approving the PO, the Receipt is generated.
Go to Receipt, enter the received quantity less than the ordered quantity and save it.
Click on Validate button, it shows the window to create back order or not.
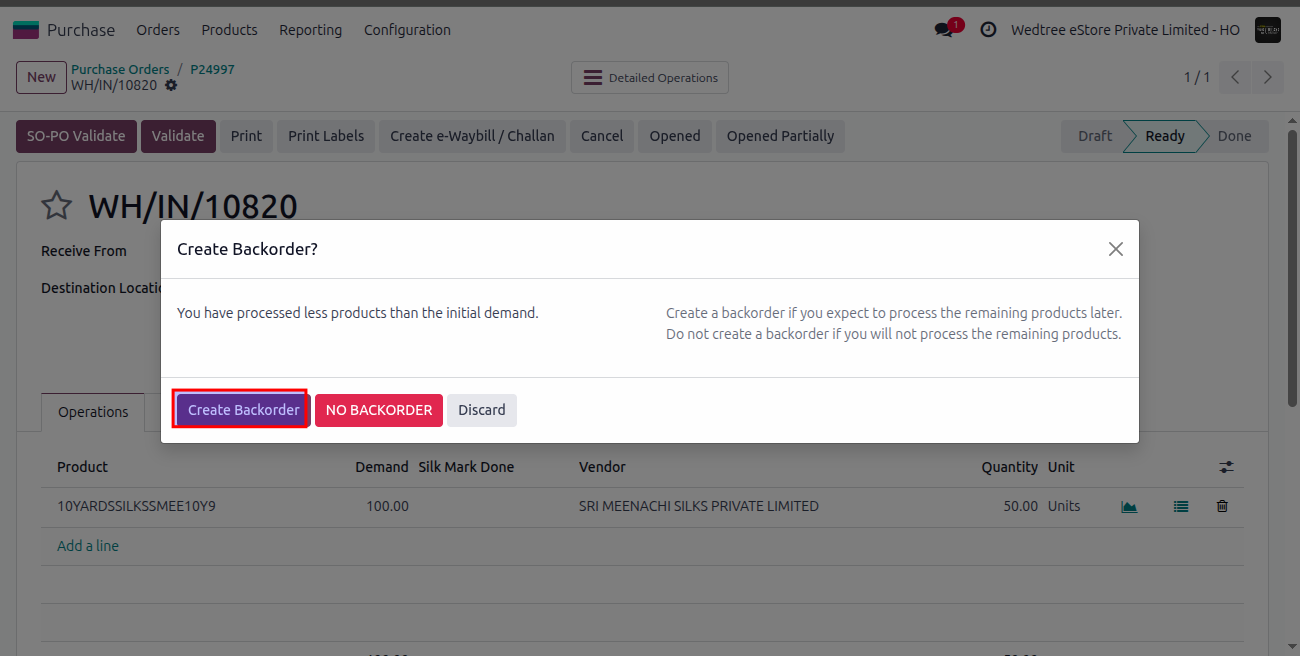
On giving create back order it automatically creates the back order for remaining quantity and the status goes to Done state. If no back order is required, then click on No Backorder and the status goes to Done state without creating any backorder.
Go to PO again.
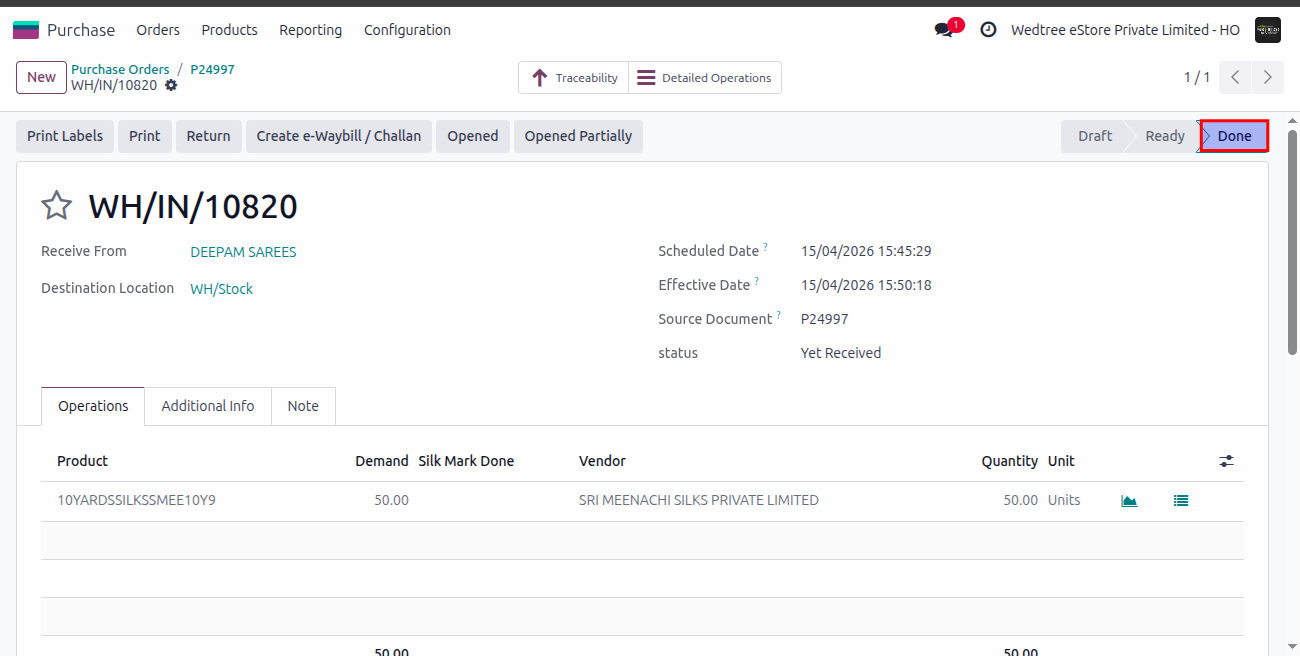
There are two Receipts generated one in Ready state and one in Done state.
Open Receipt in Ready state.
Give Validate and the back order goes to Done state.
Now, both the Receipts are in Done state.
Demo Video for creating Back Order:
Return Process in Purchase Module:
The return process is the method of sending purchased goods back to the vendor when they are damaged, incorrect, or not needed.
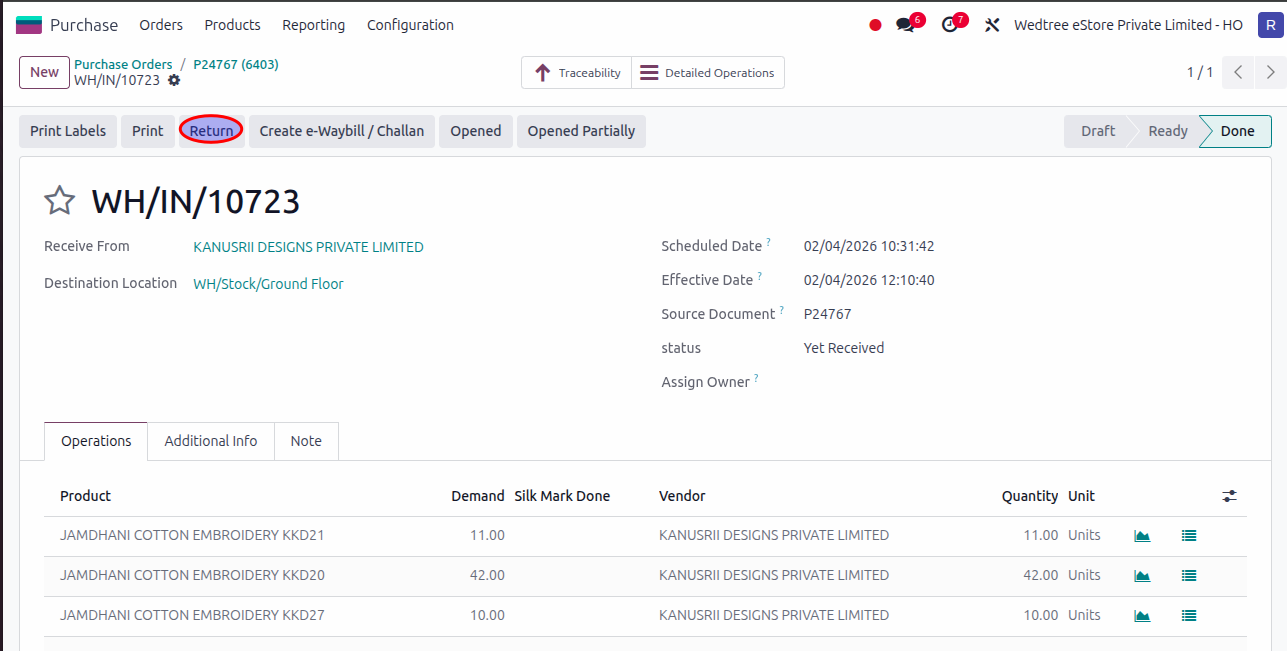
Open Receipt of PO received.

Click on Return to return products.
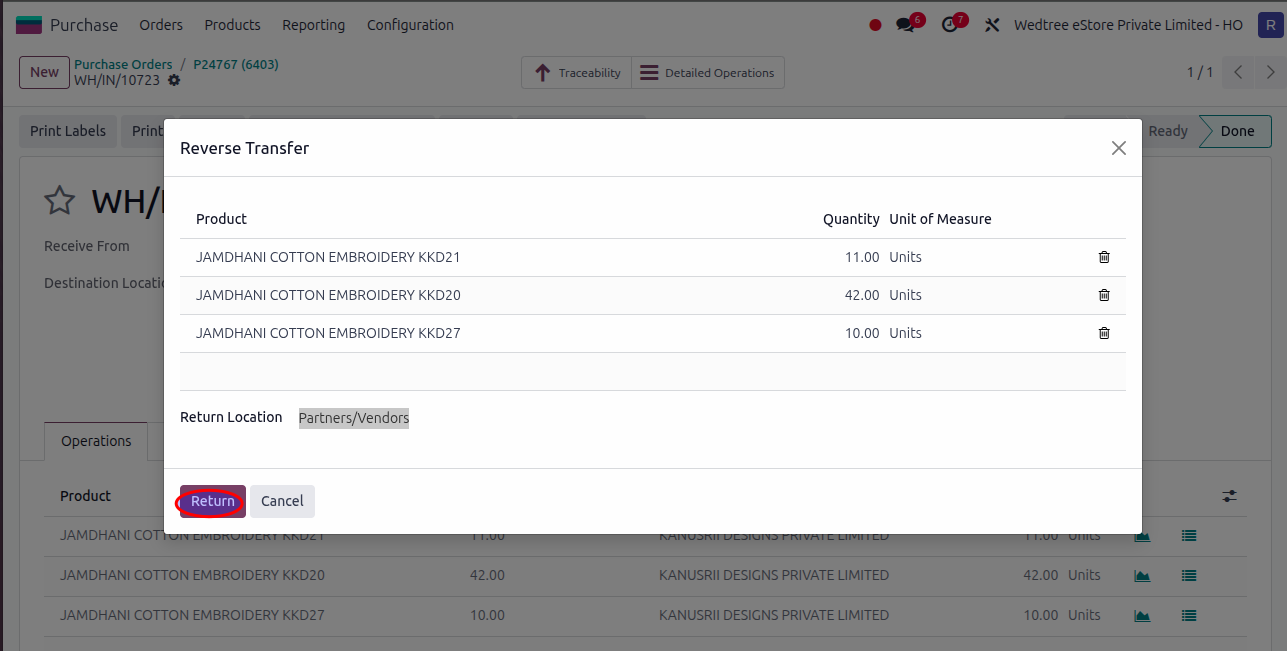
It opens Reverse Transfer window and click Return button to return all products.
Then, click on Validate button.
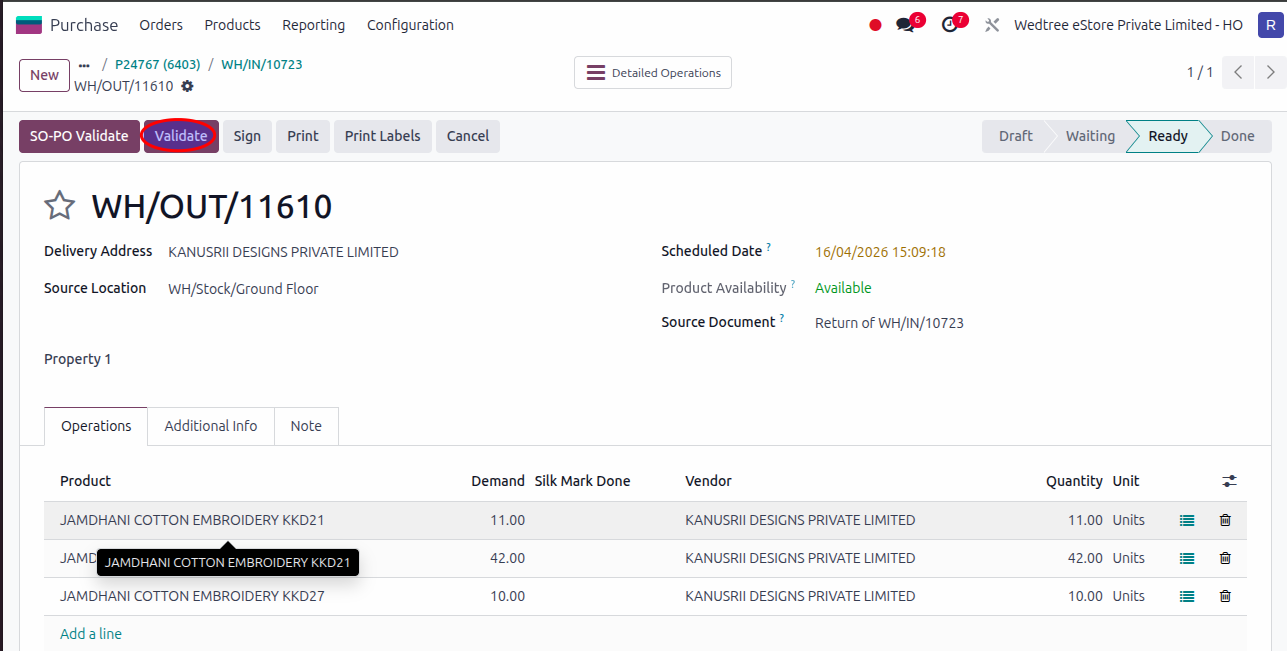
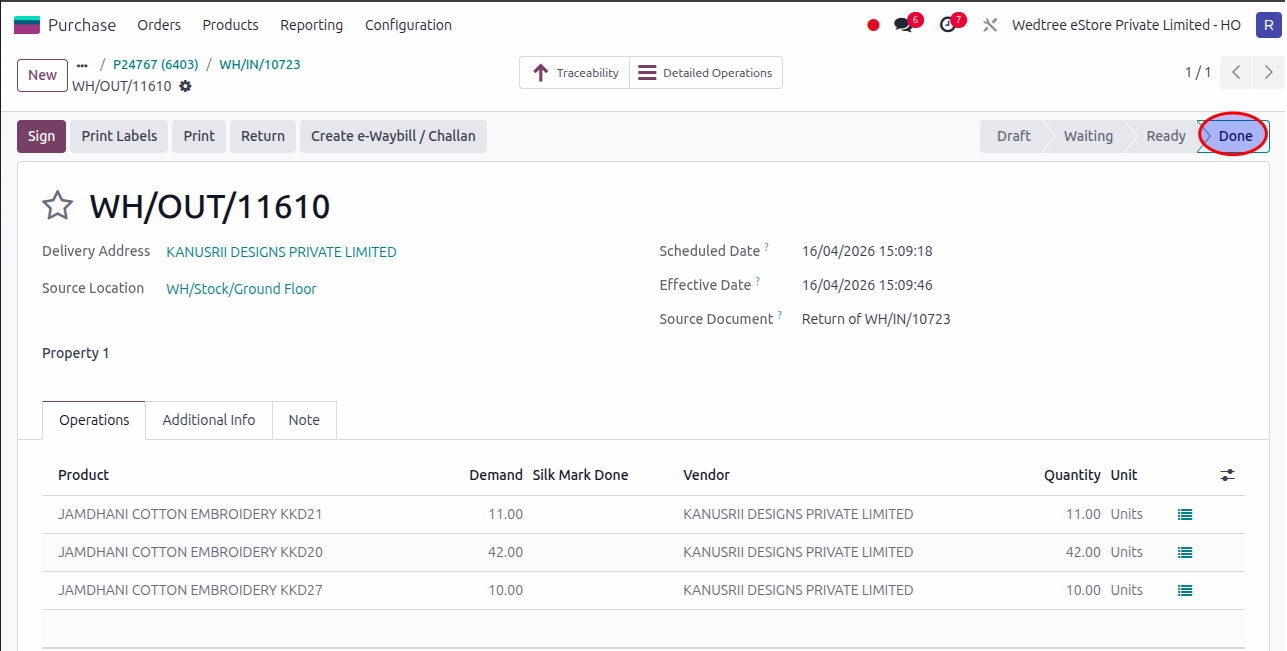
The status goes to Done state.
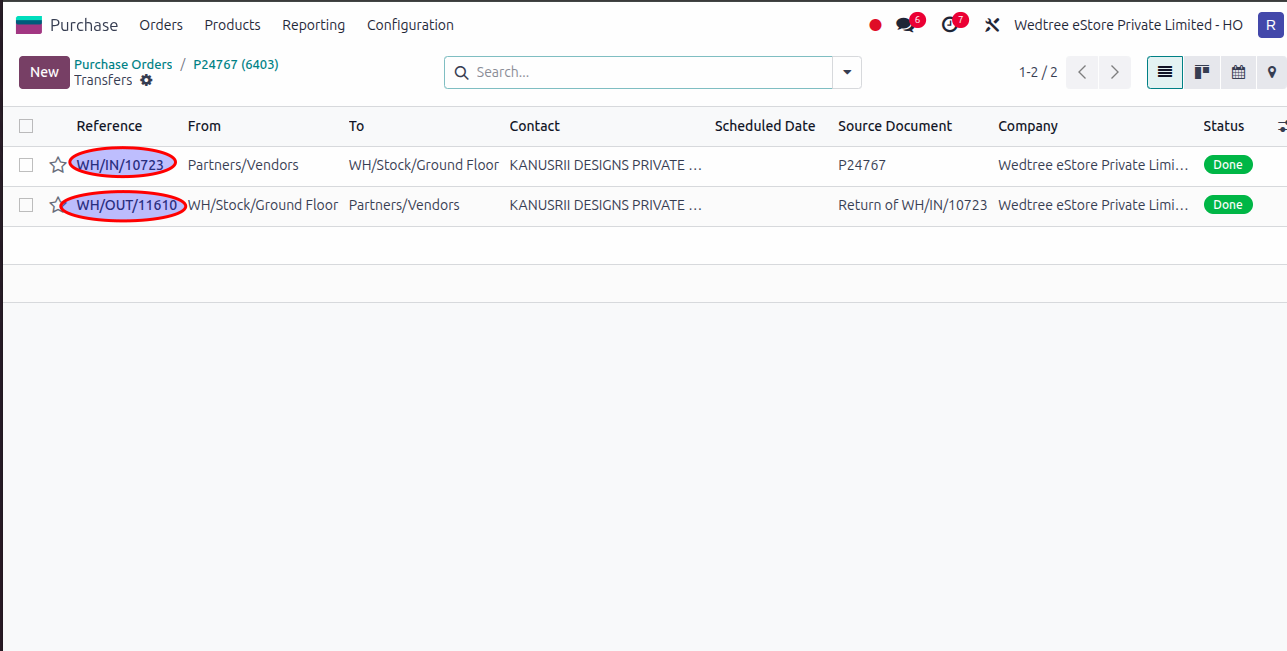
Go to PO again.
There will be two Receipts generated. One was the Receipt when receiving the products from the Vendor and another one is now returning the products.
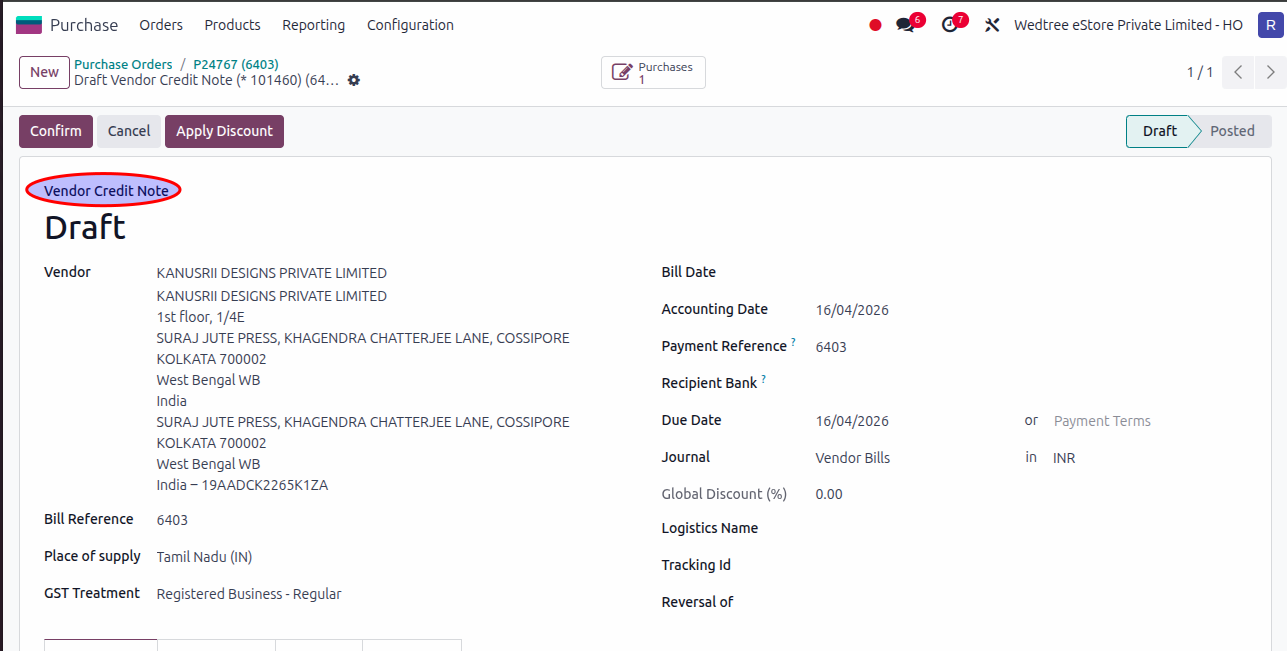
Go to PO again, there will be a Create Bill button to create Bill. Vendor Credit Note will be generated. This will be confirmed in Accounting module.
Demo Video for Return Process:
Workflow of Job work
Process
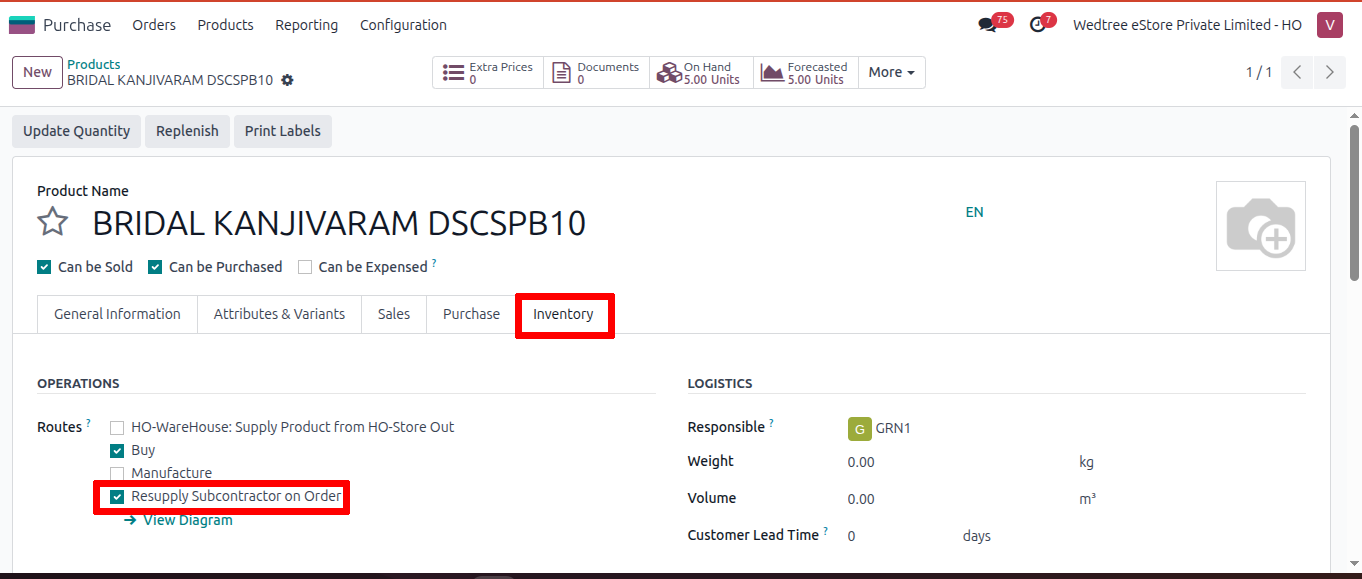
Purchase some plain sarees from one vendor and send them to another vendor for some printing work. Then, purchase those sarees from that vendor by another saree name. This is the Job Work done in Prashanti. For that, both plain saree and finished saree are created in Products master and should be marked as Resupply Subcontractor on Order.
Log in with user ID:
Go to
Step 1: Select Products
Go to the Inventory tab in the product form.
Select the checkbox: Resupply Subcontractor on Order.
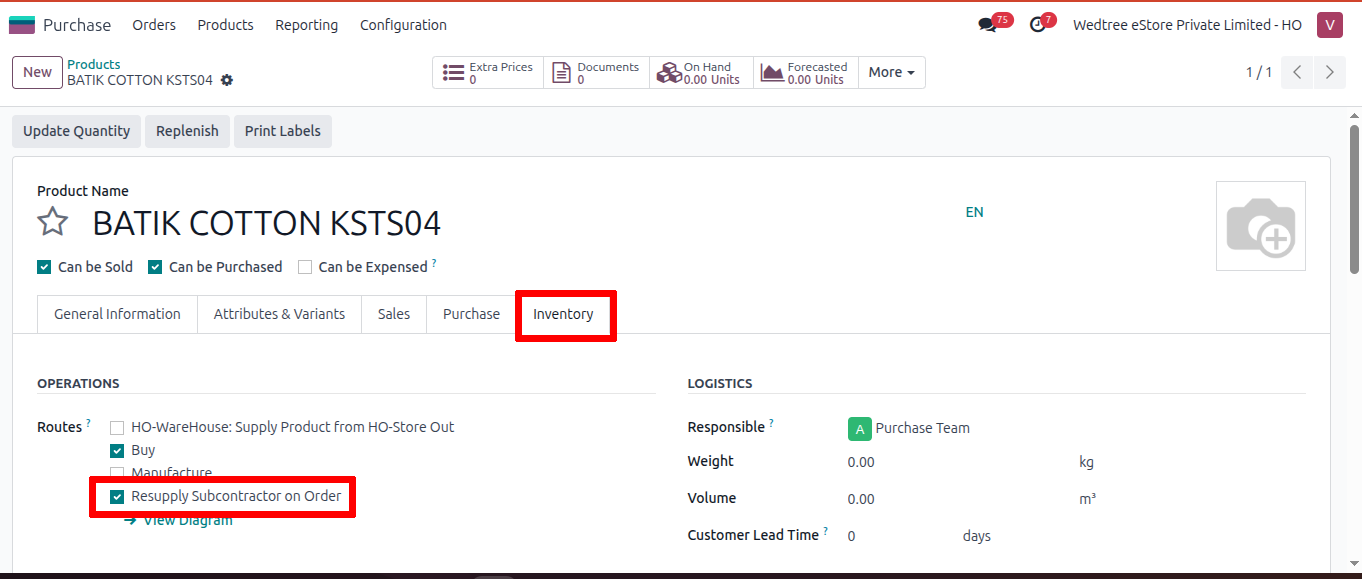
Here also, select the Resupply Subcontractor on Order checkbox.
Step 2: Create Bills of Materials.
To create Bills of Materials, see Bills of Materials
Step 3: Job Work:
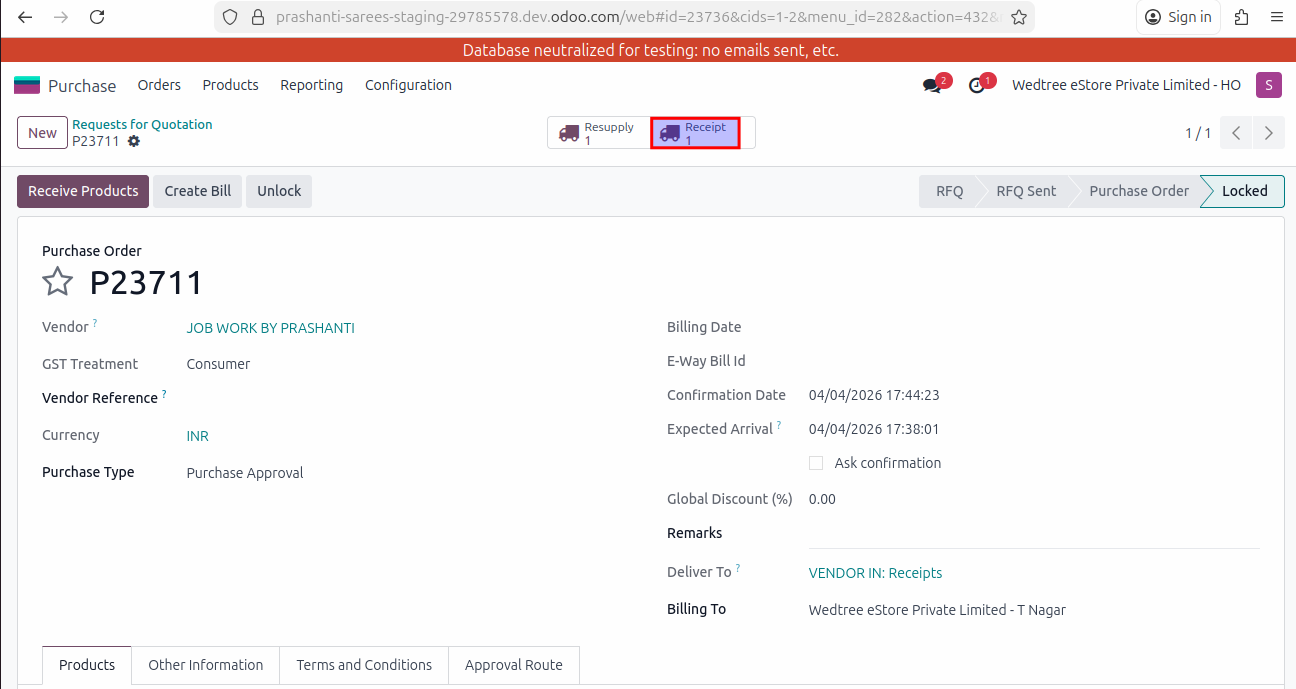
Create PO to purchase products after the Job Work from the Job Work Vendor. Enter Vendor name (Job Work By Prashanti), Purchase Type.
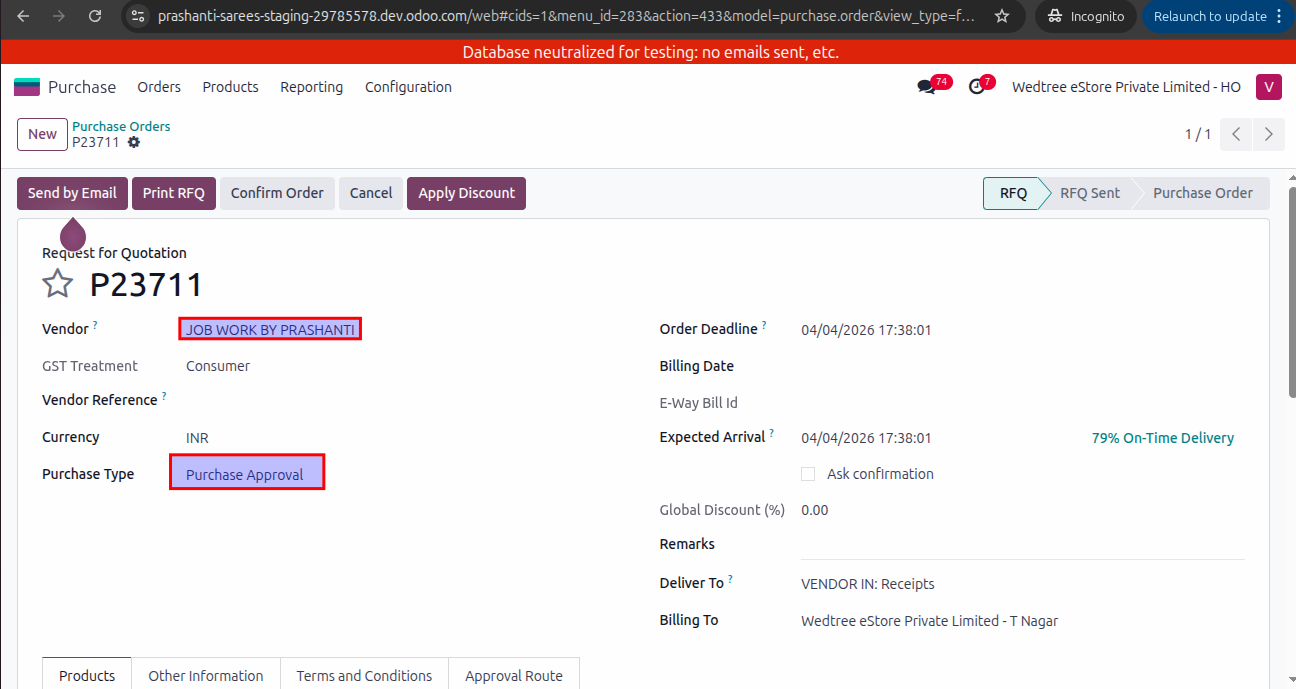
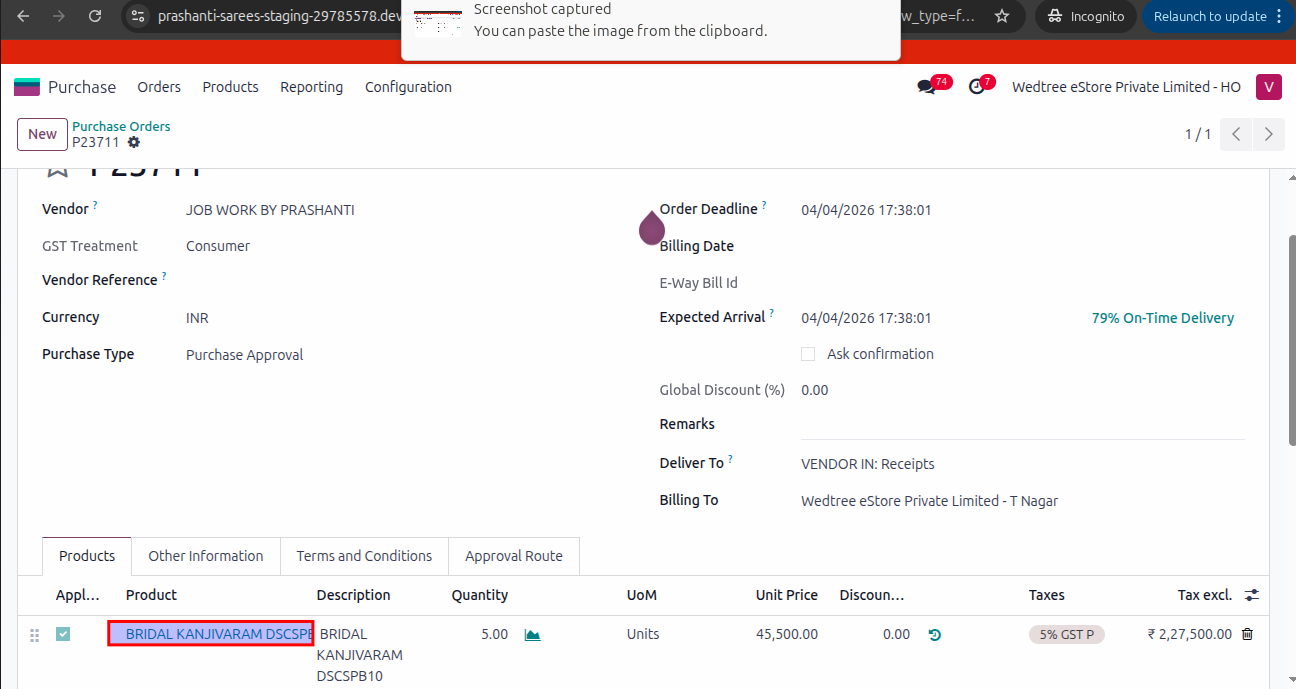
Enter the Product name given after Job Work. Enter Quantity then save and Confirm Order. The status goes to To Approve.
This PO should be approved by the Manager.
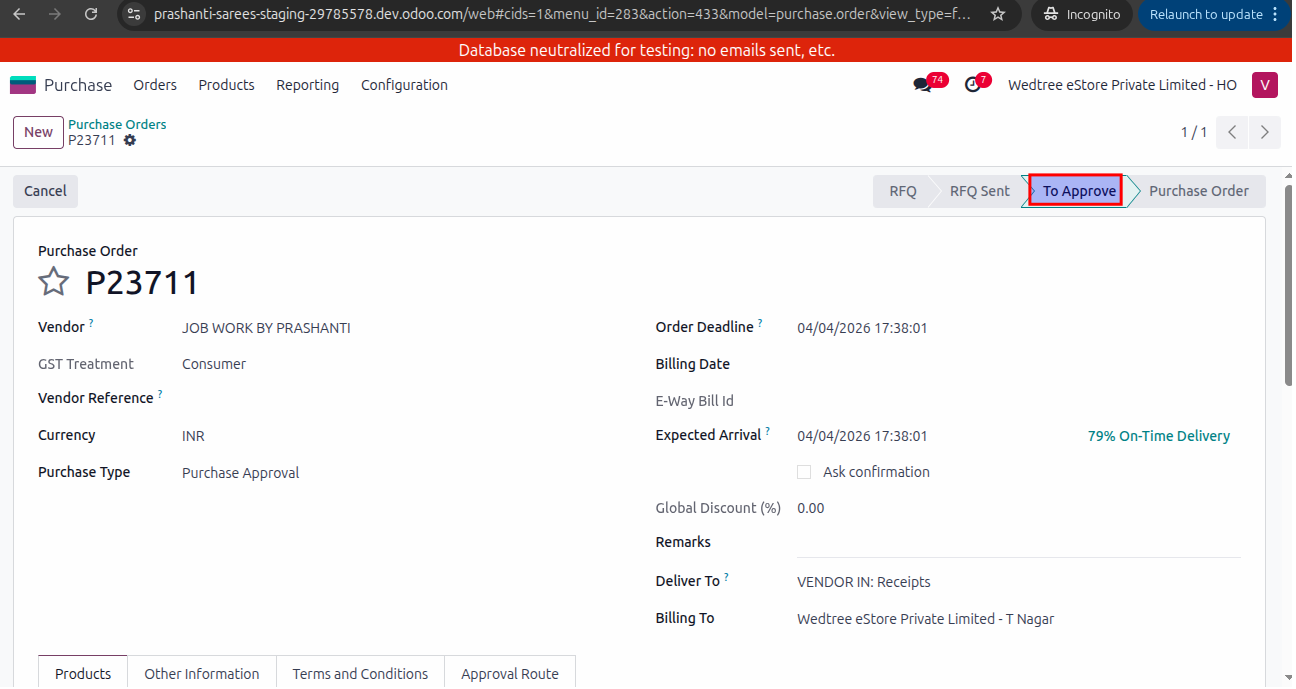
Login with Manager ID, select RFQ in To Approve state.
Click on Approve button.
After Approve, Resupply and Receipt button shows above. Open Resupply button.
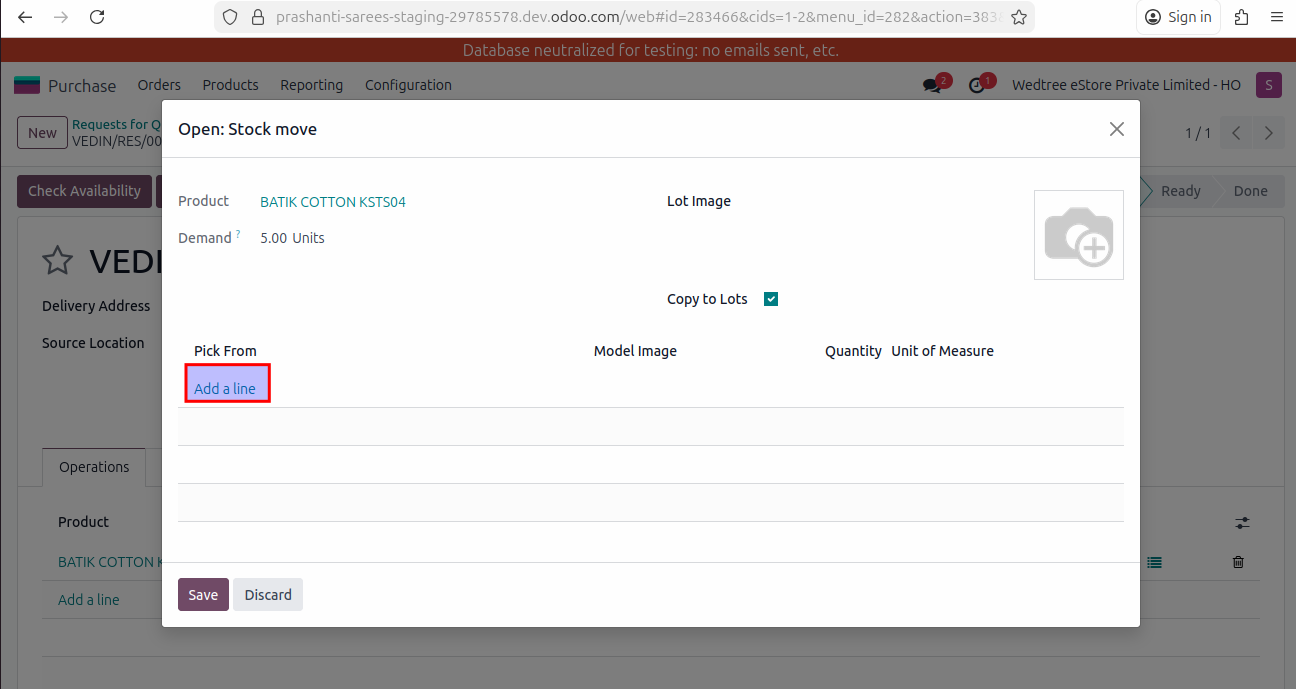
Enter Source Location and click on Stock Move Line.
Here click on Add Line.
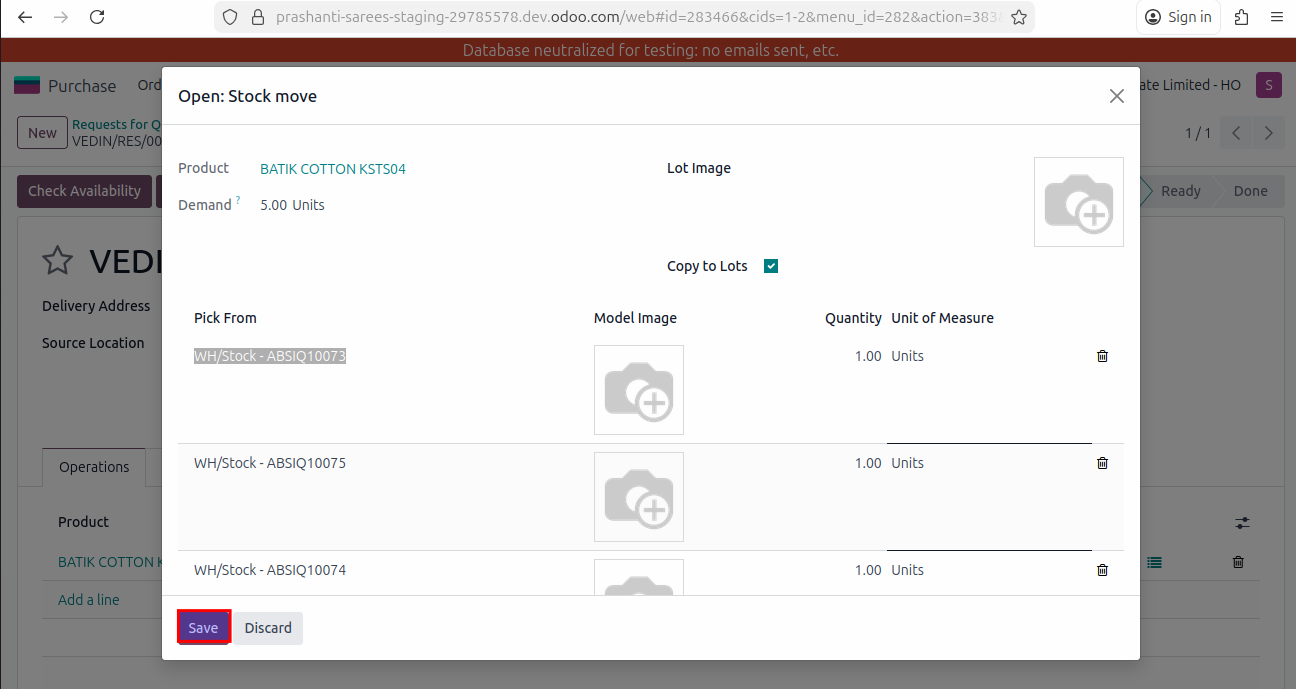
Add one by one the first product we sent for Job Work.
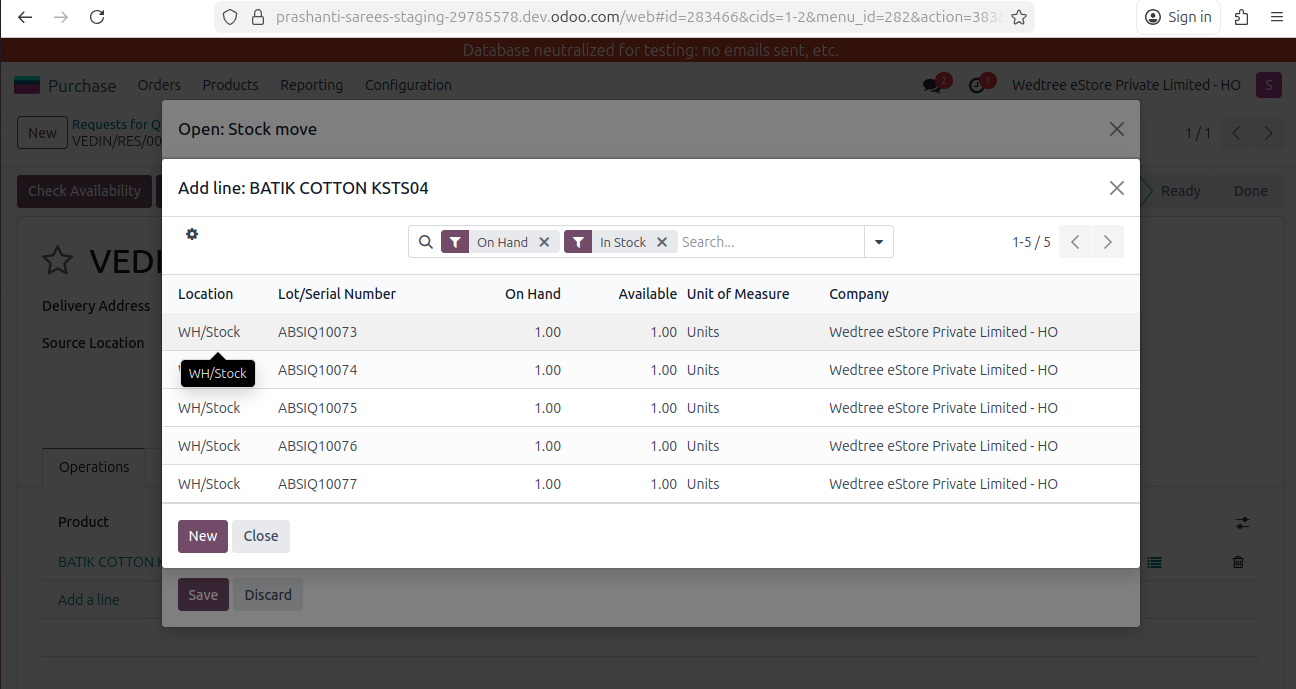
Select all products sent for Job Work.
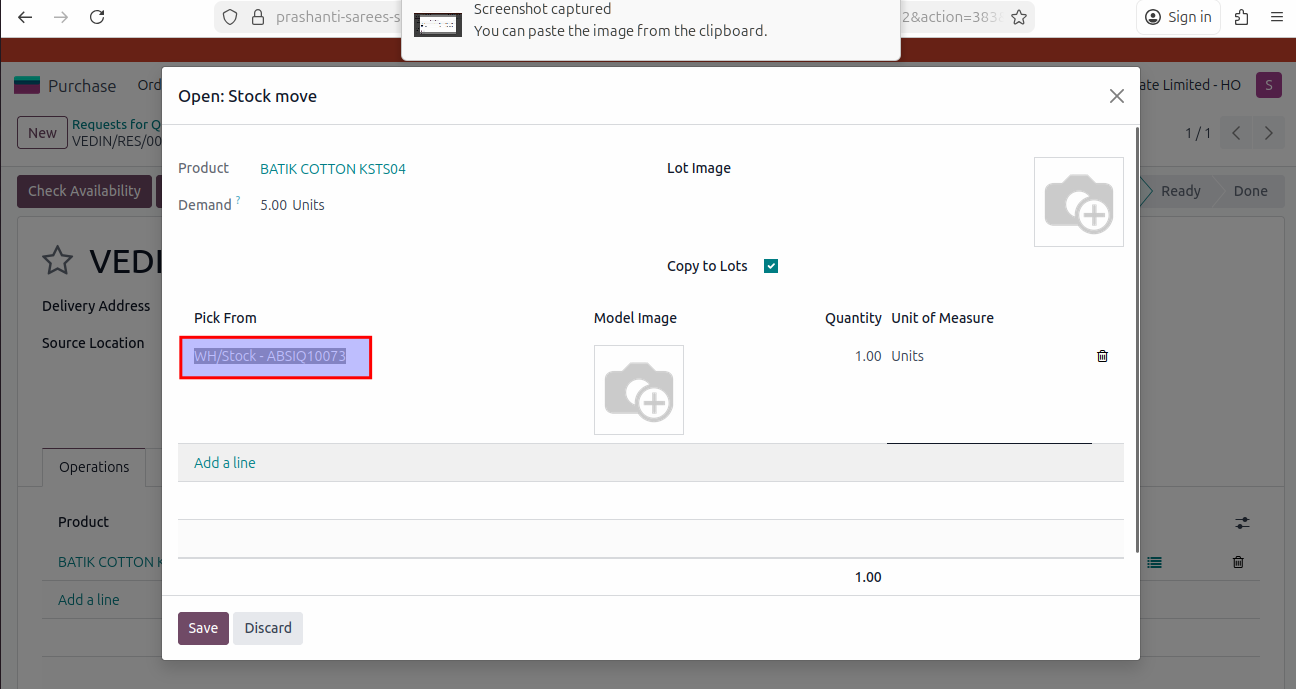
Then Save it.
Now, Validate the Resupply.
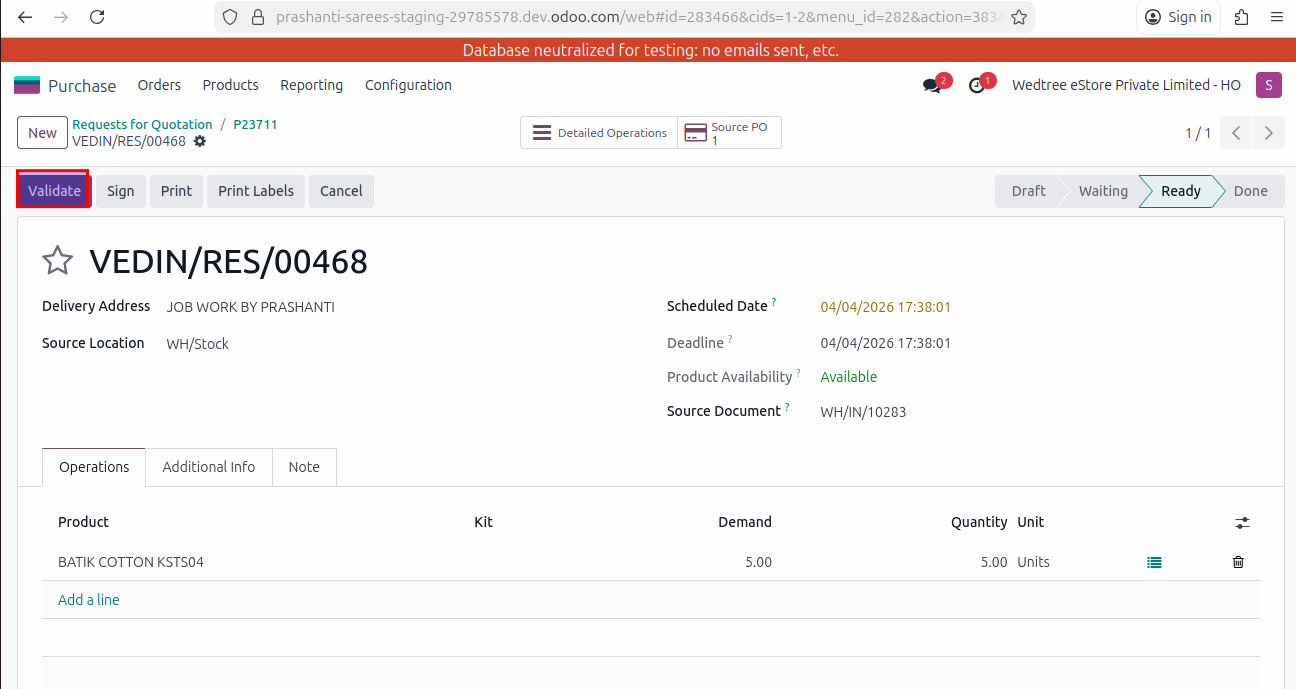
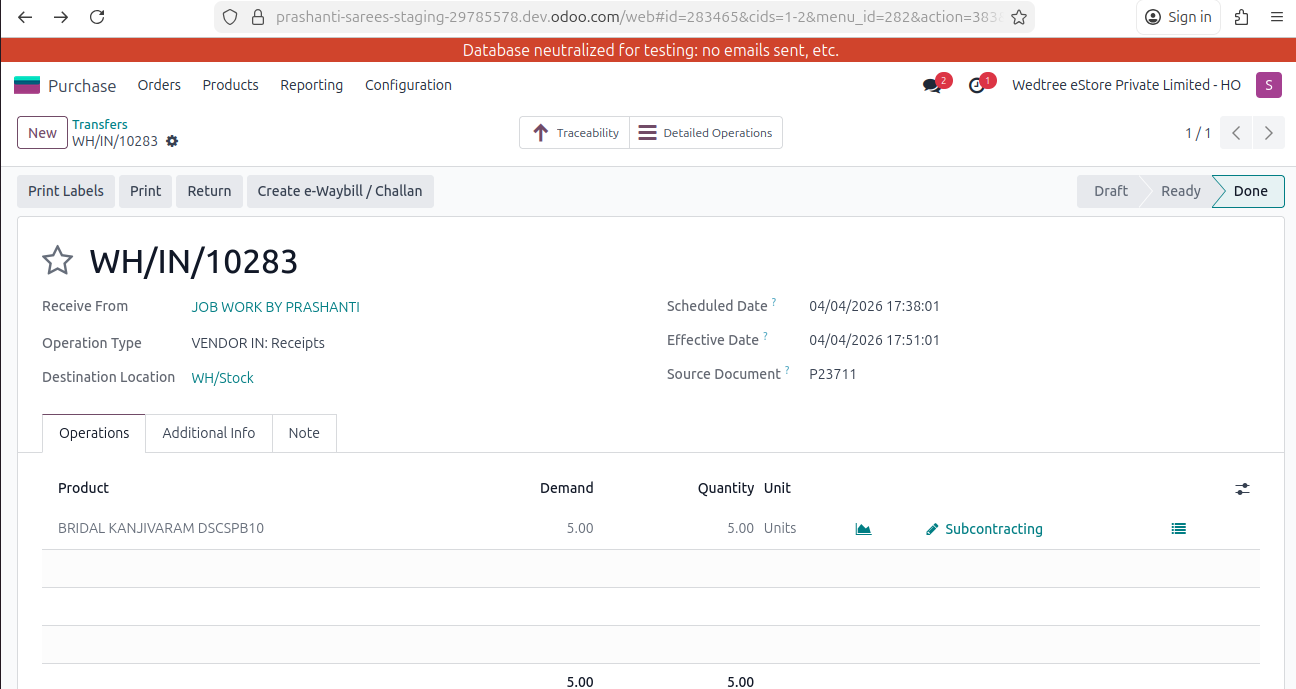
Then click on Receipt button.
Open Stock Move Line.
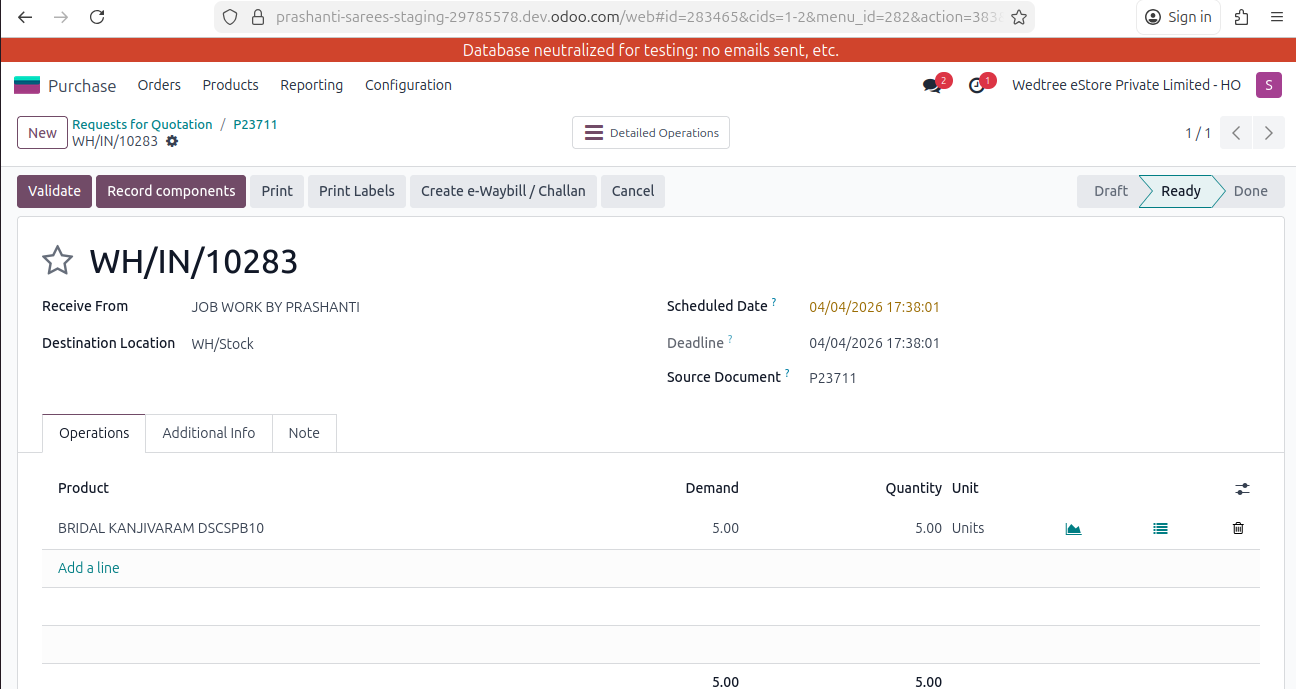
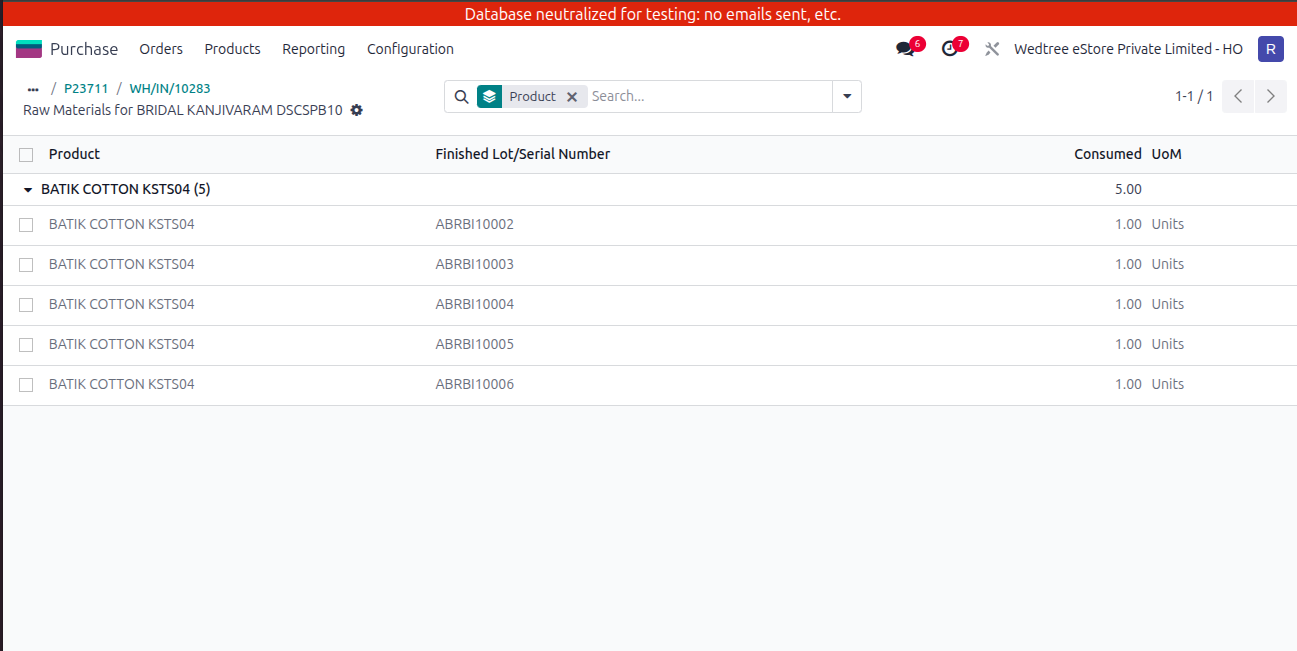
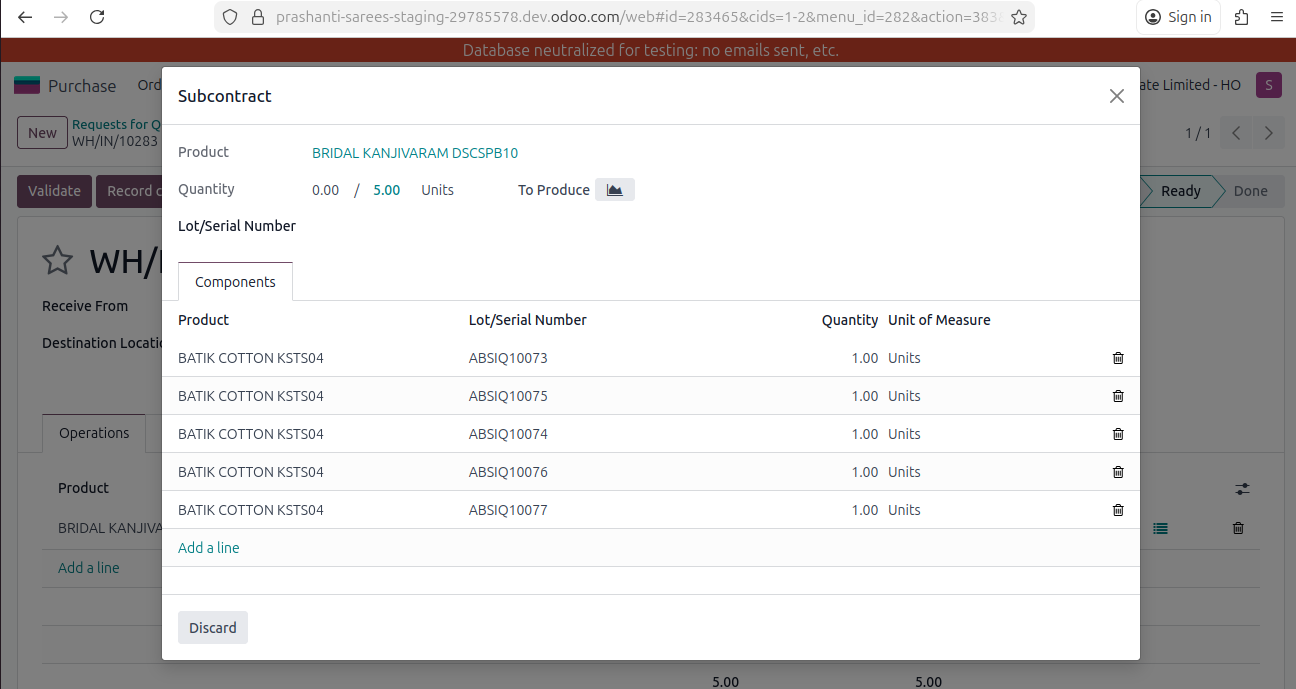
Here, it shows the new Product with old product in Components with Lots/Serial Number.
Validate the Receipt by entering the Destination Location and the status goes to Done state.
Open subcontracting, it shows the new product with raw material for that product.