Products
About
The Products menu is used to create and manage all products. It allows defining product details, variants, pricing, categories and inventory settings ensuring smooth Purchase Orders.
Kanban View

List View

Form View

While creating the products, we should enter the following details:
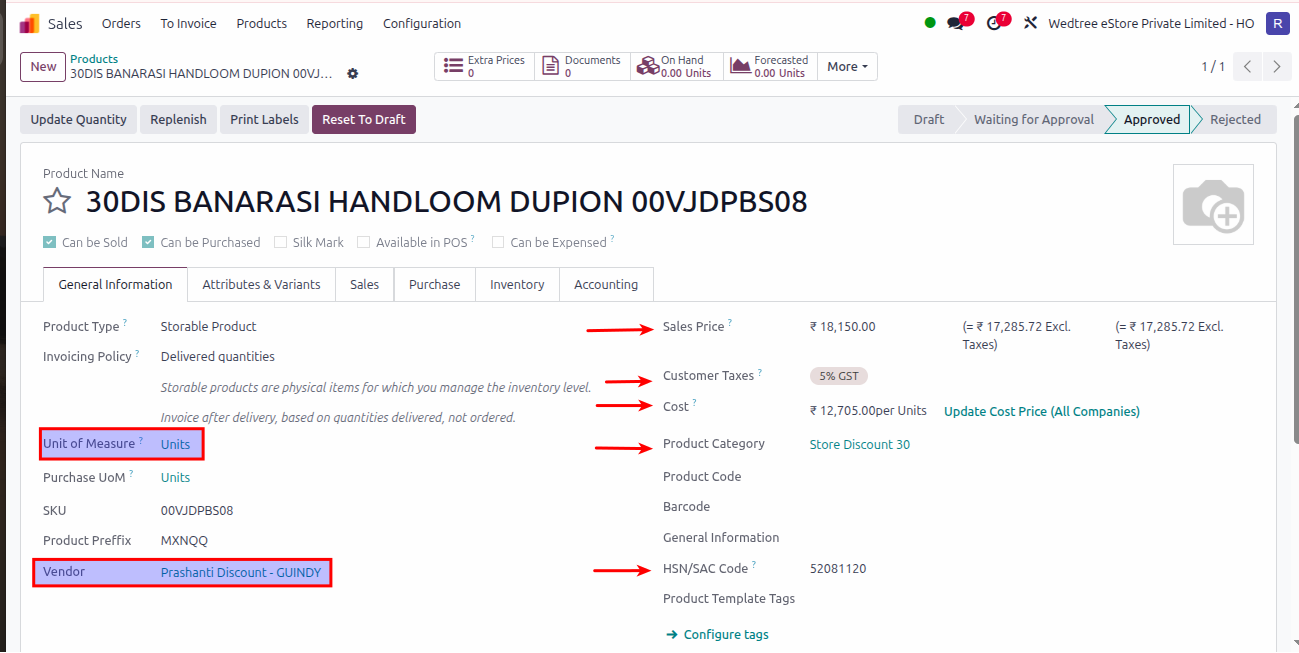
General Information details for Product:
Customer Taxes – Default taxes used when selling the Products (like 5% GST).
Sales Price – Price at which the Product is sold to customers (like ₹48,650.00 with includes GST).
Cost – The Cost price of the Product is entered here and click on that update cost price (all companies) to make this cost price visible in all Companies.
Product Category – Select the Category to which this Product belongs (like SAREES / SILK / KANJIVARAMS / 10 YARDS SILKS).
Vendor – Select the Vendor from whom we are Purchasing this Product (like VASTHRALAYA TEX).
Units of Measure – Default Unit of Measure used for all stock operations (like Units).
HSN/SAC Code – A required tax code for the Product(like 52081120).
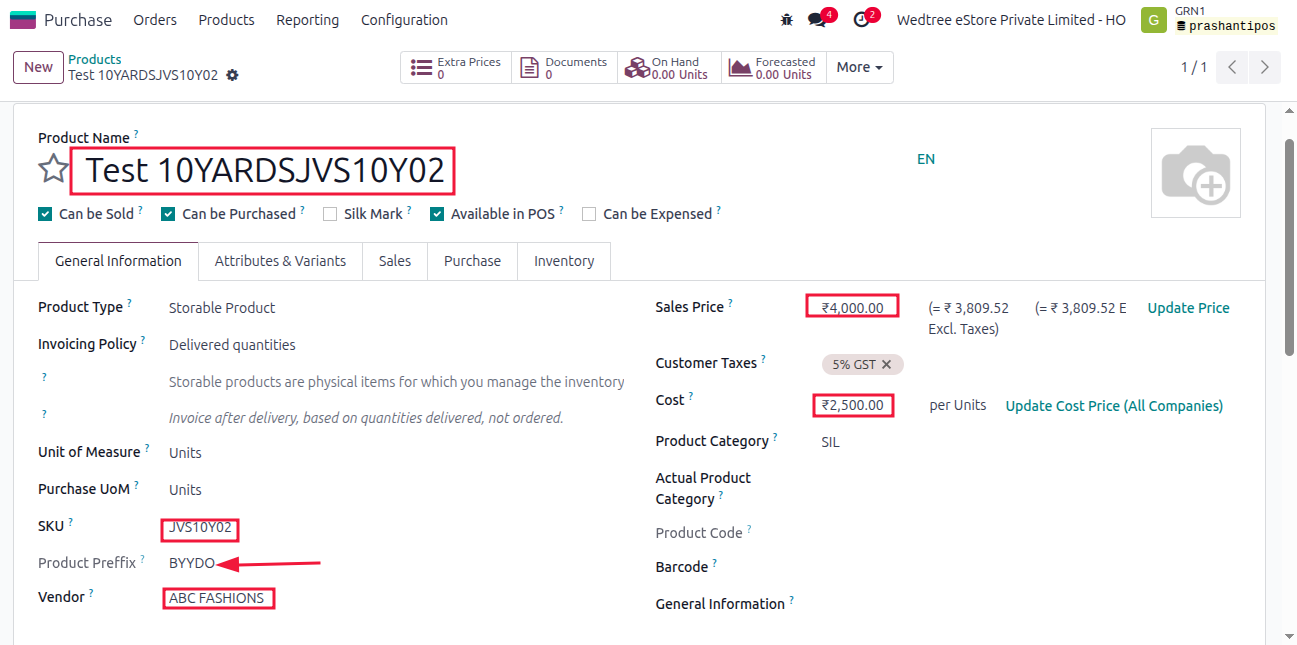
Product Prefix - The product prefix is an alphanumeric code consisting of: The first 5 characters must be alphabetic (A–Z) Followed by numeric digits (0–9).
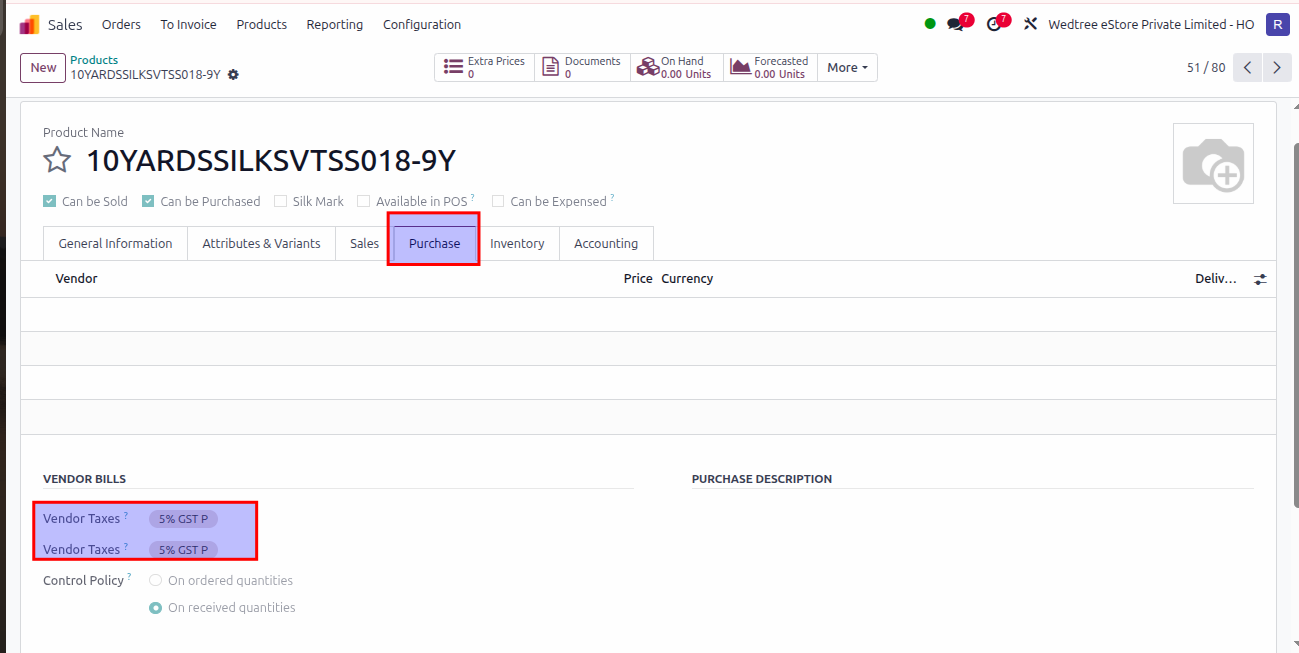
Go to Purchase in Product:
Here, we can enter the Vendor Taxes.
Customizations Done in Products Master:
Auto generation of Product Prefix:
After entering required details in Products Master and saving it, the Product Prefix will be auto generated.
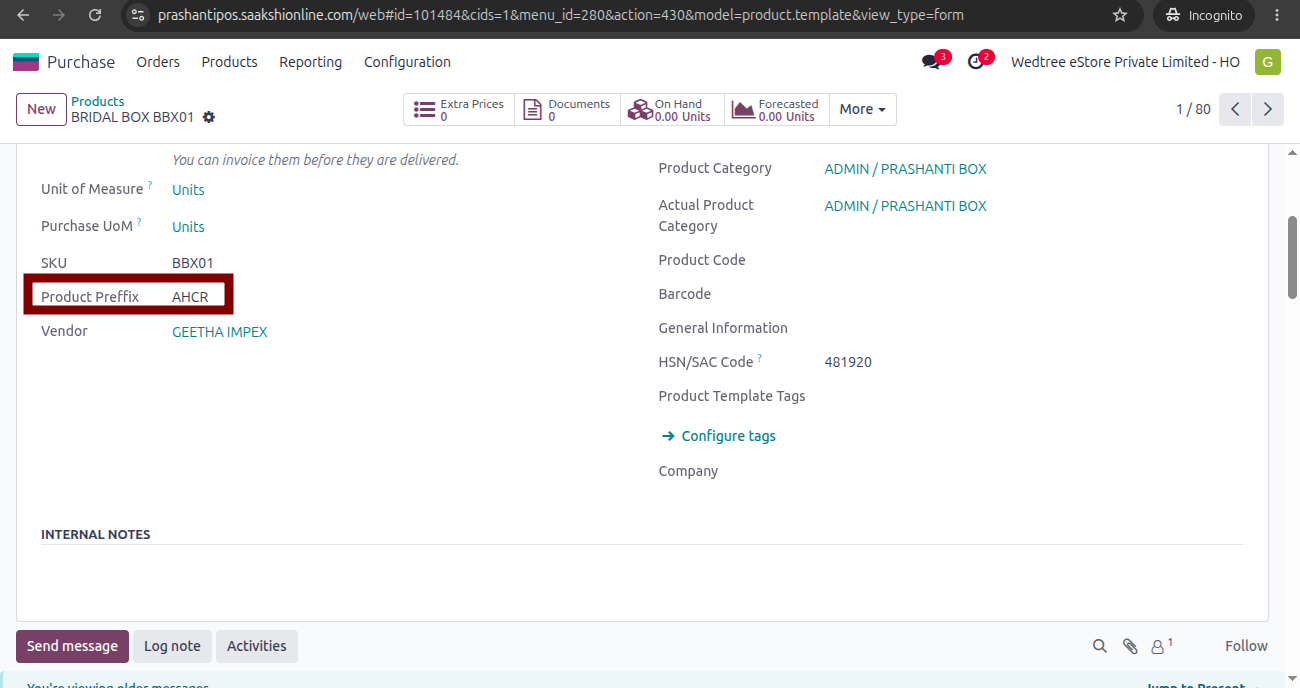
Update Cost Price field in Products:
If the Cost Price of a product is changed in WEPL HO and the same product is subsequently transferred to another location, the updated Cost Price will not be reflected at the receiving location.
To address this issue, the Update Cost Price (All Companies) field customization has been implemented. When this option is clicked, the updated Cost Price will be applied to the product across all locations.
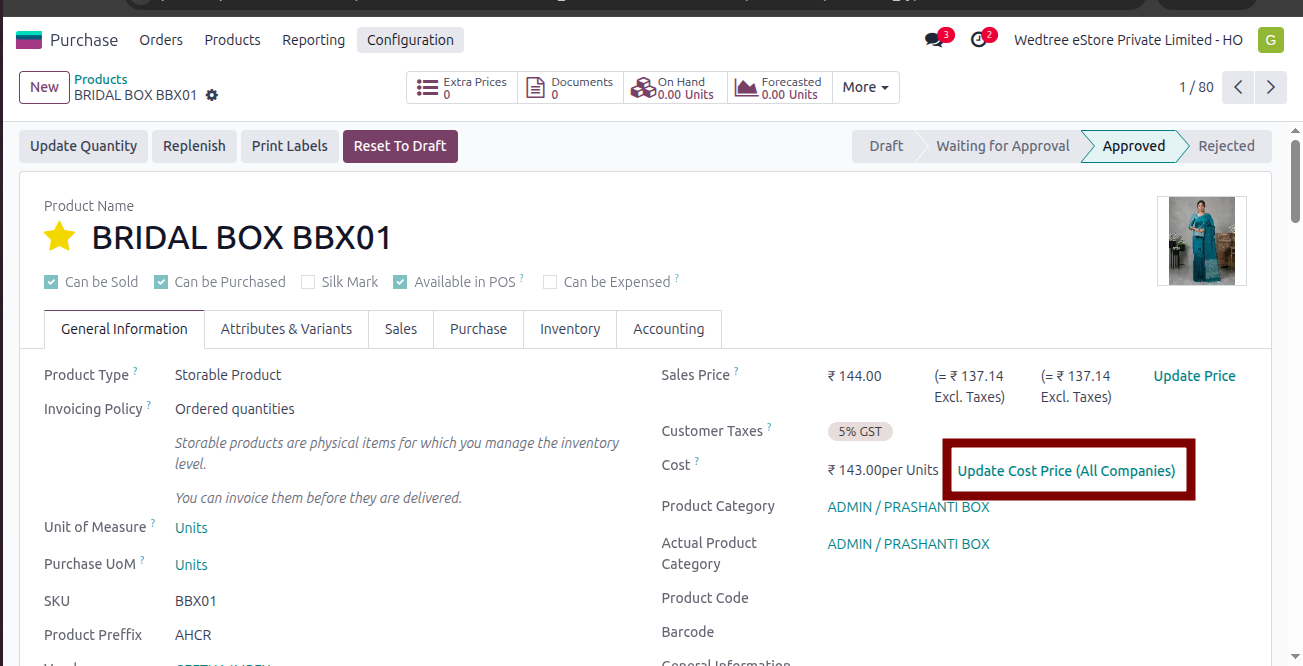
Update Sales Price field in Products:
If the Sales Price of a product is changed in WEPL HO, the updated price needs to be reflected across all locations. For this purpose, the Update Price field has been provided. Clicking this option will update the Sales Price of the product across all locations.
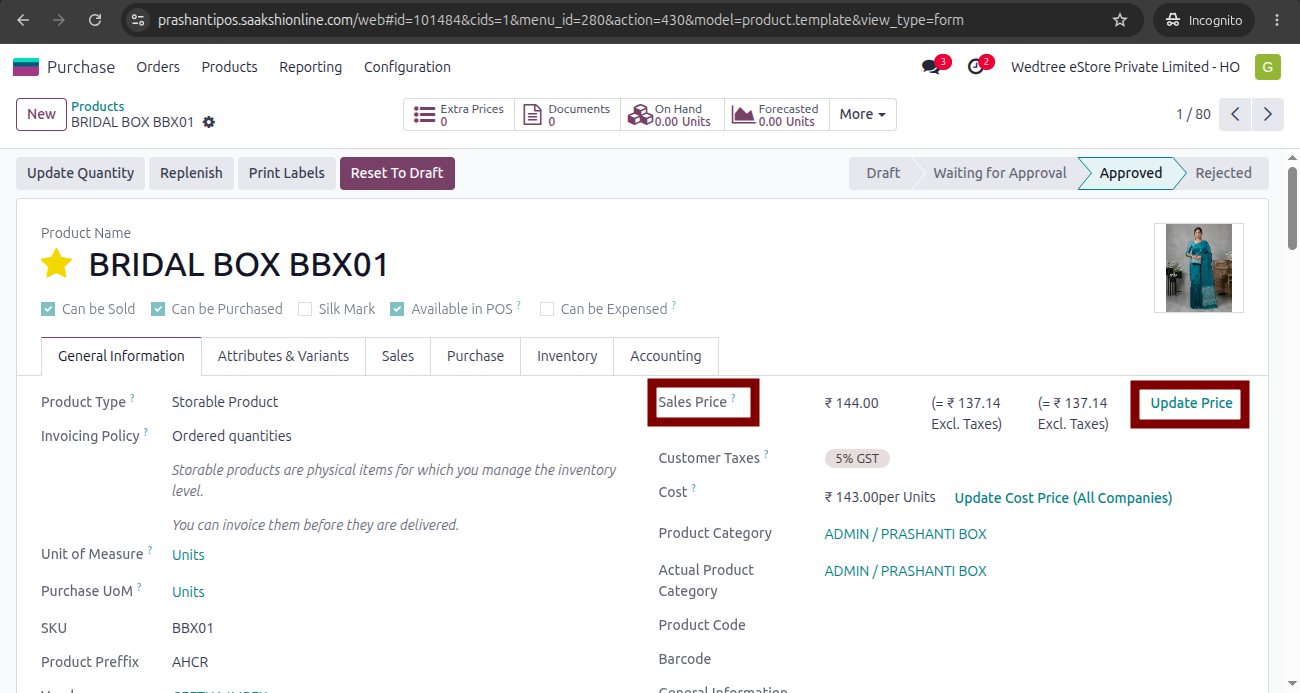
Product Category and Actual Product Category:
While giving discount for some Categories, the category name can be changed as for example, Store Discount 10-Lot whereas the Actual Product Category is SAREES / COTTON SAREES / HANDLOOMS OF INDIA / 10 YARDS POLY COTTON. For this purpose, this Actual Product Category and Product Category fields are kept.
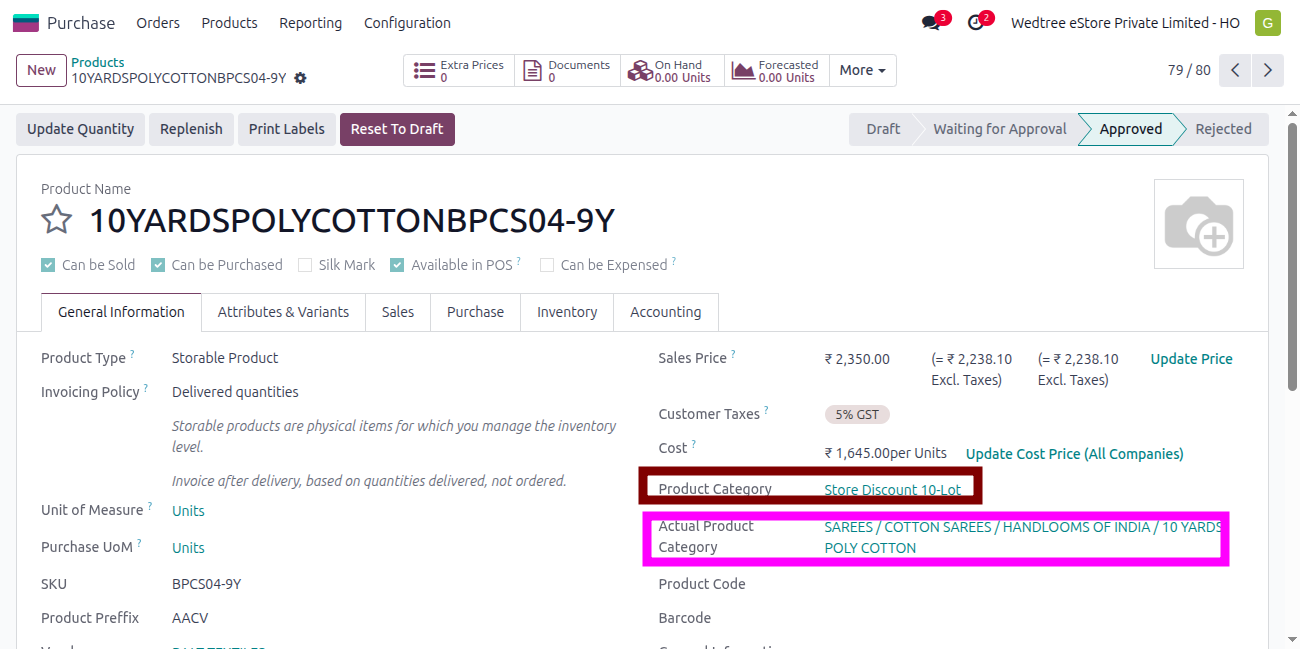
To Create a New Product
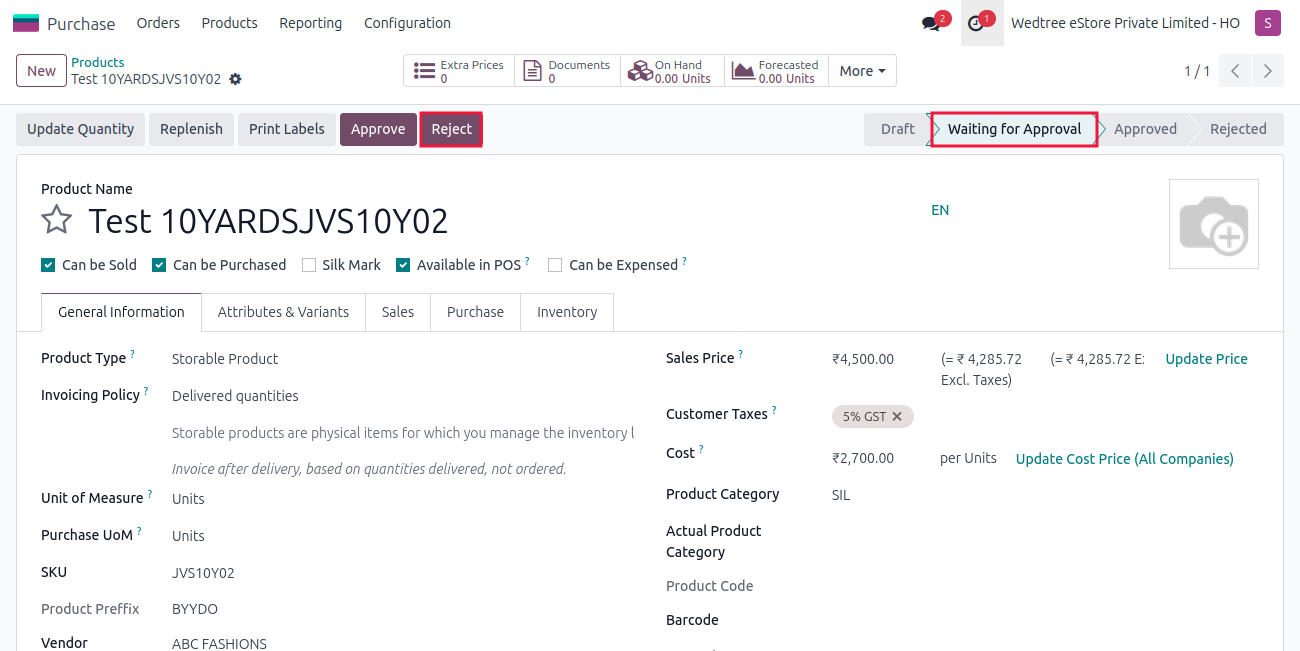
To create a new Product, login as a Purchase User and enter the Product Name, Sales Price, Cost Price, SKU, then select the Vendor. After entering all the values, click on Save button. The Product Prefix is automatically generated. Details are attached in the screenshot below:
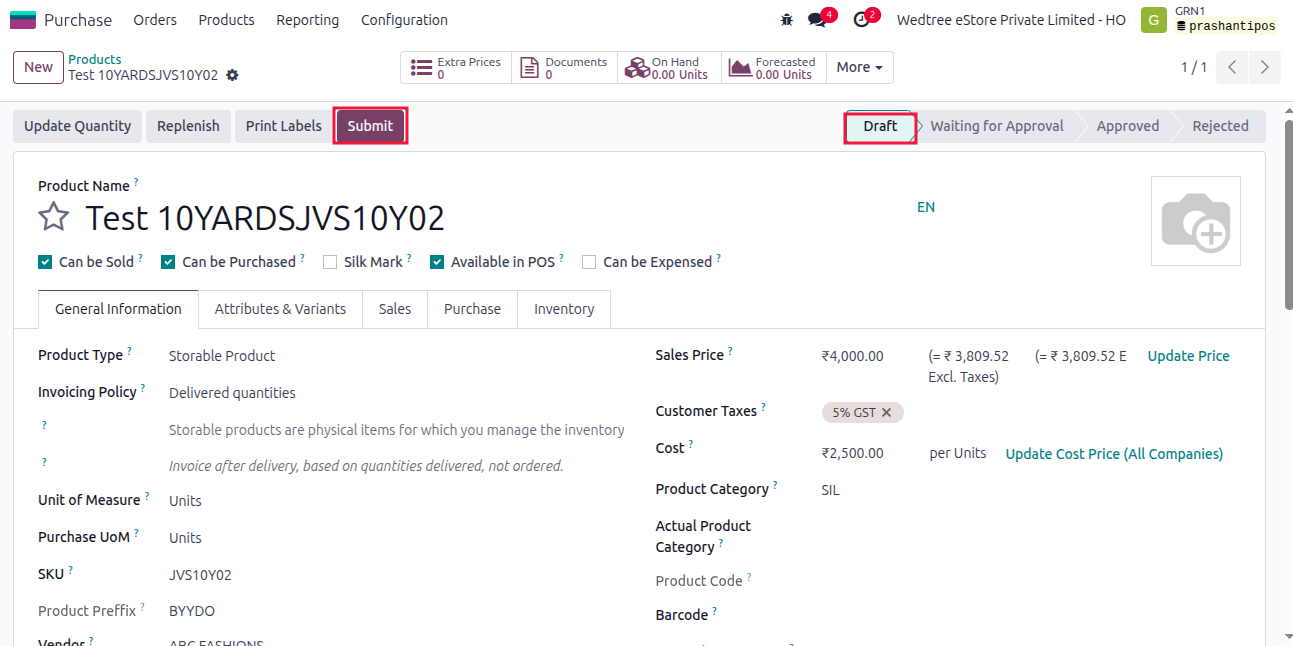
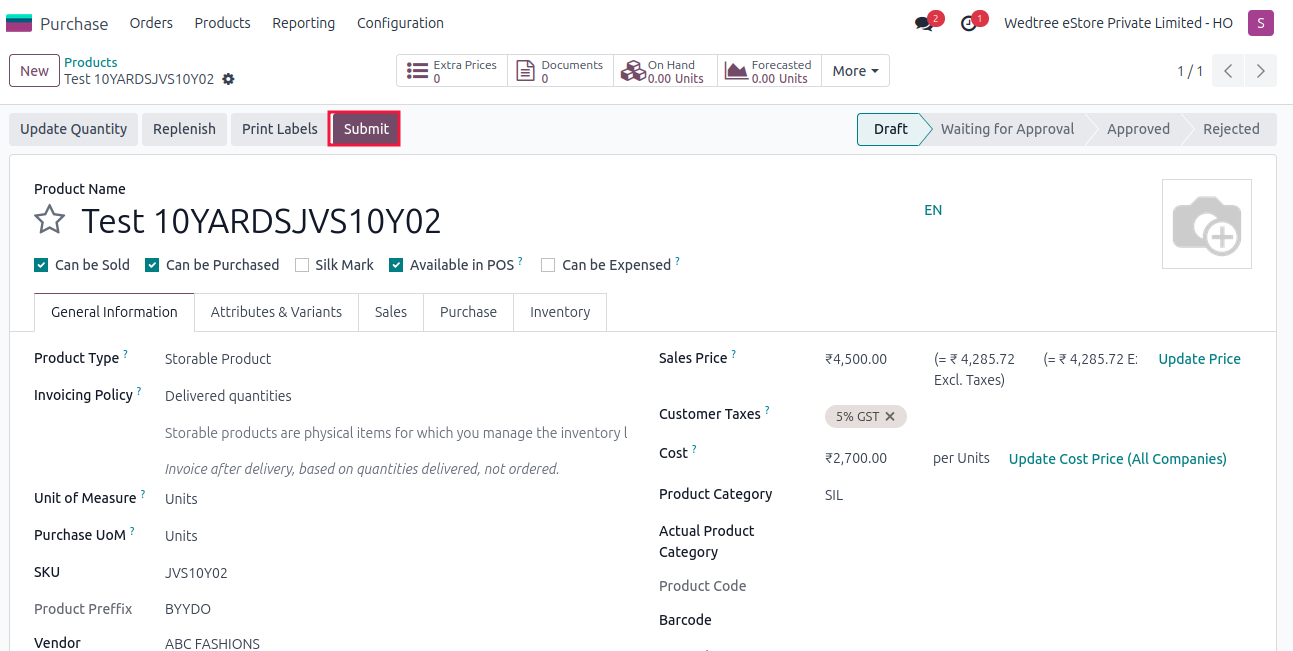
Click on Submit button. The status changes from Draft state to Waiting for Approval state.
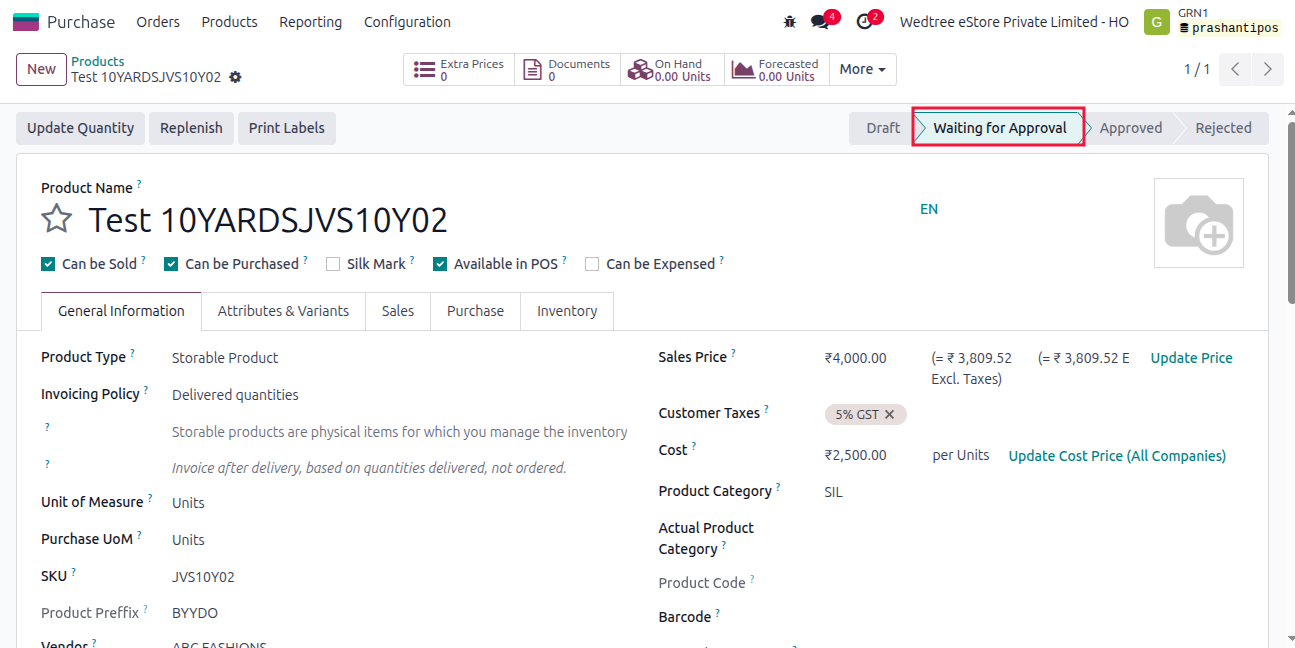
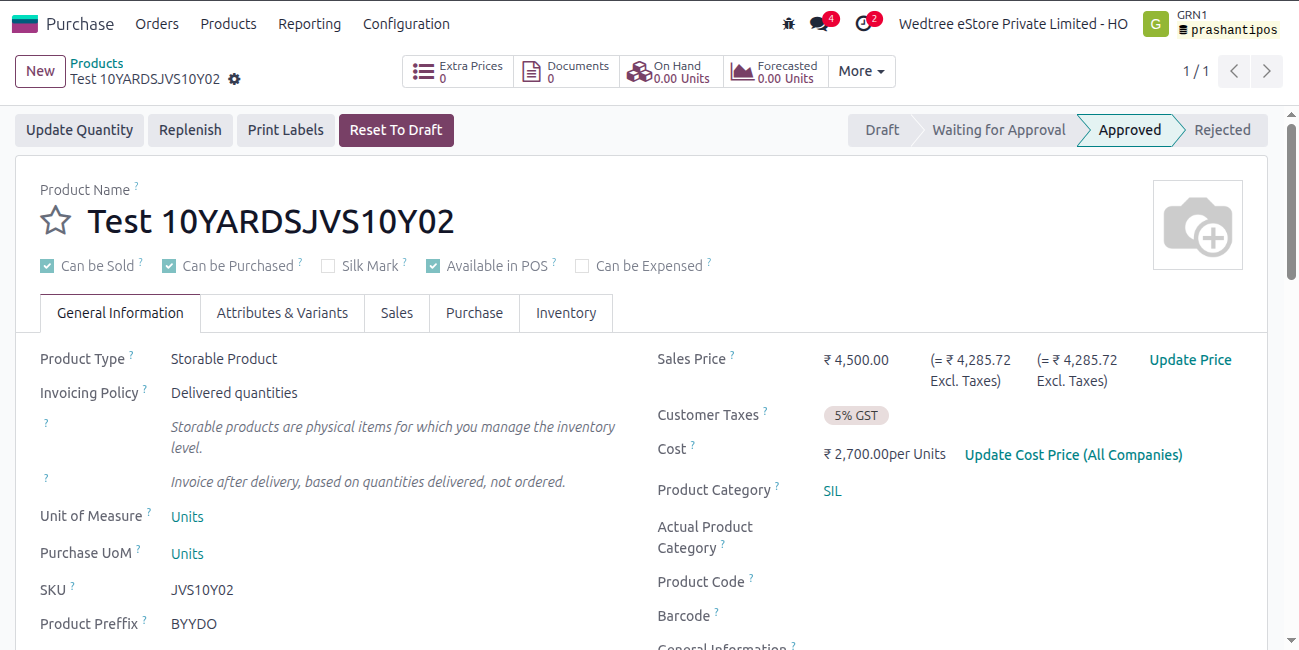
Login as a Purchase Manager, go to Products, Product Waiting for Approval can be seen there. The Purchase Manager gives Approve and the status goes to Approved State.
To Approve a Product
Case 1: To Approve a Purchase User Request
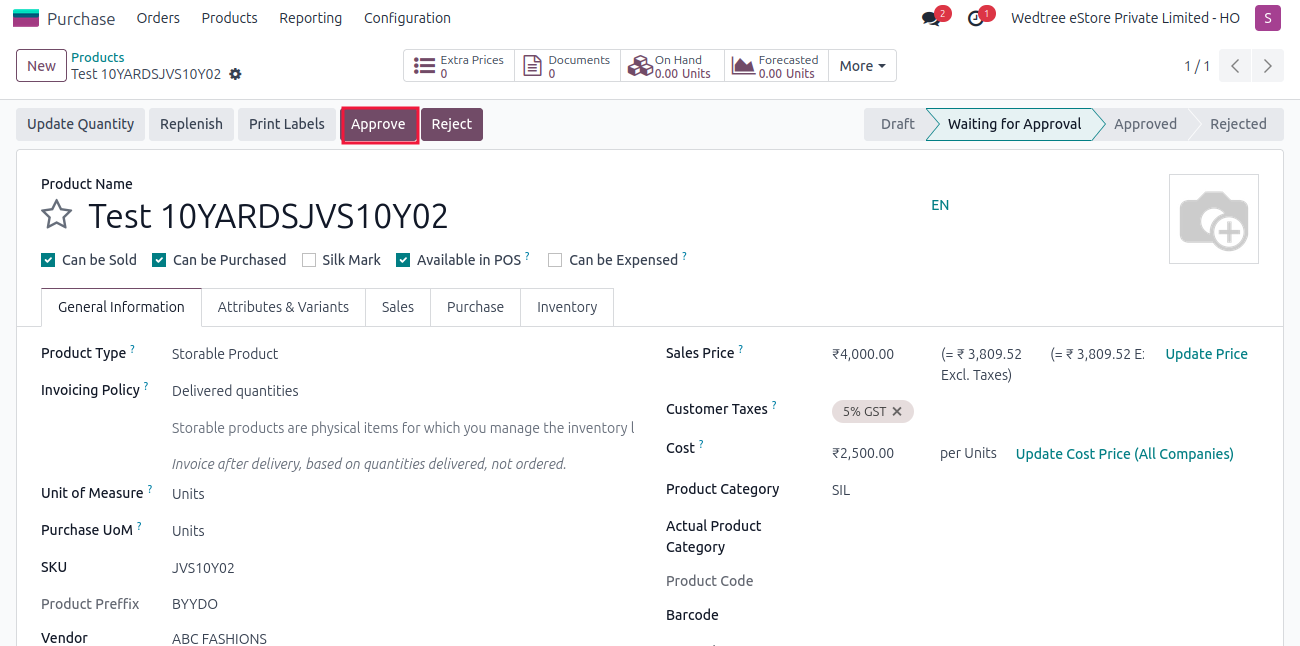
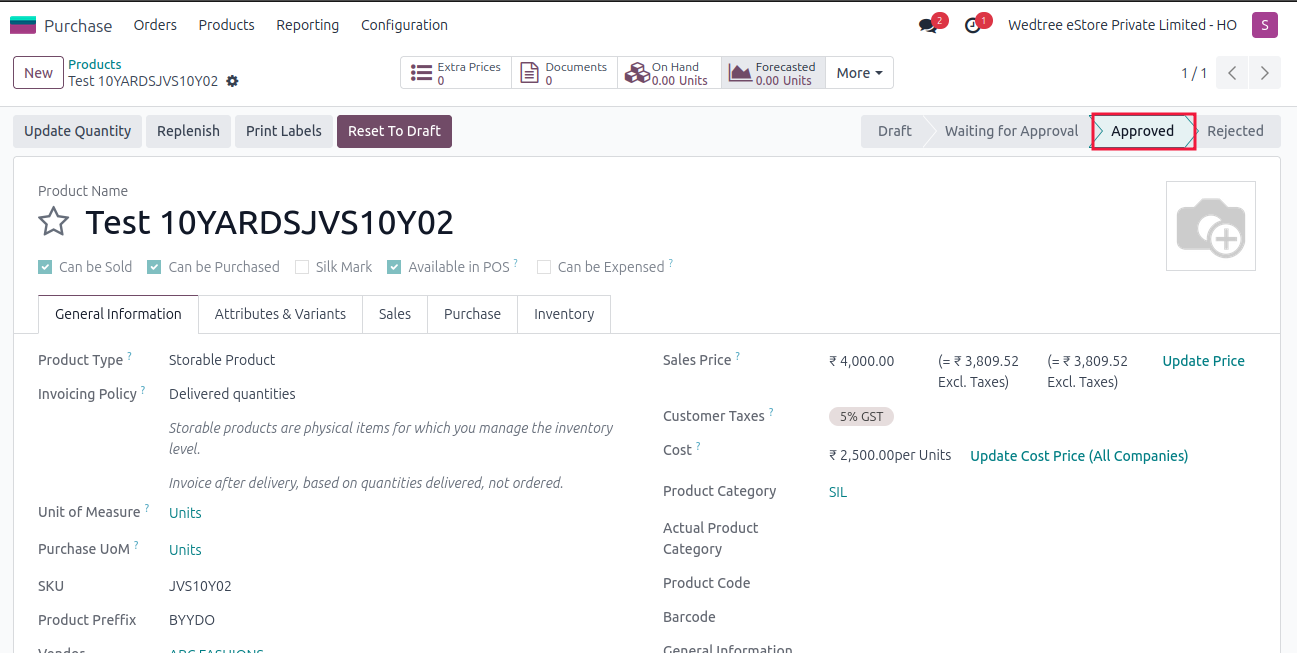
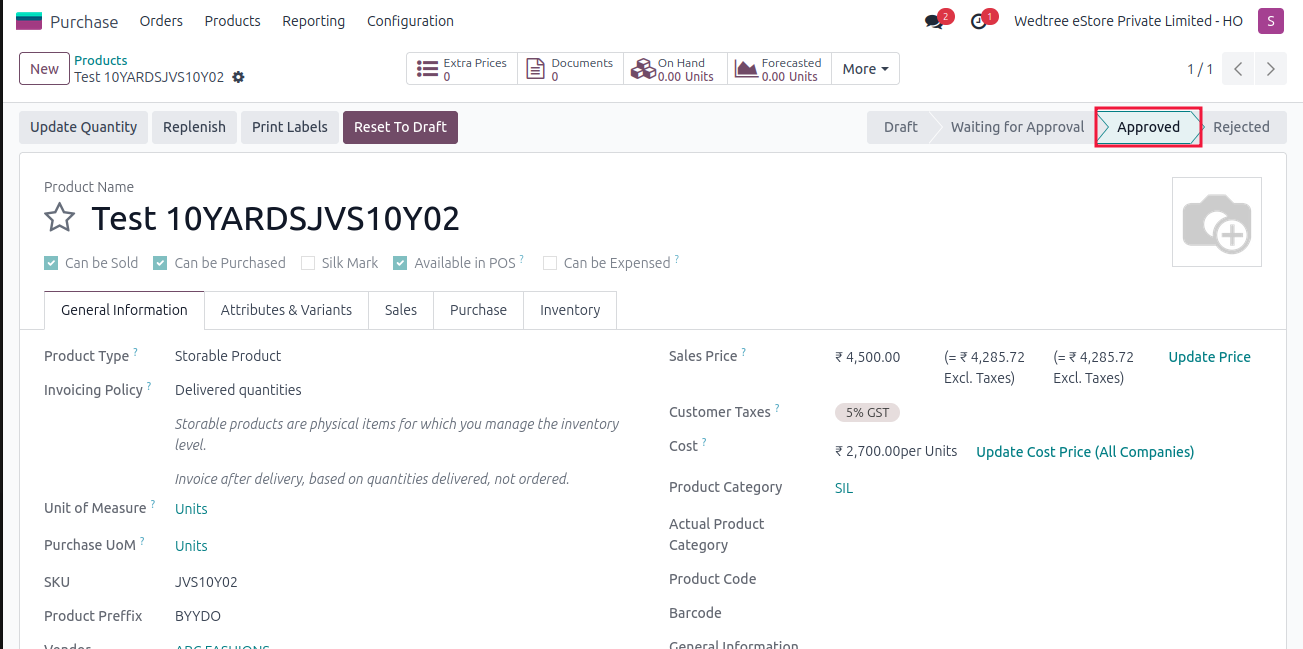
Login as a Purchase Manager and click on Approve button. The status changes from Waiting for Approval to Approved state.
Case 2: To make any corrections in the Product details:
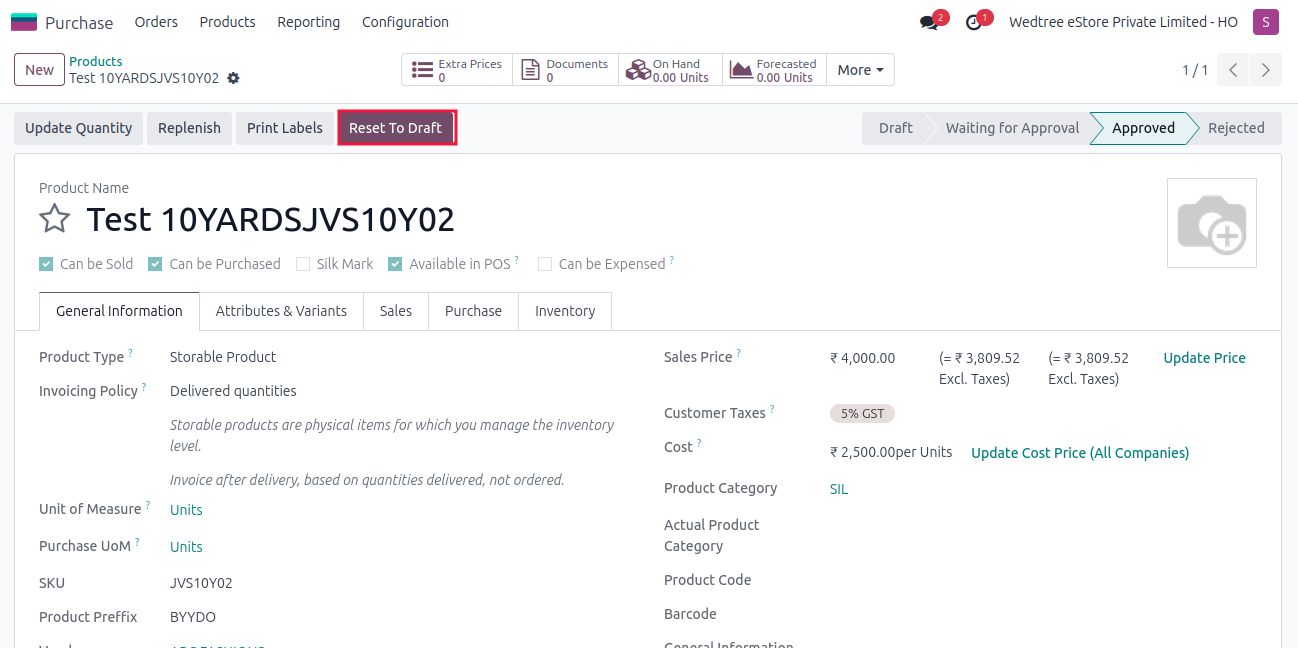
If there is any change to be made in the Product, the Purchase Manager clicks on Reset To Draft button. The status goes to Draft state.
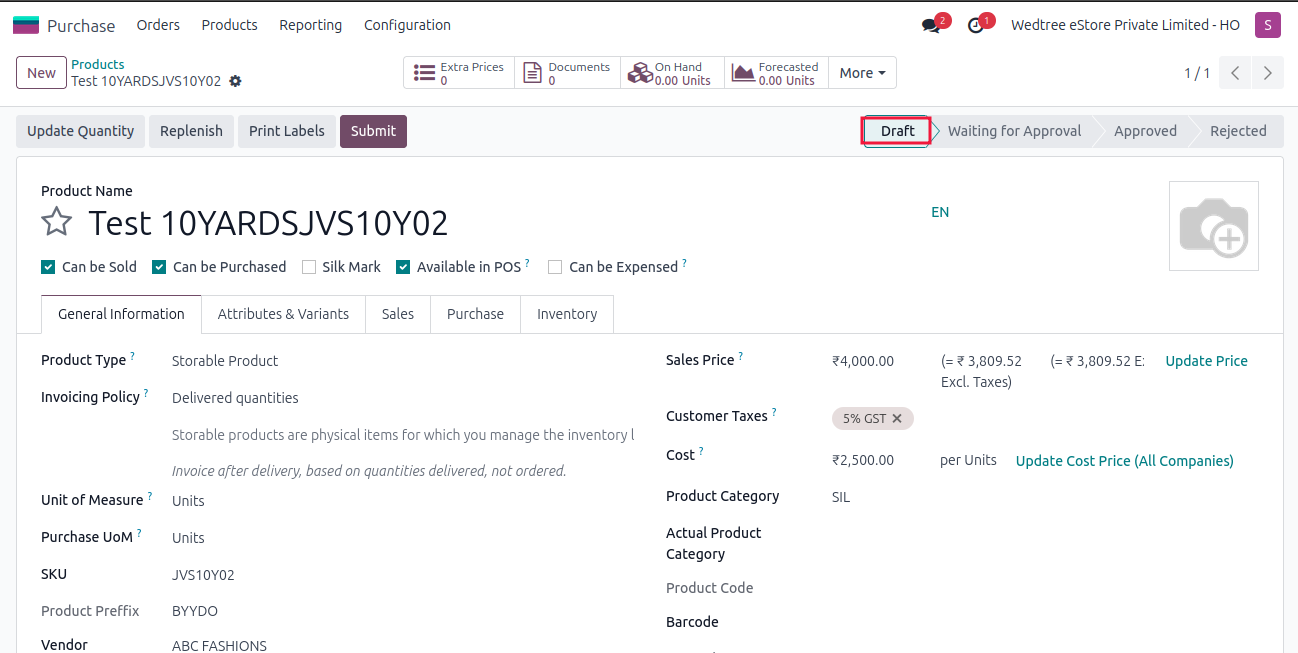
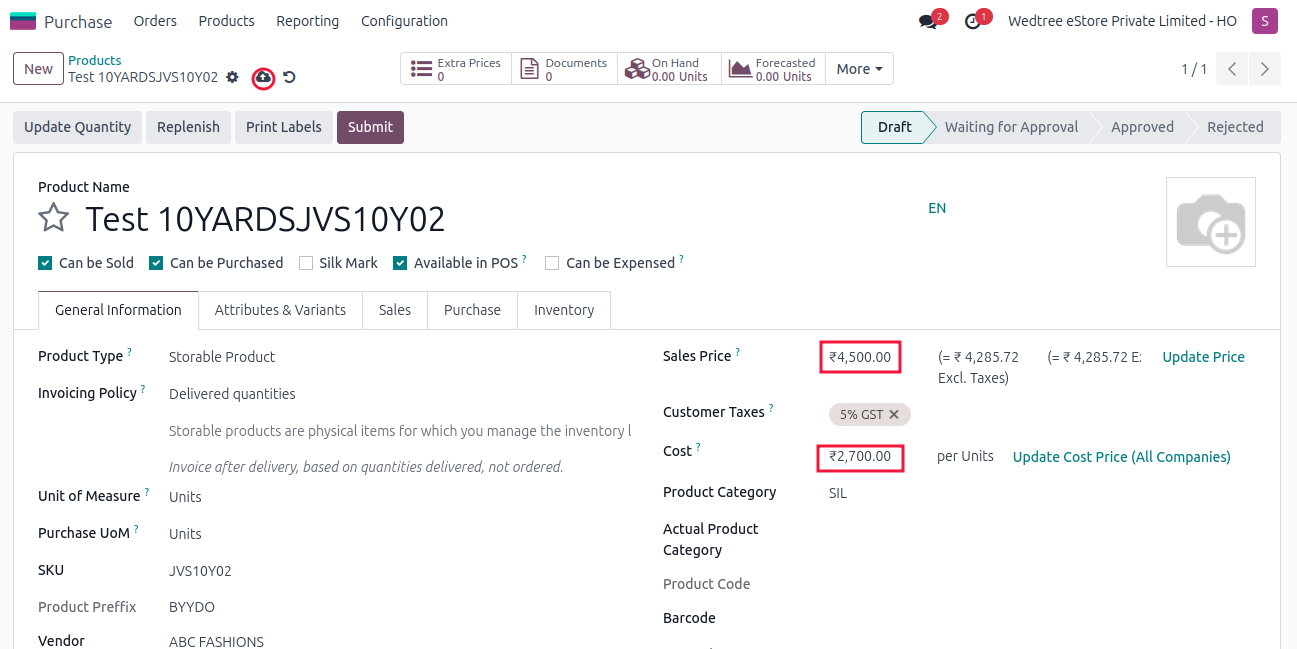
After making any corrections, the Purchase Manager or the User clicks Submit button. The status changes from Draft to Waiting for Approval state.
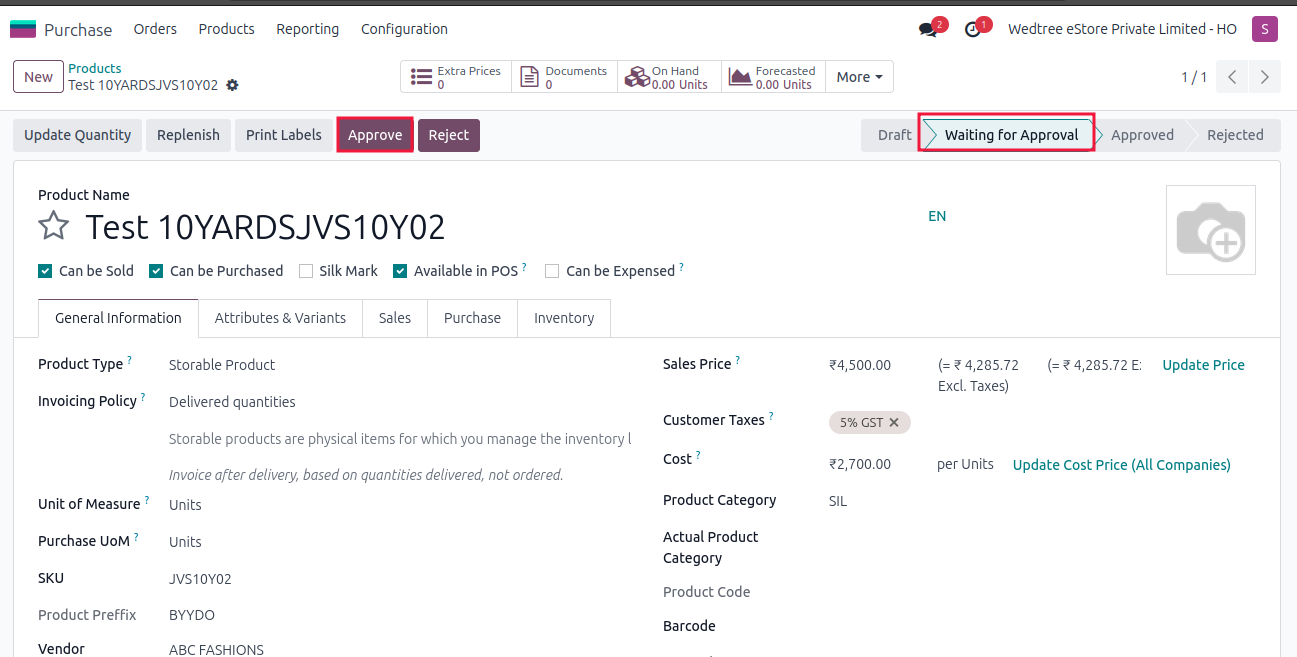
The Purchase Manager clicks on Approve button and the status goes from Waiting for Approval to Approved state.
Case 3: To Reject a Product:
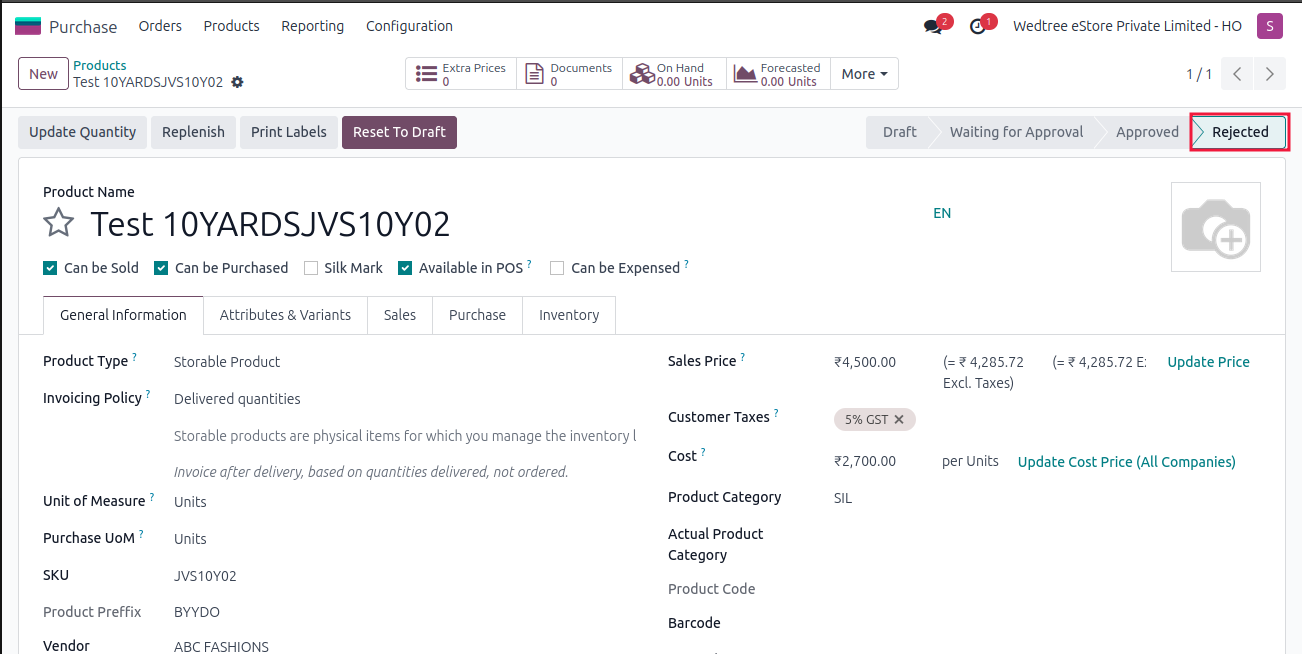
To reject a new Product that the Purchase User has created, the Purchase Manager can click on Reject button. The status goes from Waiting for Approval to Rejected state.