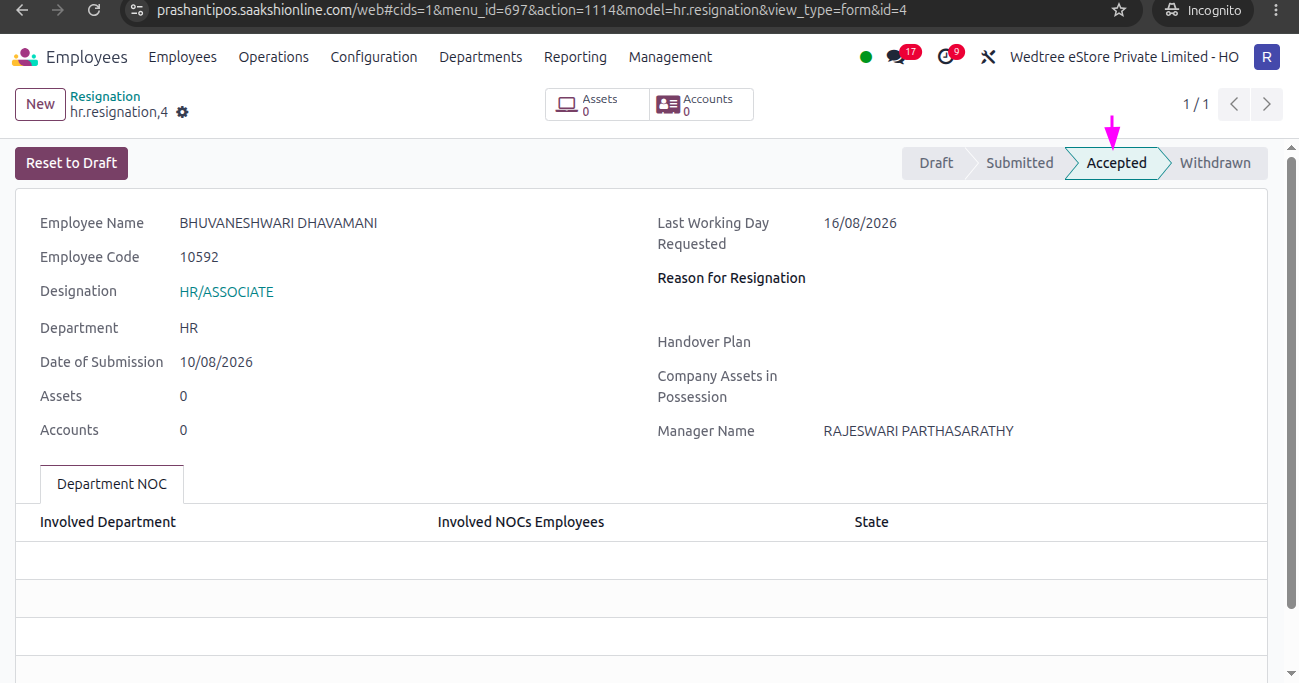
Resignation
About
Resignation is the formal process by which an employee voluntarily notifies their organization of their intent to leave their job position.
List View
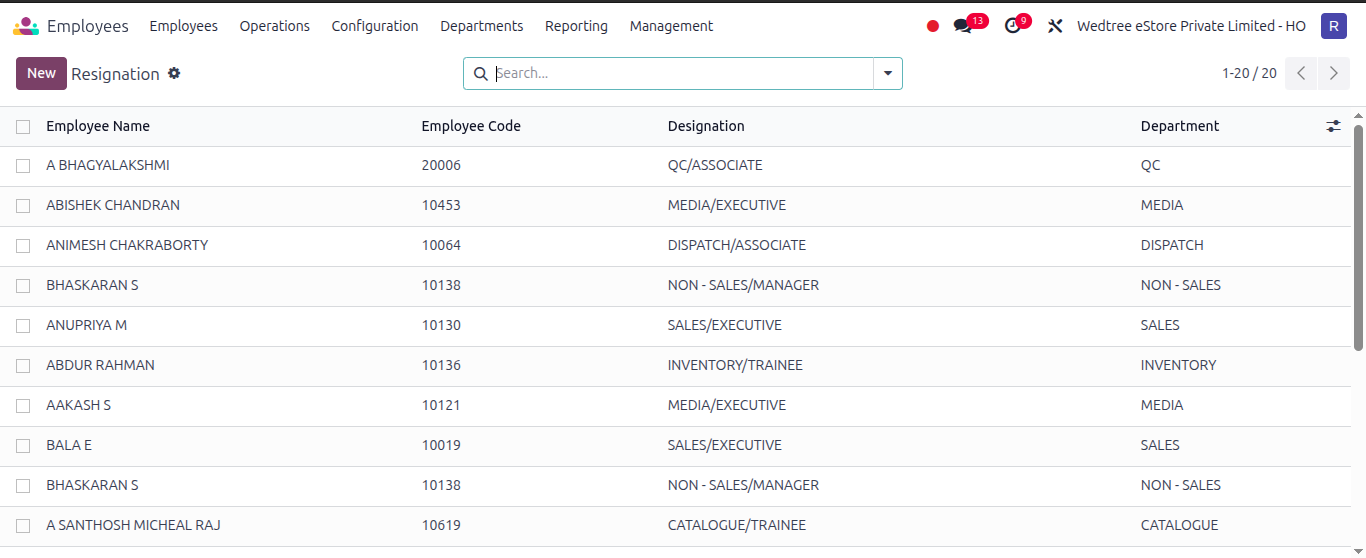
Form View
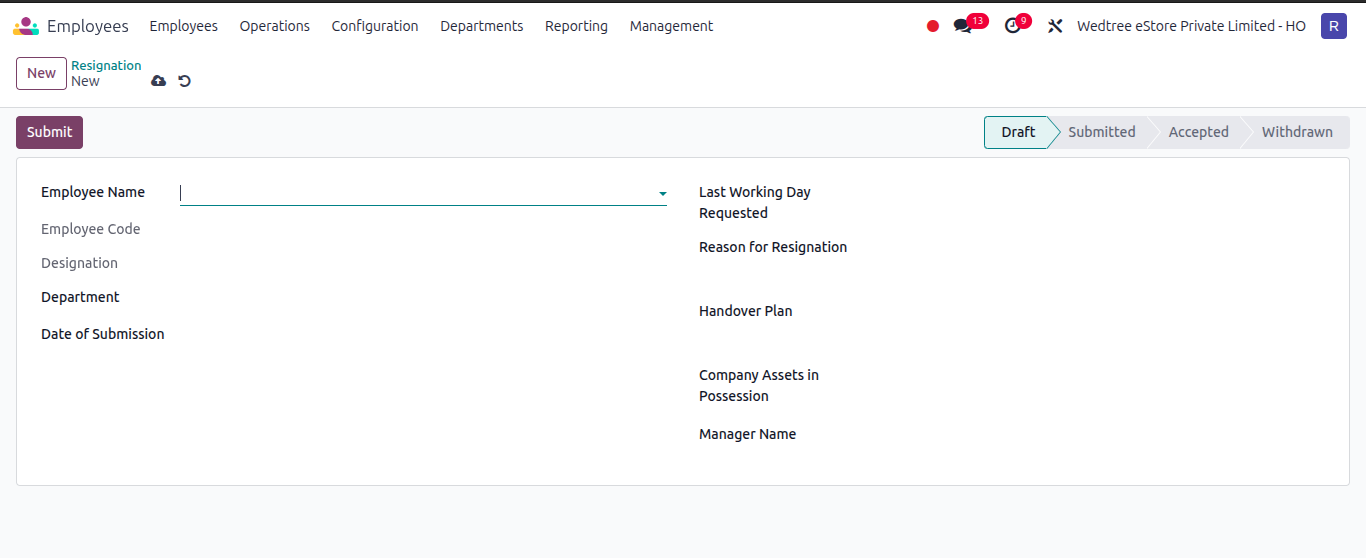
Process of creating Resignation:
Click the New button at the top left of the screen.
Fill in the employee details, reasons for leaving, and the requested last working day.
Click Save.
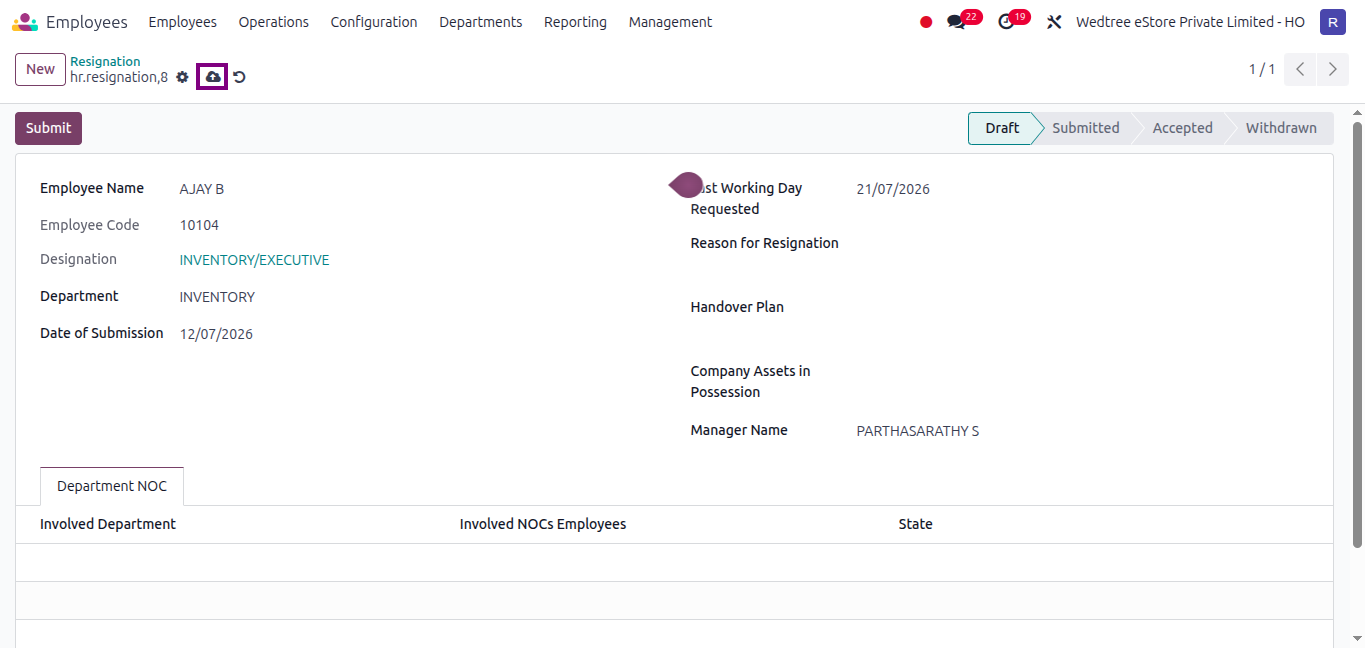
The resignation will now be in Draft state.
Note
Store Managers can only Create, Edit, or Delete resignation records while they are in the Draft state for their own company, whereas HR Managers can Create, Edit, or Delete records globally across all companies while in this state.
Click Submit to move the state to Submitted.
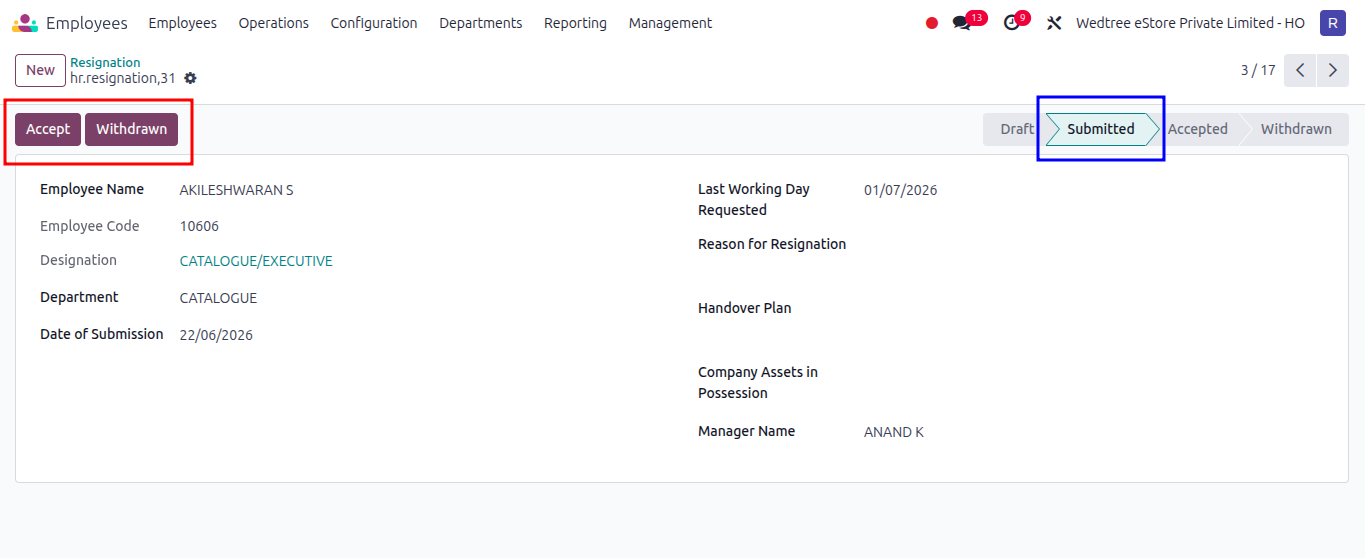
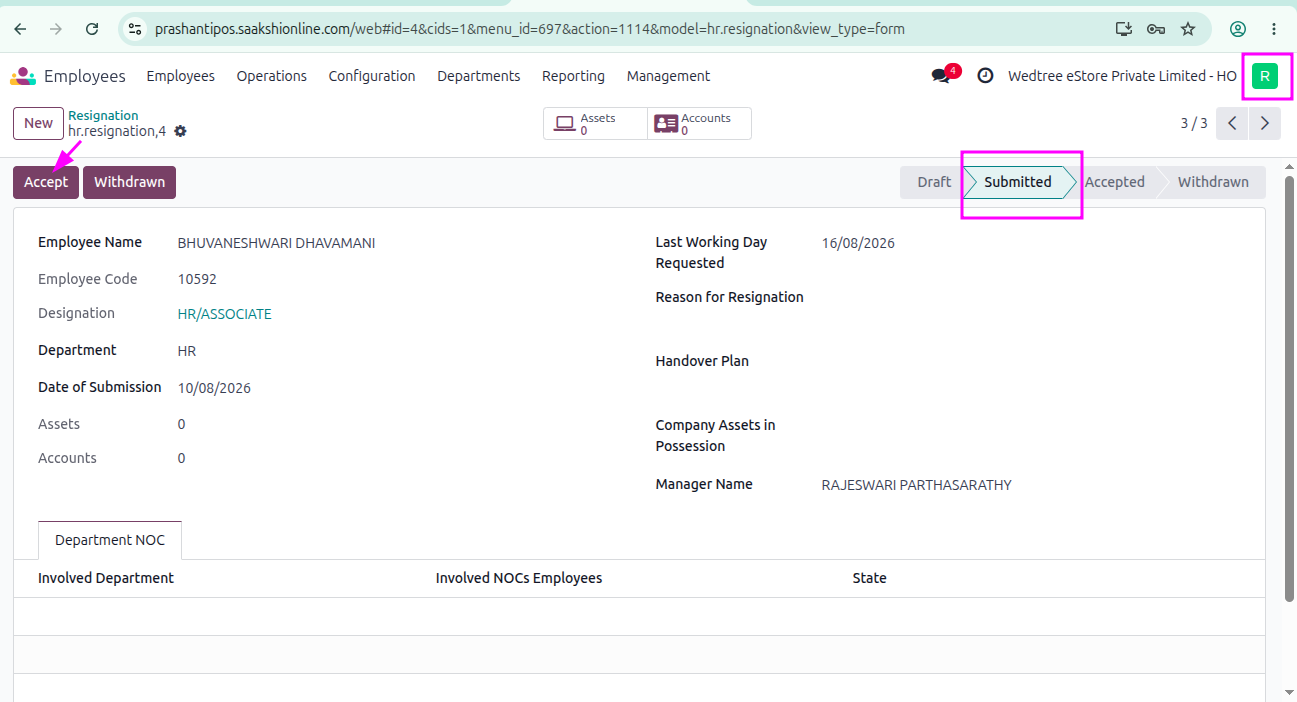
After Submit, both the Accept and Withdrawn buttons become visible in the header for the HR Manager.
After submitted state, the Involved Deparments and Involved Employees will be shown in Department NOCs for Approval
First all approvals has to be done by all involved Employee’s from selected Departments in Exit NOCs form.
In Department NOCs tab All states should be Approved before accepting the resignation otherwise the form shows Validation Error.
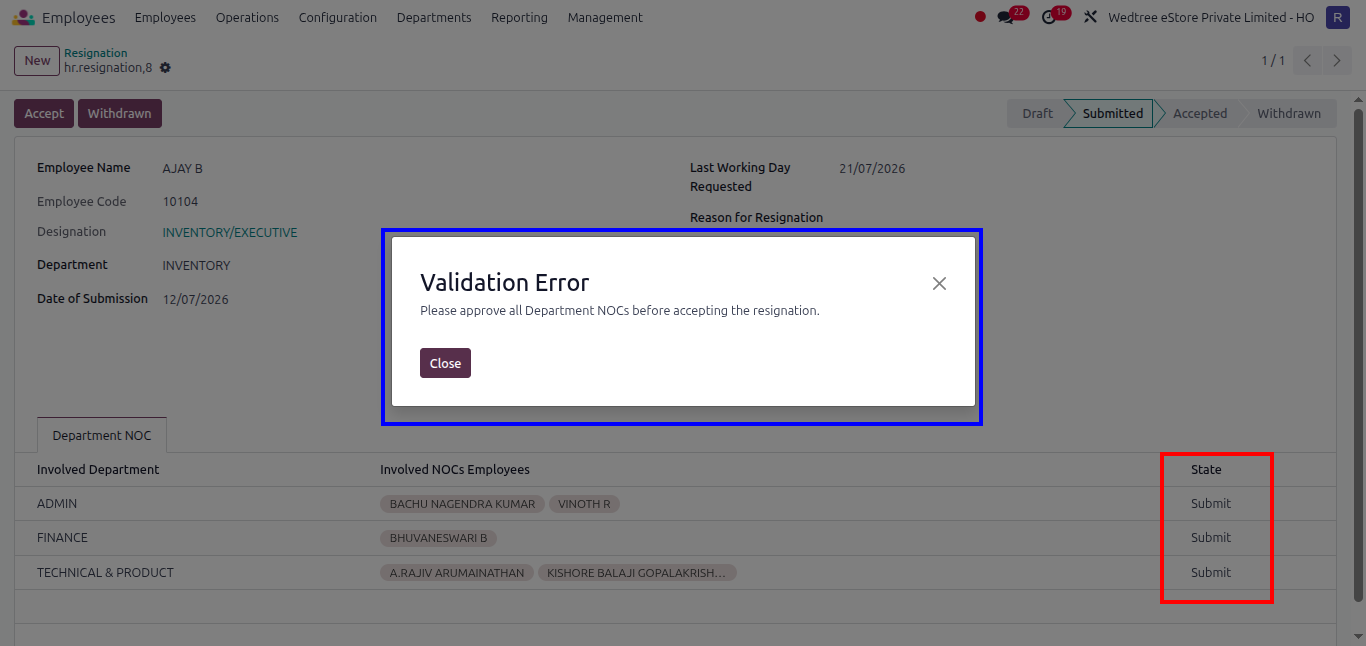
After All Approvals from department wise, then HR can Accept the resignation.
Withdrawn button if the employee changes their mind and decides to stay.
Note
The form fields become completely read-only for Store Managers, whereas HR Managers can still edit the fields in both Draft and Submitted states. However, records cannot be deleted once they leave the Draft state.
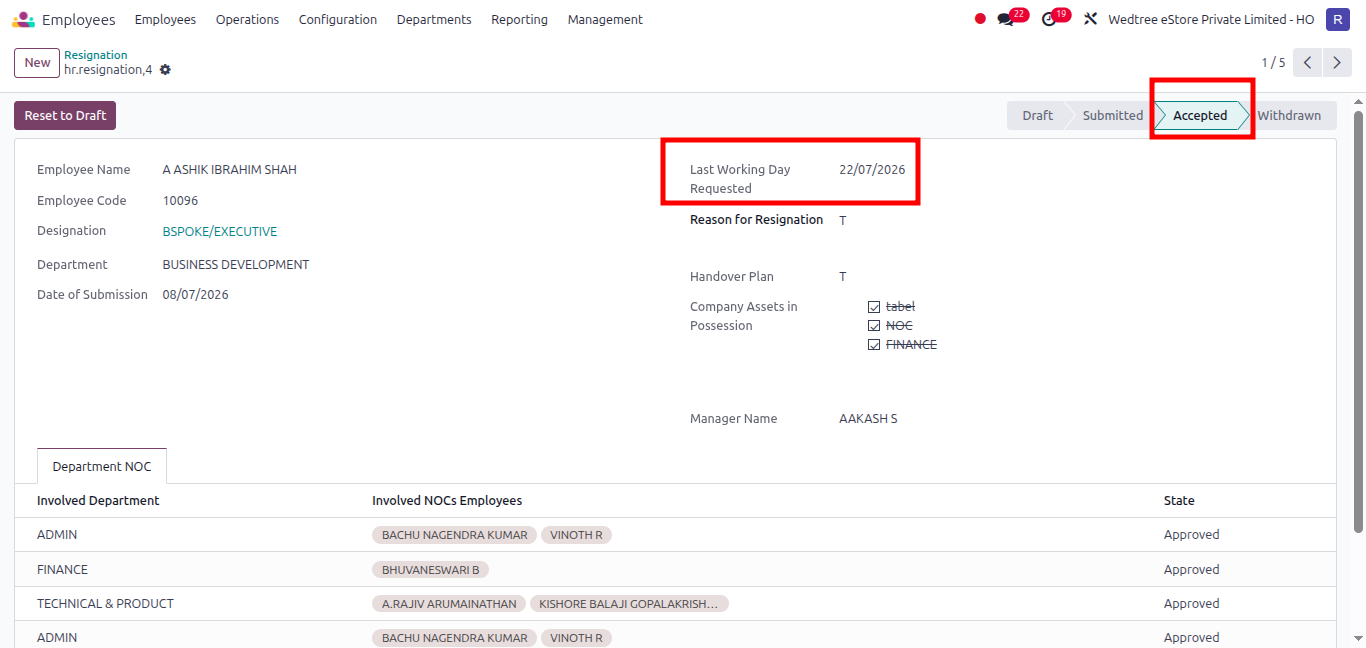
Click Accept button.
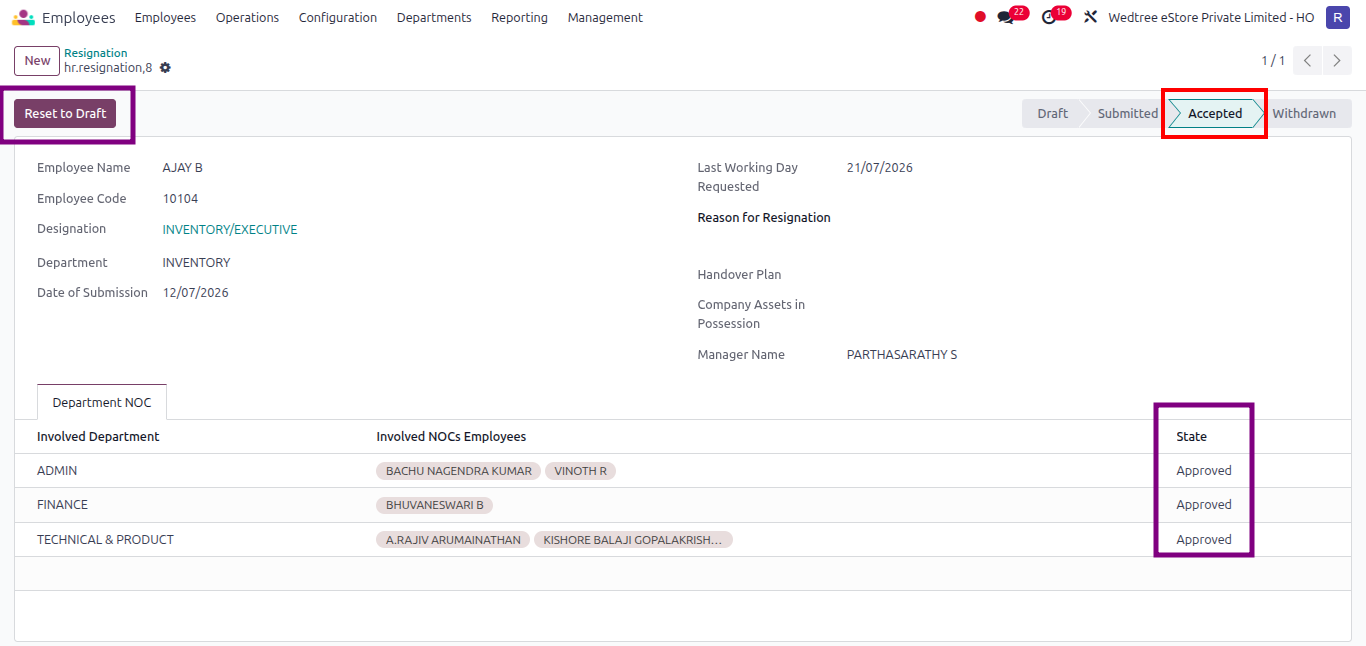
The resignation will now be in Accepted state.
Note
HR Managers cannot edit form fields or delete the record, but they can click the Withdrawn button if needed.
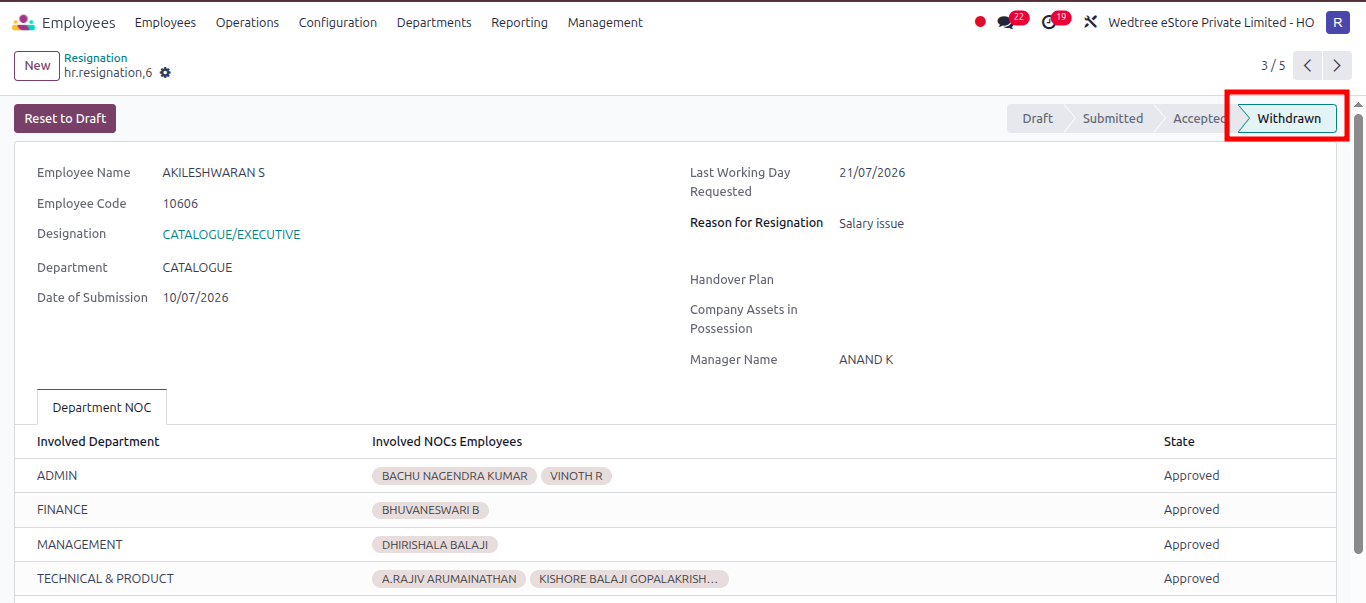
The resignation will now be in Withdrawn state.
HR Managers cannot edit form fields or delete the record.
They can click the Reset button to bring the record back to the Draft state.
All fields will unlock for editing again.
After the cron job executes
For employees associated with an accepted resignation record:
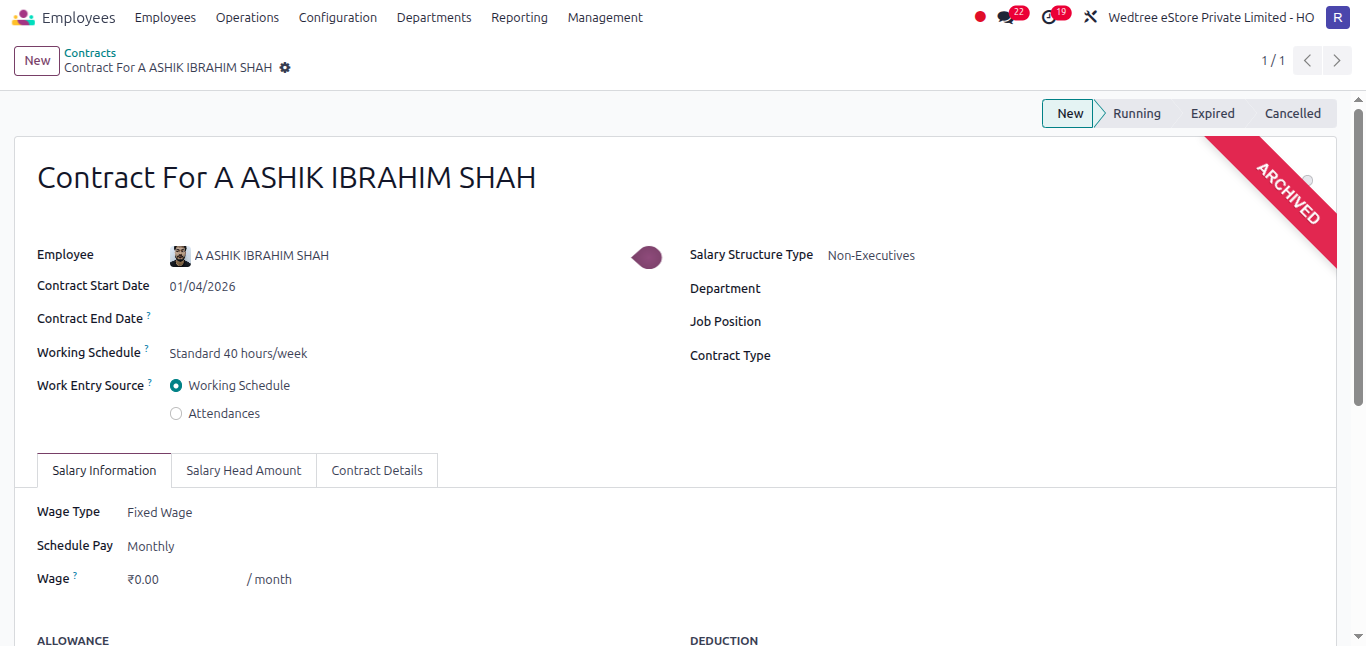
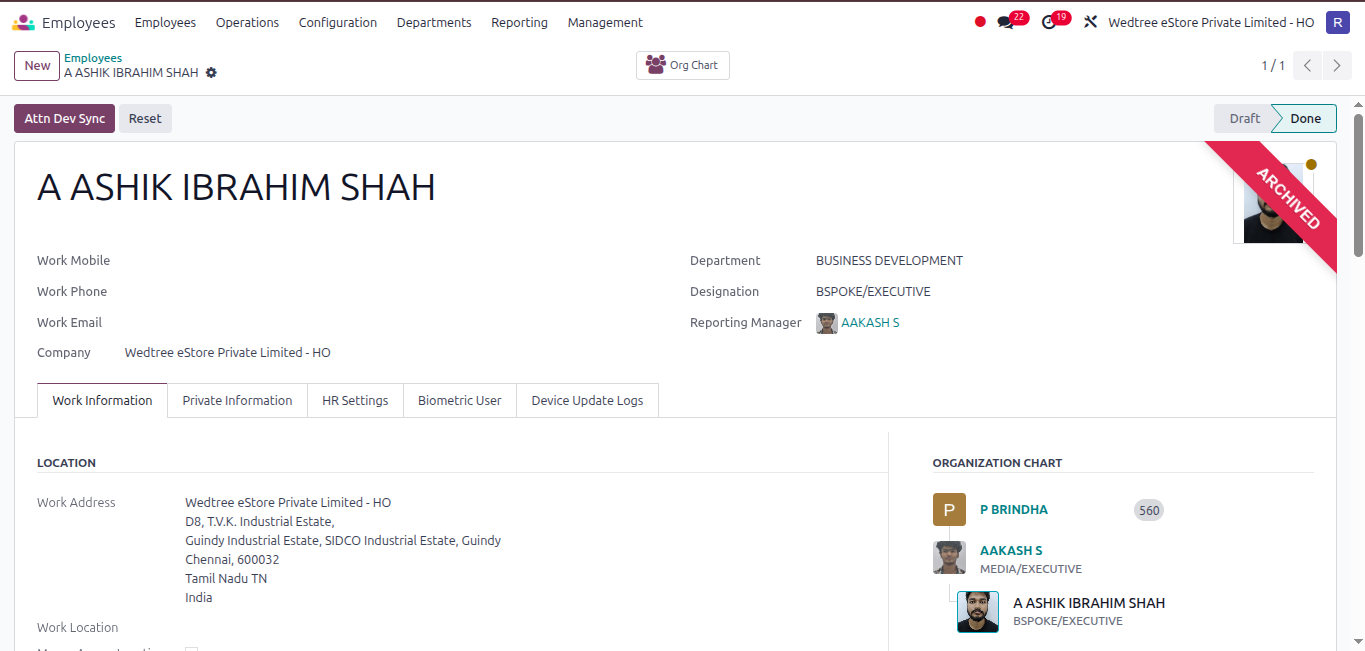
Their employee profile and contract are automatically archived.
Note
When the cron job executes the employee whose Last Working Day Requested is day before today.
Employee Contract: The employee’s contract status changes to Archived.
Employee Profile: The employee’s profile is archived and hidden from the active employee list.
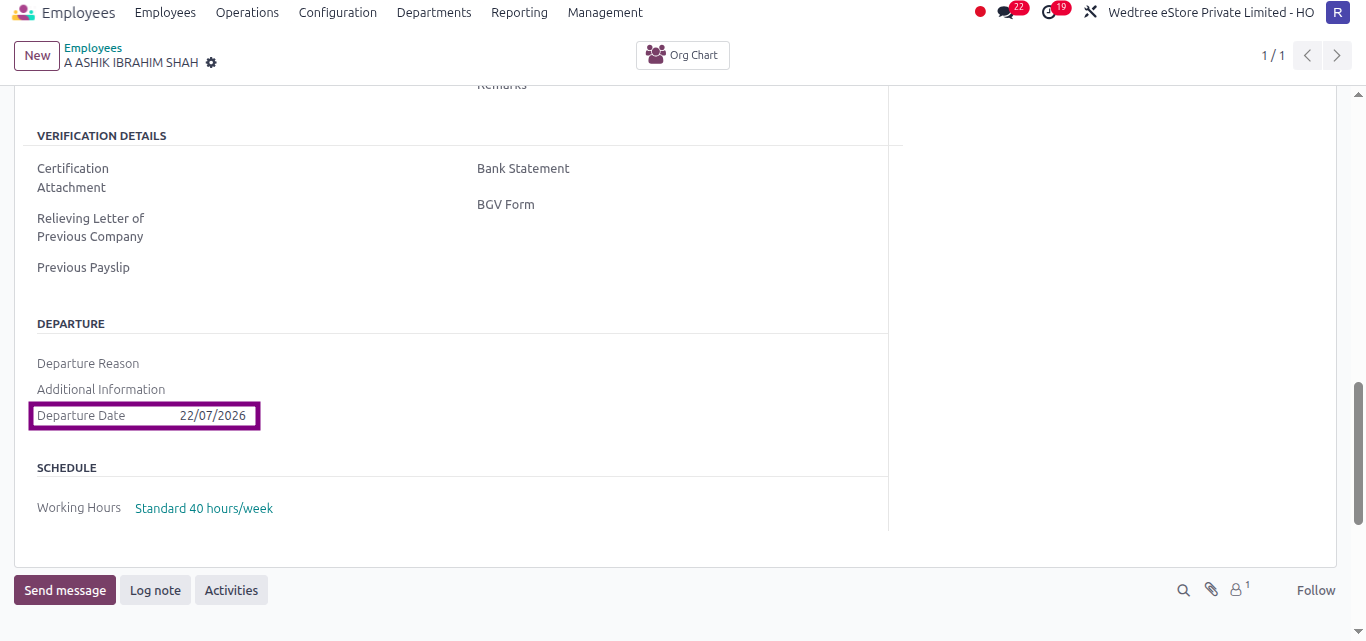
Departure Date: : The Departure Date inside the private information tab automatically updates to match their last working day.
Tracking of Employee Assets and Accounts when an Employee Exits:
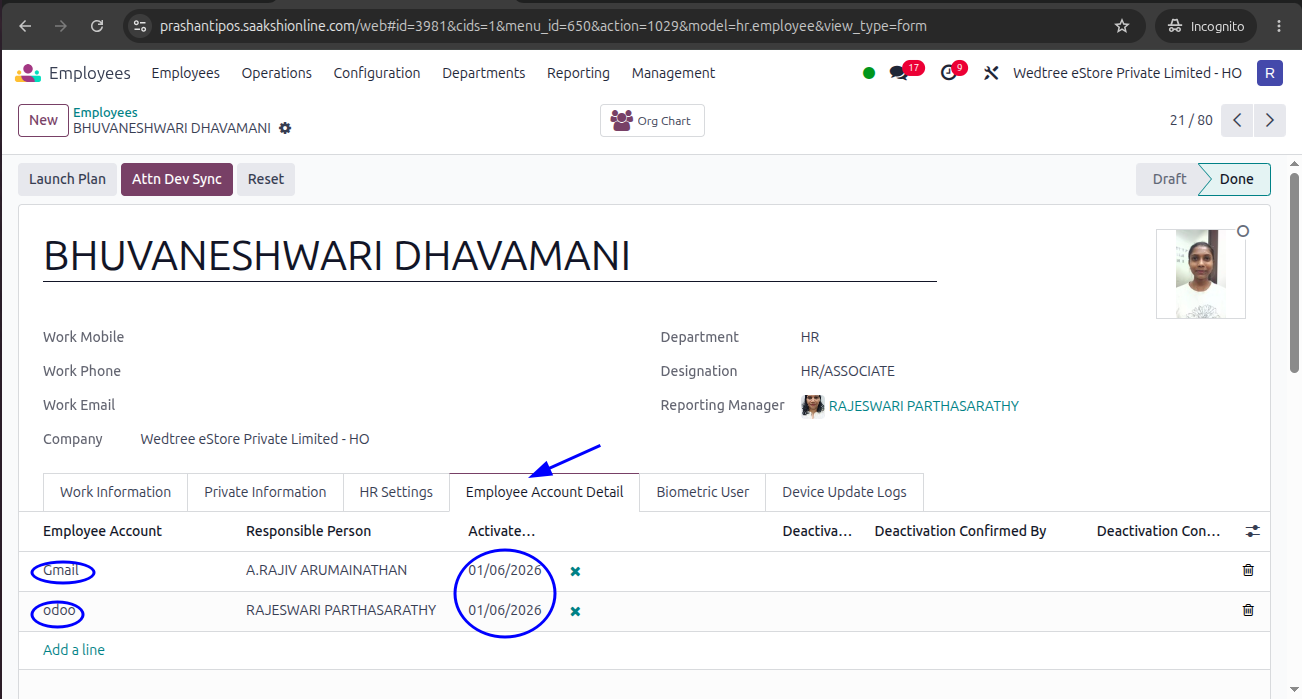
Step 1: For Employee Account creation, See Employee Account.
After creating Accounts in Employee Account in Employees module, add the Accounts to an employee. Log in with manager ID and enter all the accounts applicable to an Employee and its Responsible Person and Activated Date and save. Once the Activated Date is given, deactivation Icon shows as below.
Step 2: For Employee Asset creation and mapping, See Equipment Categories and See Equipment.
Create Equipment Categories:
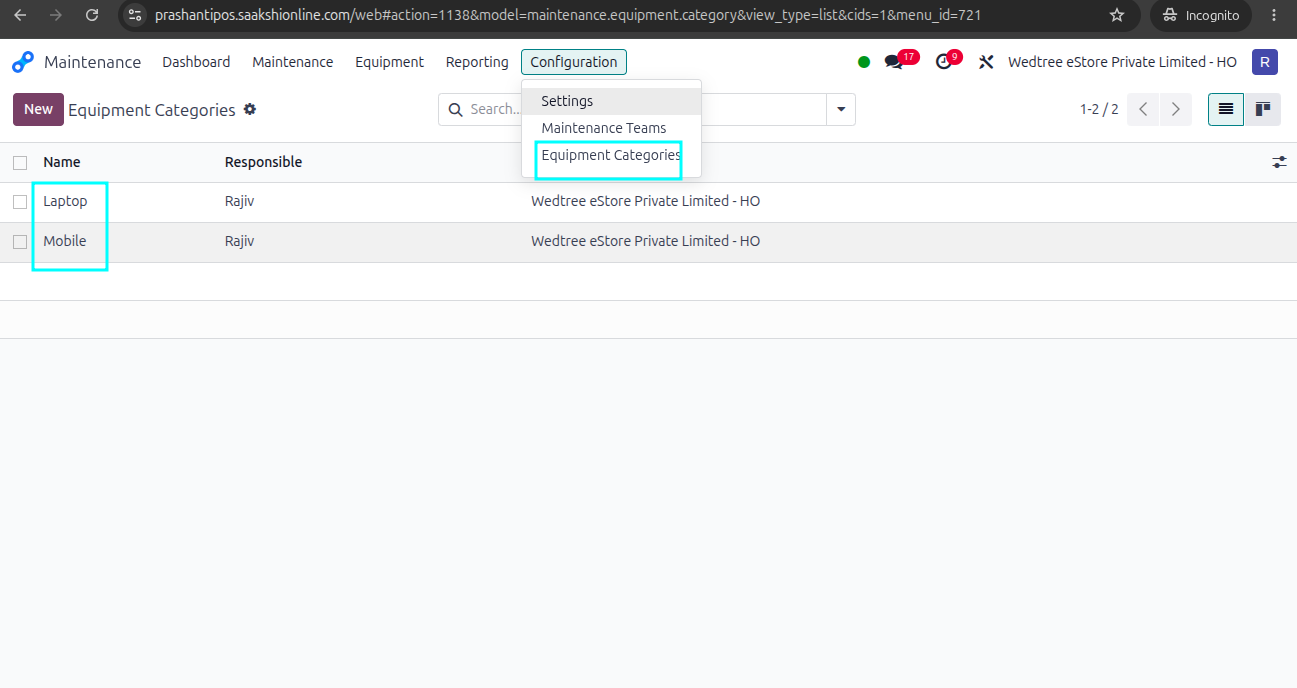
Add Equipment name, category and map employee’s name.
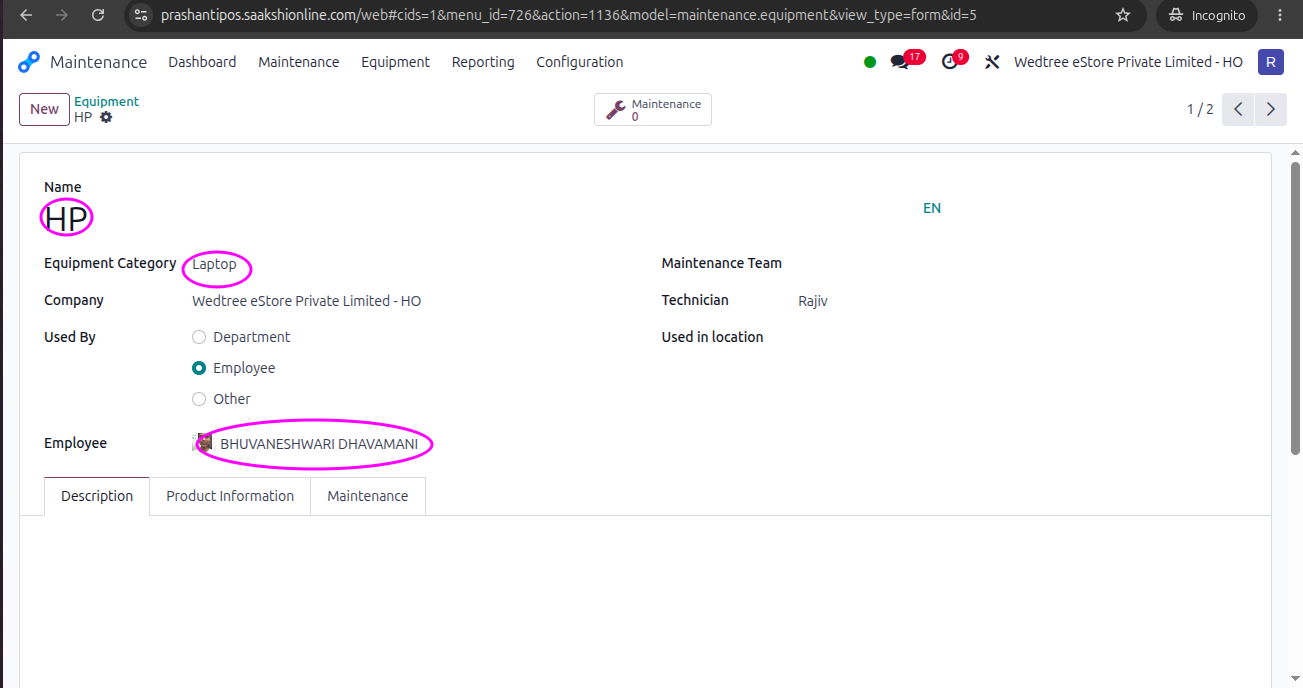
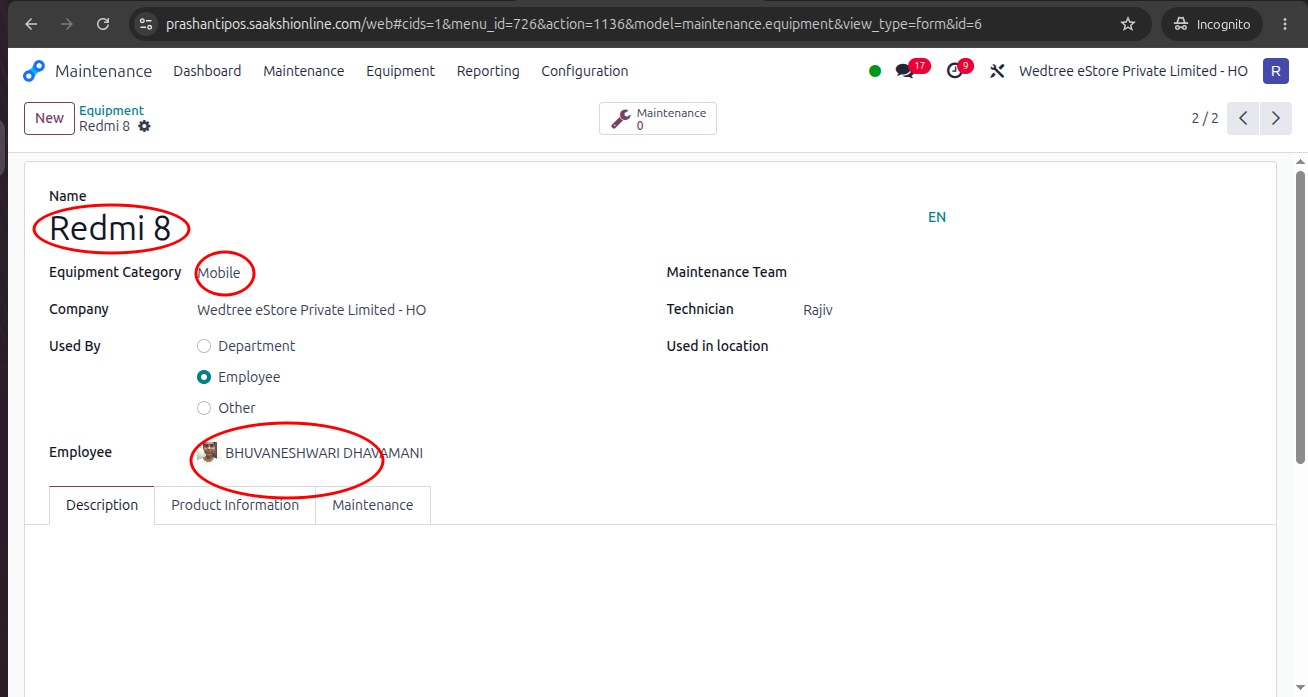
Step 3: Go to Resignation form and check the Assets and Accounts list.
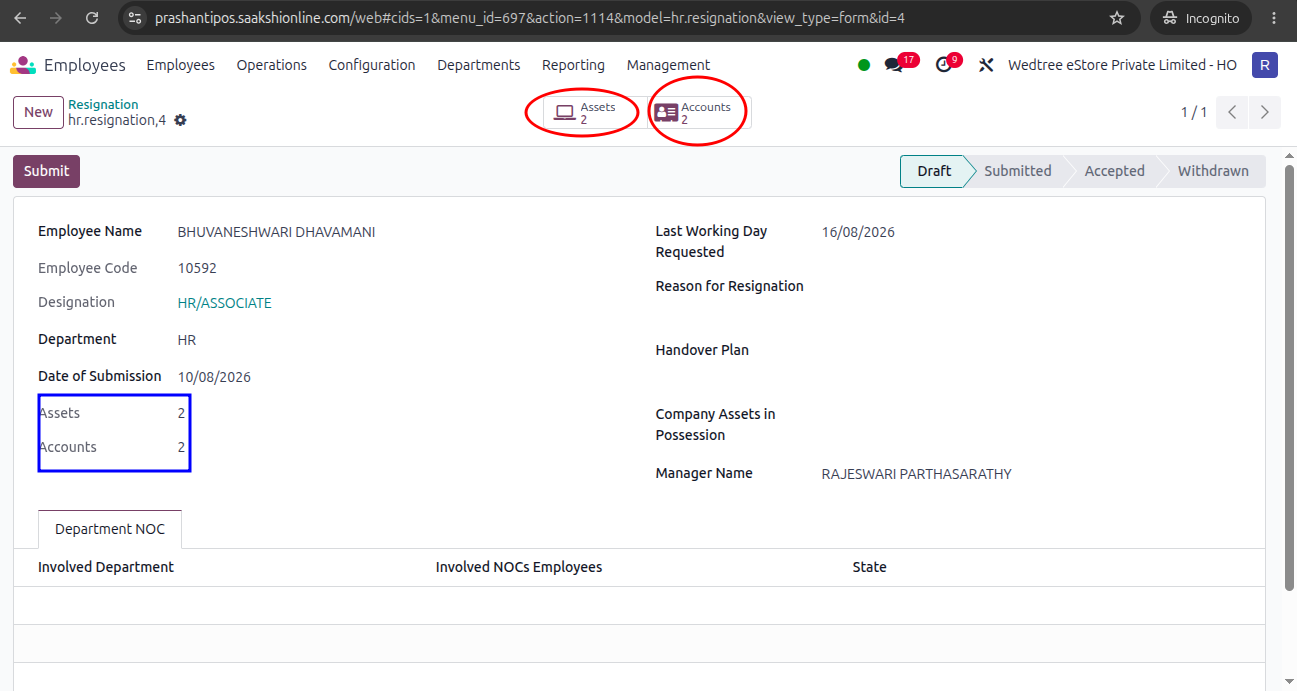
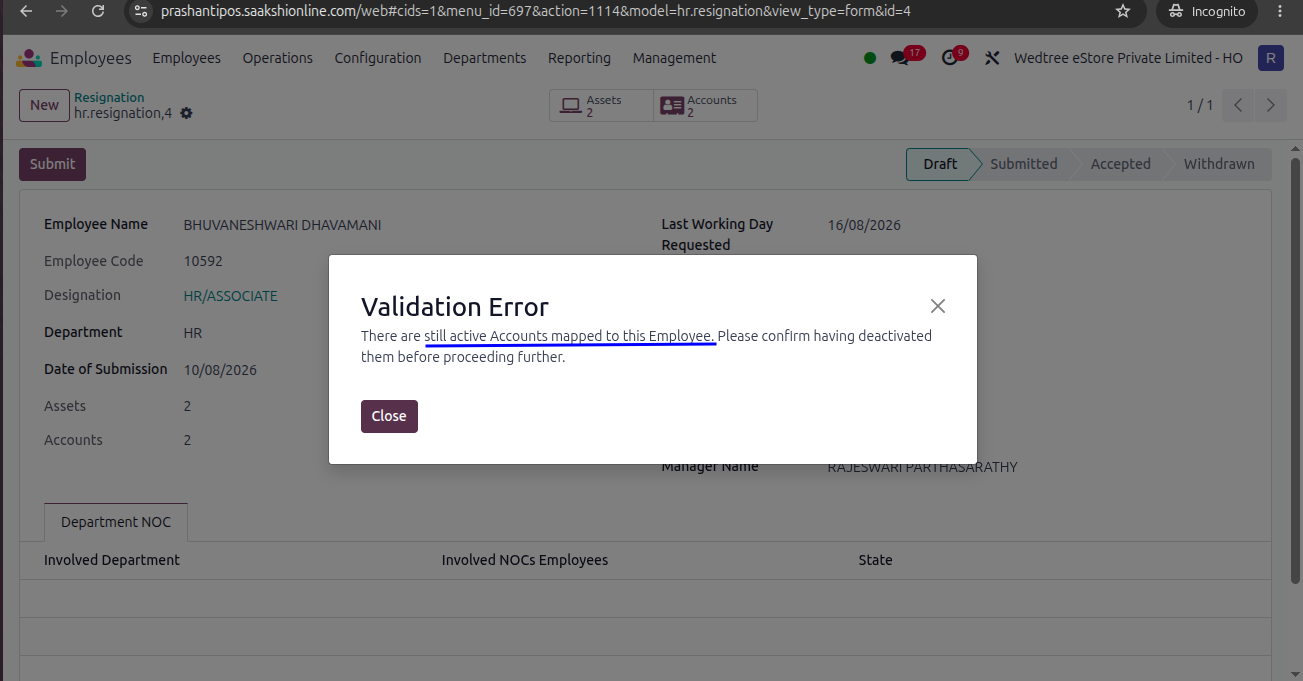
Step 4: When the Manager submits the resignation form by clicking Submit button, if there are any Assets or Accounts linked to the employee, it shows validation message. Below shows active Accounts mapped to this employee.
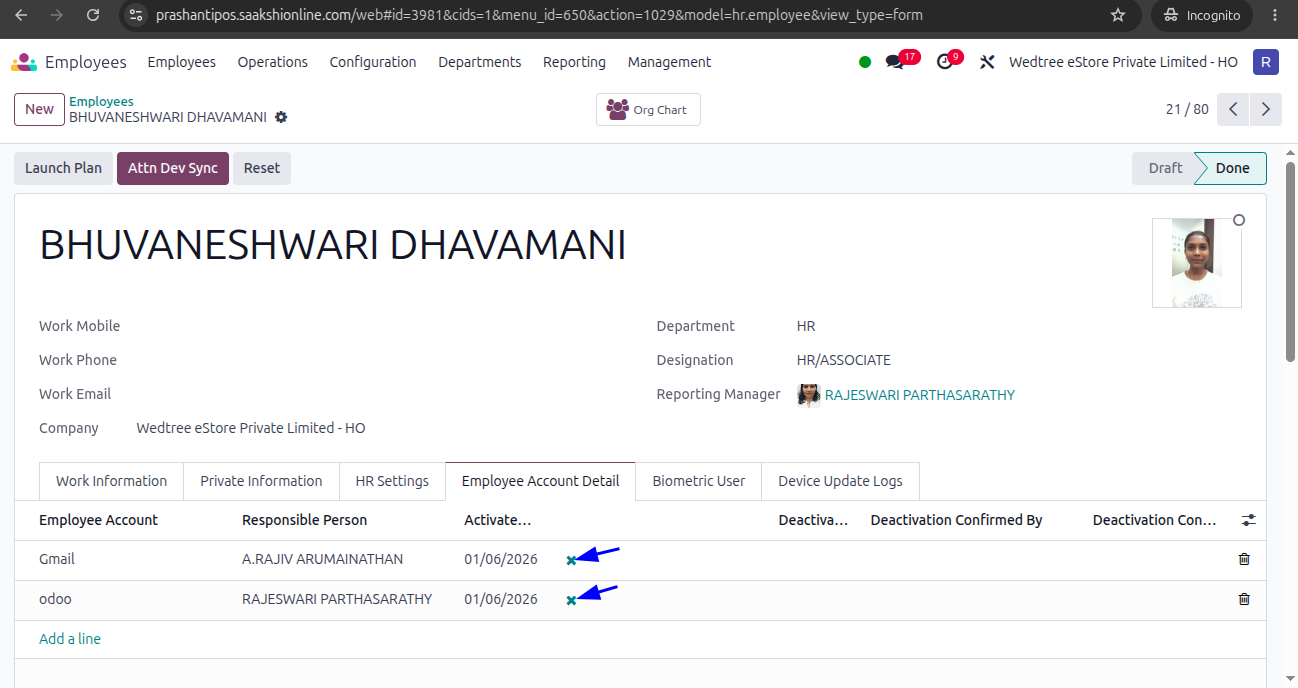
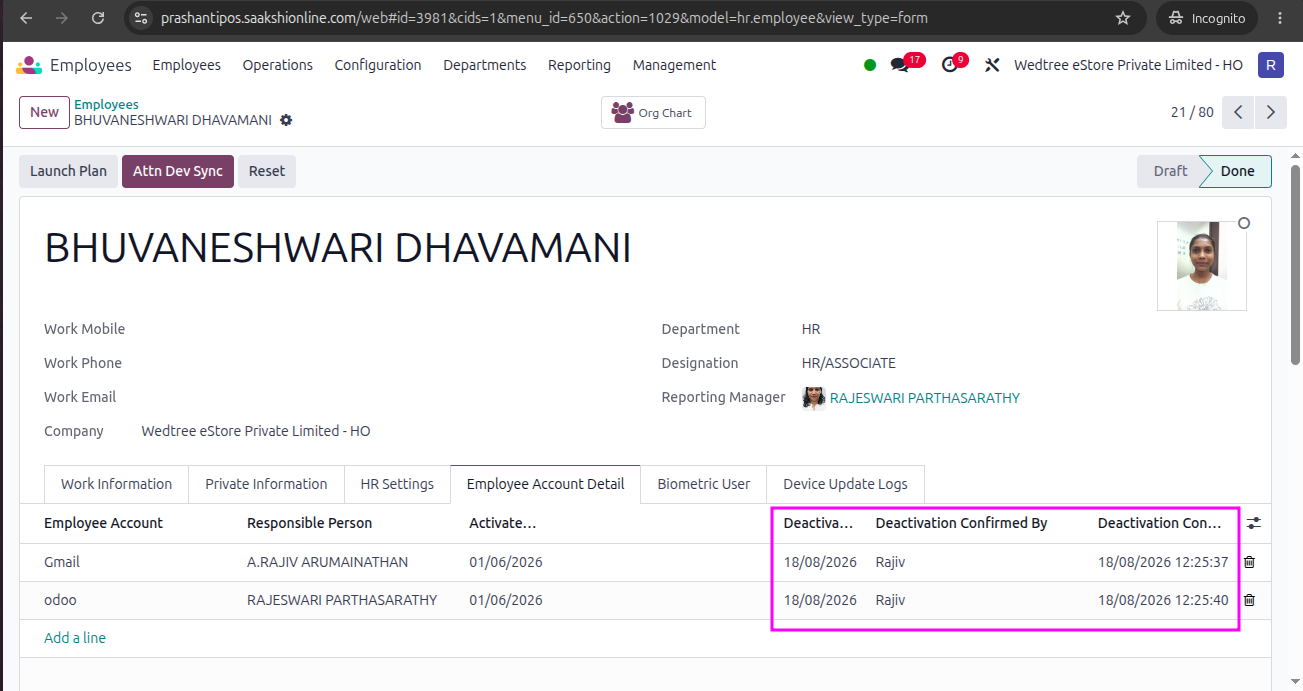
Step 5: To deactivate the account go to Employees –> Employees –> Employee Account Detail and click on x icon next to Activated Date. Once this icon is clicked, Deactivation Date, Deactivation Confirmed By, and Deactivation Time fields will be filled.
Step 6: After deactivating the Accounts from the employee, the Accounts widget shows as “0”. Now, if Manager clicks on Submit, it again shows validation error message that still active Assets are linked.
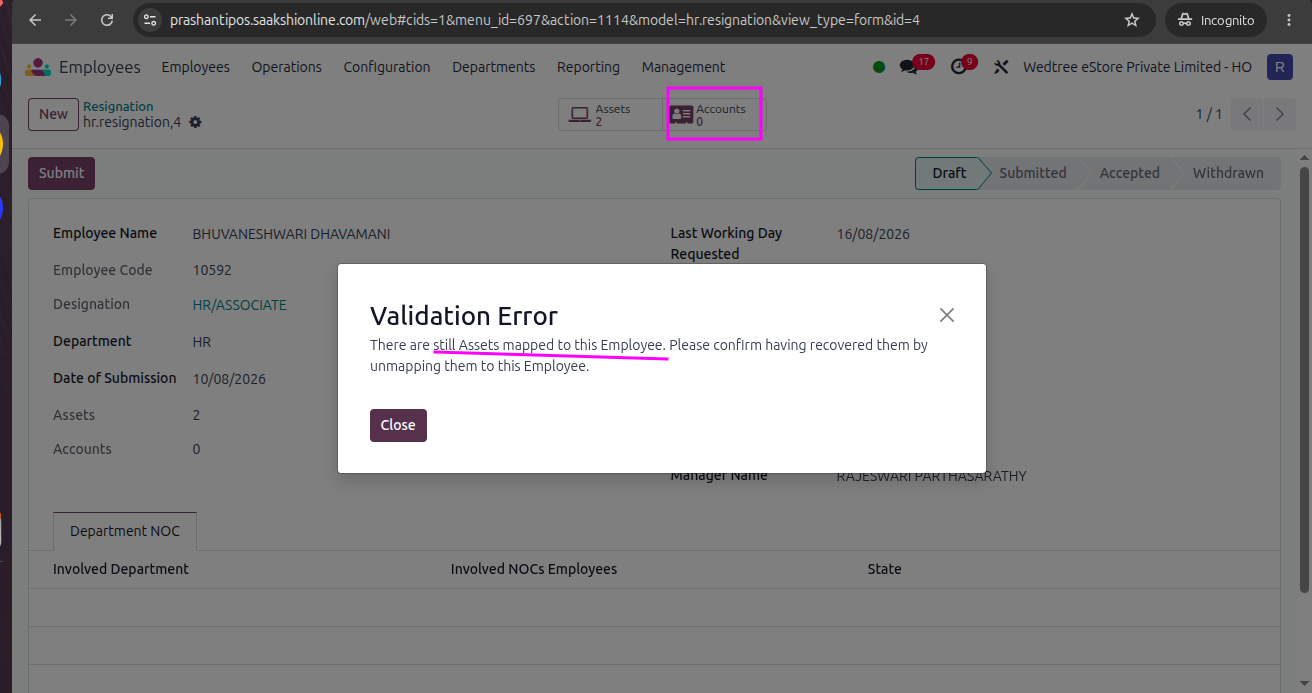
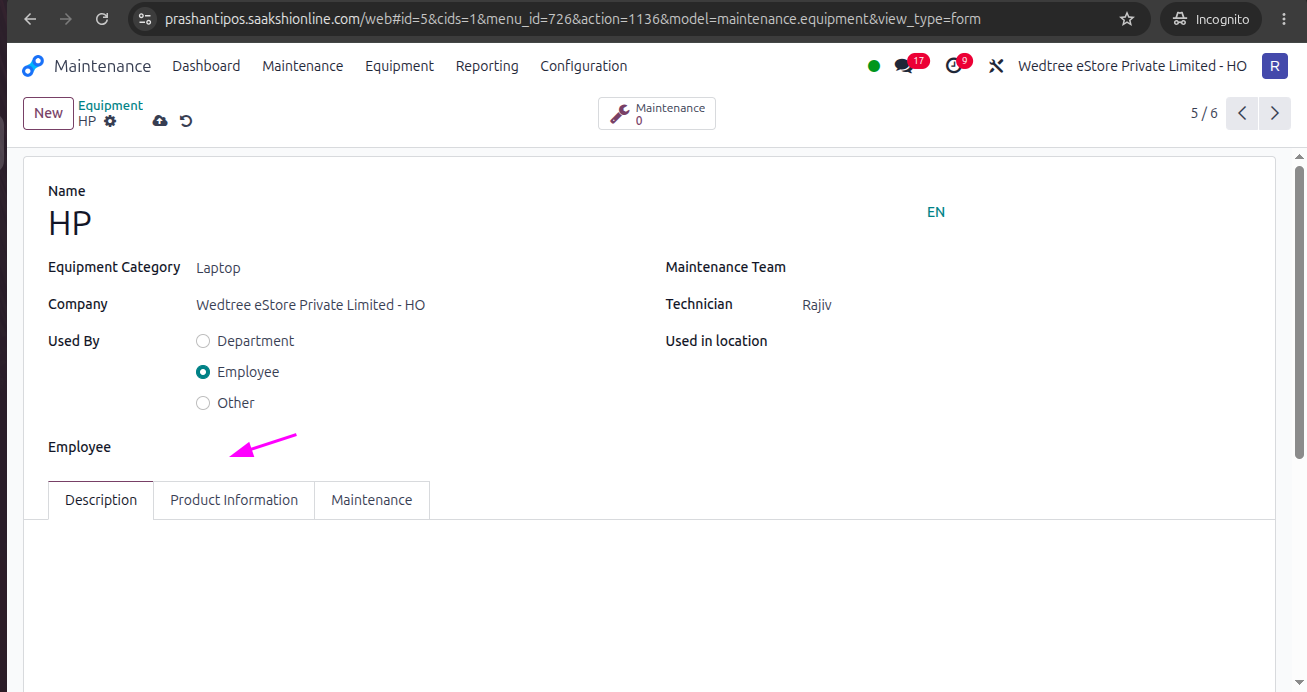
Step 7: To remove the mapping of Assets to employee, go to Maintenance –> Equipment and remove the employee’s name mapped to the equipment. For exit process submission, the Asset must be removed from employee mapping or to be mapped to another employee, then only the form can be submitted.
Step 8: Go to Resignation form and check the Assets and Accounts fields and widgets above shows “0”.
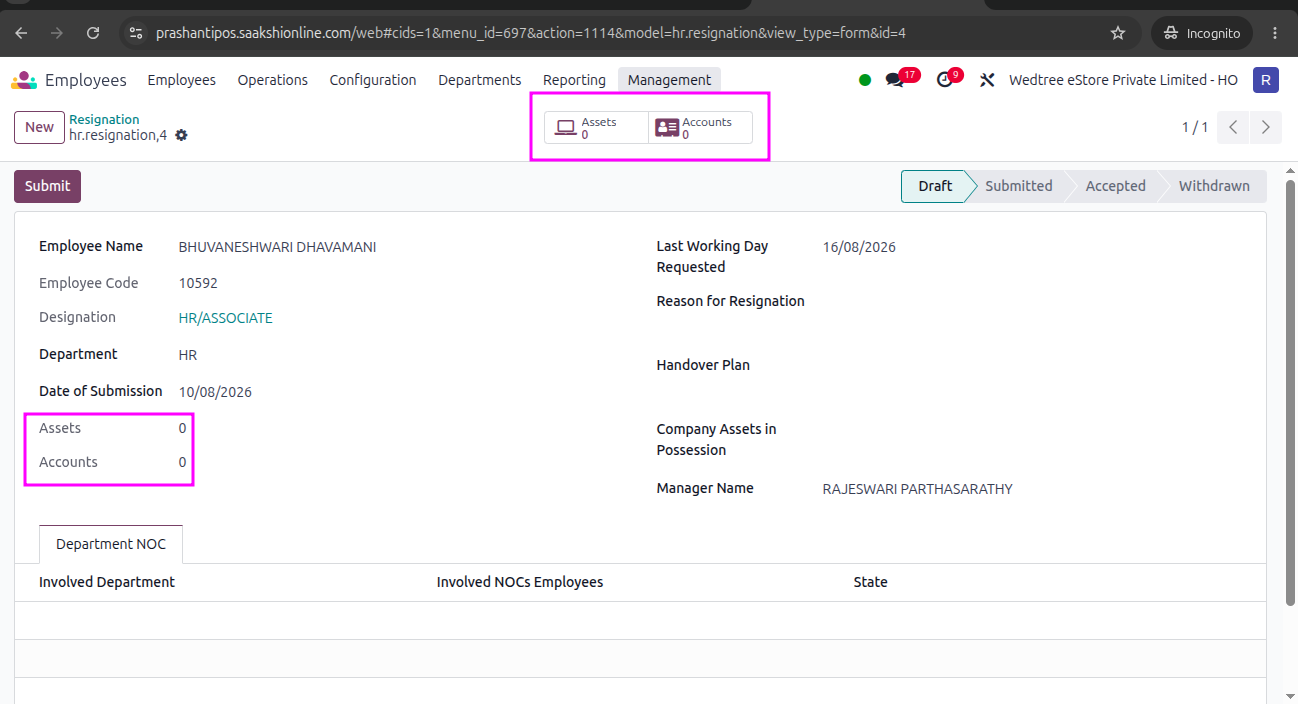
Step 9: Now, the manager gives Submit and the form goes to Submitted state.
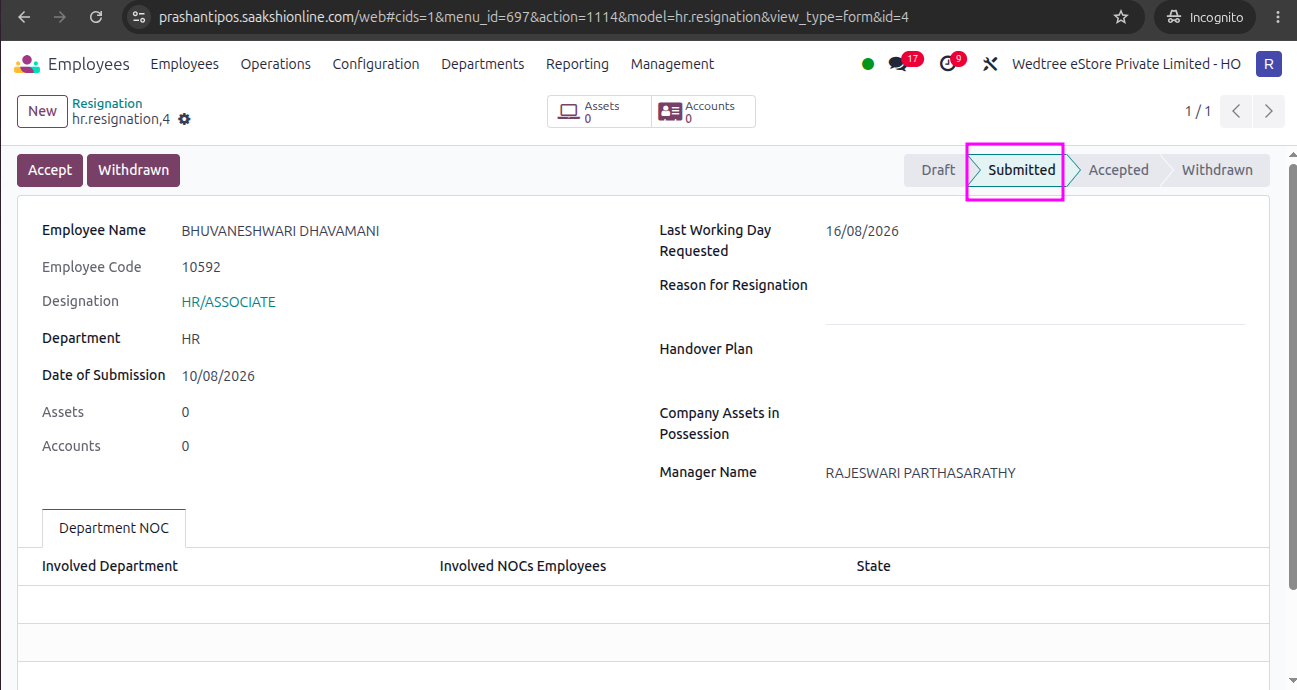
Step 10: The form goes to HR manager for Accept or Withdrawn. The HR manager accepts the resignation form by clicking Accept button.
Resignation form in Accepted state.